


How to Bounce Light and Use a Bounce Flash Effectively
Learn the art of bounce lighting in photography and film to enhance your images with soft, natural-looking light and reduced shadows.
Learn | Lighting Guides | By Brenda Bergreen
This guide will discuss how to bounce light, an important lighting technique in both photography and film.
As a photographer and videographer for over a decade, I’ve had to learn a variety of lighting setups over the years for different situations that I find myself shooting in.
Bouncing light is one of the best techniques to learn because it’s a flattering lighting technique that is fairly versatile and easy to implement once you understand how it works.
I’ll walk you through what bounce light is, when and why you might use it, and what gear you’ll need.
When you learn how to bounce light, you’ll love having the ability to create better light in your photo and video work.
As you’ll learn, bouncing light can be simple or complex and is a great lighting setup for everything from cinematography to portrait, product, or wedding photography.
Table of Contents
What is Bounce Light?
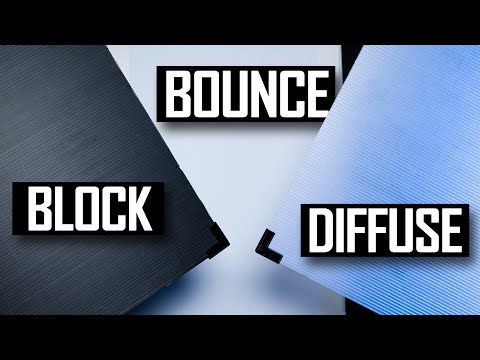
- Bounce light can be softer light because it is diffused
- A small source can create a broad light if bounced
- Bouncing light allows you to have a less direct angle
- Bounce light can be done with both on and off-camera flash set-ups
- Bounce light works well in small spaces where some other lighting setups don’t
- Bounce light can be hard to learn to control
- Light tends to bounce off things even if you don’t want it to, which can make it hard to control
Bounce light is a lighting technique in which the subject is lit by light that bounces off something else first instead of being lit directly from a light source.
Why Bounce Light?
Let’s walk through some of the main reasons to utilize bounce light in your photography and videography.
We’ll discuss soft light, broad light, and the versatility of bounce lighting.
You’ll quickly see why bouncing light is a great technique to add to your skill set.
Creating Soft Light with Bounced Light
As discussed in the pros and cons above, bounce light is a great choice if you’re looking for soft, diffused light.
Softer light is desirable because it reduces harsh shadows that can be unflattering on human subjects or simply too contrasty for certain goals.
This works because instead of the light coming directly from your flash or light source, it first bounces off a bigger surface.
The light is diffused and broadened as the flash bounces off a bigger surface, creating a softer look than direct lighting would.
Try setting up your light to bounce and diffuse on your subject in a soft, flattering way that reduces harsh shadows.
Broad Light from a Bounce Surface
To continue on this concept, the soft, broad light created by bouncing your light off of a bounce board or wall is distributed across your scene.
Bounce light is a great way to add light in a natural-looking way because it’s not so intense that it will look like an artificial light source.
In this way, you can use bounce flash to compliment the natural light or to overpower it, depending on your settings and flash power.
You might use other techniques to create a broad or diffused light, but bounce light is fairly versatile and can be easy to implement even in smaller spaces.
Versatility of Bounce Lighting
First of all, you can often use bounce flash without that much investment in gear by simply bouncing your flash off a surface that’s already available to you.
This might be a ceiling, wall, or other reflective surface.
You can even use an inexpensive bounce board improvised from something like foam core.
You don’t necessarily need that much space to use a bounce flash to create a broader light, making it a great choice if you’re in a smaller room.
You might not be able to back your light source up, but you can turn it and bounce it off the wall or other surface.
You can use bounced light as your primary light source or use it in combination with other lighting as a fill light.
As you can imagine, the soft look can complement or even replicate natural light well.
When to use Bounce Lighting

Credit: Olia Danilevich
Once you know why you might use bounce light, you can start to determine when you should implement it.
For example, if you’re shooting in a studio, you might utilize bounce light techniques to create a soft and broad look on your subject, whether a person or a product.
In event photography, you might use bounce light when dealing with low light conditions and need a quick, portable way to add light different from direct flash.
In film, bounce light allows you to create a natural look on your scene while putting your characters in good light that mimics a natural light.
Sometimes, you’re going to create bounce lighting because it fits a need, and sometimes, you’re going to simply because you find yourself in front of a nice white wall.
What are the Differences Between Bounce Light, Diffused Light, and Fill Light?
Bounce light is, as we said before, light that is bounced off a surface.
Diffused light is softer because it has been scattered either by clouds or particles in the air or a diffuser.
Fill light is light that is used to fill a shadow.
As you can see, these types of light are interconnected.
For example, you would want your fill light to be diffused light because its goal is to fill shadows.
Bounce light creates a softer, more diffused light, but typically, when we think of diffused light, we think of shooting through something to create the effect rather than redirecting the light.
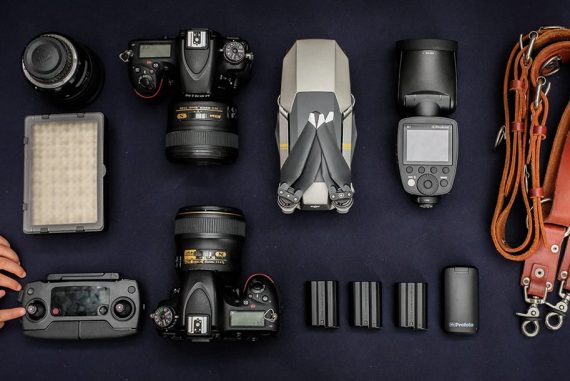
What Gear is Used for Bounce Lighting?
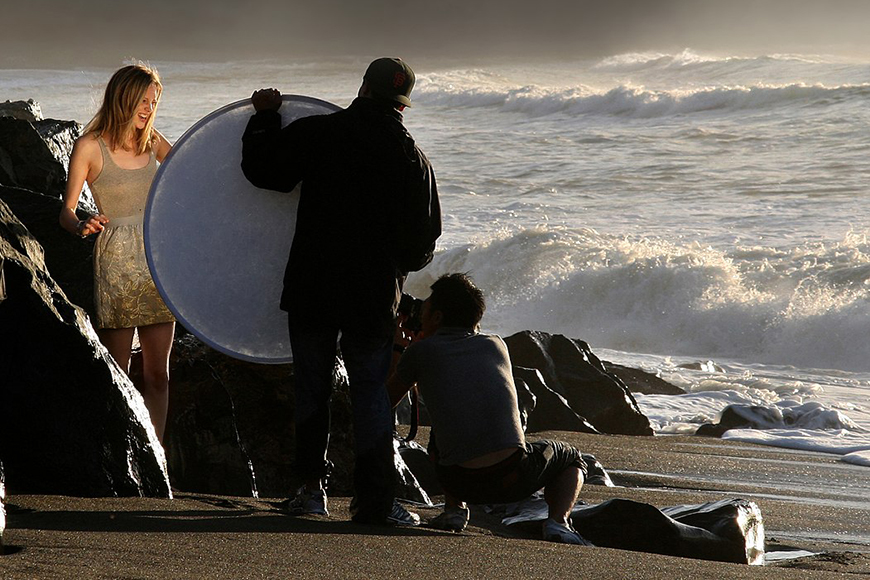
A portable folding reflector positioned to “bounce” sunlight onto a model. Credit: Brocken Inaglory, CC BY-SA 3.0, via Wikimedia Commons
The main gear that you need for bounce lighting is a light source and a bounce surface.
But first, imagine utilizing bounce lighting with no additional gear for a second.
Can you find light that is naturally bouncing off a light-colored or reflective surface?
Where would you place your subject to utilize that light flatteringly?
That exercise of seeing bounce light will help us as we move towards creating bounce light.
Light Source
For bounce lighting, you’ll need a light source.
Simply put, your light source could be the naturally available light.
Maybe you simply use a reflector to soften and broaden the light or to fill certain shadows.
As you can imagine, sometimes light is bouncing even when you didn’t plan it such as if you have a subject near a white wall that the light source is bouncing off of.
In other situations, you’ll need more power to add a light source with your lighting equipment and create your bounced light.
Objects to Bounce Light Off
If you’re going to bounce light, you will need a surface to bounce light off of.
Simply put, it might mean something around you, such as the walls, ceilings, floors, water, or other reflective surfaces.
You can also use tools such as a bounce card or reflector to bounce the light.
Note that light may also bounce off things you don’t intend it to, such as clothing or other objects.
Keeping that in mind may impact clothing choices or simply make you more aware of any reflective objects nearby.
What are the Different Ways to Bounce Light in Photography & Film?
Let’s discuss a few different ways to bounce light based on what we’ve already discussed.
We can notice bounce lighting that already exists by being aware of the surfaces around the scene and how they impact the light.
From there, we can add a bounce board to redirect or redistribute the existing light in the scene.
And finally, we can add both light and a bounce board.
Or we can only add light and use the naturally available bounce surfaces.
As you can see, bounce lighting can be extremely simple, or you can get more complex and particular depending on how much control you want and how much you’re trying to impact the scene.
How to Bounce Light: 4 Pro Tips for Natural Bounce Lighting
1. Practice by noticing how light bounces
In all of my photography advice, I try to remind people to take things one step at a time.
Before we can learn a complicated lighting setup, we need to learn to see light and notice the qualities of natural light around us.
Only then can we start to create light.
If you start by noticing how natural light bounces off the bright tile in your kitchen or that metal building outdoors, you can start to see the bounce surface as its own light source.
With that little shift in awareness, it becomes easier to understand how you will create bounced light.
2. Choose the right light angle
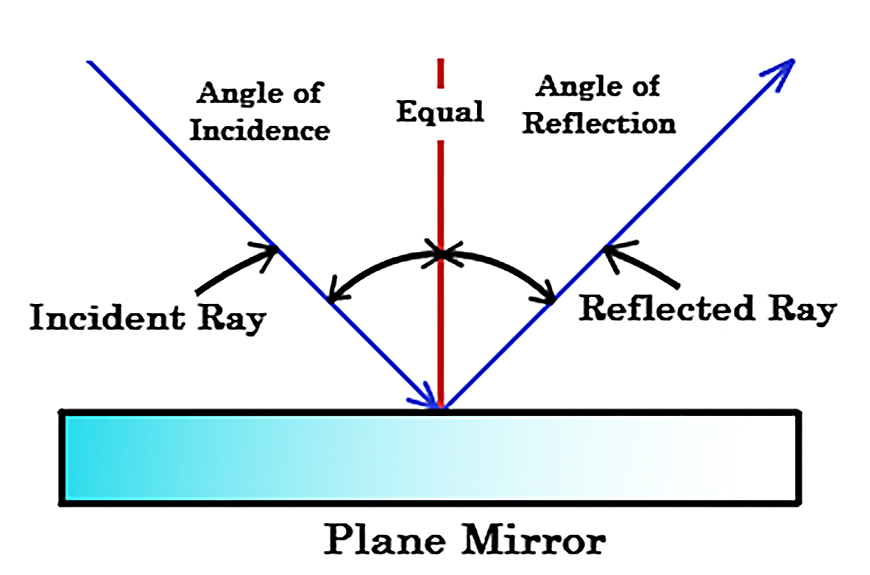
NCS Pearson, CC BY 4.0, via Wikimedia Commons
Bounce light is often chosen for the soft and broad lighting impact, but direction is important, too.
Sometimes, you’re limited in terms of what you’re going to bounce your light off, but it’s important to understand how the direction will impact your photos so that you can control it when possible.
Bouncing a flash off the ceiling will diffuse the light and create a softer look, but the light will still come from above, so the shadows will be below.
Pay attention to the direction of your bounce surface and position your subject accordingly.
Forty-five degrees is a popular angle for bounced light.
3. Don’t forget about color
Color is another quality of light to remember when utilizing any lighting setup.
The color of the surface you’re bouncing the light off of can impact the image.
Typically, people will use white walls or white bounce boards, but you can also bounce light off a golden reflector to create a warm light.
4. Pay attention to the things you can control
In addition to the angle of the light and the color created by the bounce board, there are other things you can play with the impact how your bounce light works.
Try playing with the power of your light source or the distance.
Knowing how to adjust different aspects of your set-up will help you adapt it to different conditions that you find yourself in.
Using Bounce Flash in Wedding Photography
Let’s dive a little deeper into using bounce flash in wedding photography.
These tips will likely be helpful regardless of the type of photography you shoot because a wedding day can be very complex, and there are various times that bounce light can be useful.
Bouncing light is a common way that wedding photographers deal with the low-light conditions of a wedding reception.
While off-camera flash is a popular technique, bounce flash is often easier to learn and set up.
Not to mention the versatility that we talked about at the beginning of this article, it works well in small spaces.
See also my article on how to use flash effectively for wedding photography.
Light Source and Surfaces for Bouncing Light
For the most part, our light source for bouncing light at a wedding reception would be an on-camera flash.
If you’re in a room with walls and ceilings that you can bounce your flash off, you’re likely going to point your flash at a bounce surface so that the light bounces off the walls and ceilings and hits your subjects flatteringly.
Forty-five degrees is a common angle to point the flash because you don’t necessarily want your light source coming from directly above your subject.
The angle will impact where the highlights and the shadows land.
Bounce flash works fantastic in a white tent, although you sometimes have to pay attention to the angles of the ceiling.
If you’re outside or in a big room with dark walls, then to use bounce lighting, you would need to pull up your bounce card on your flash.
In this case, you point your flash up, and then the light bounces off the bounce card behind it and toward your subject.
If you don’t like that look, that’s when you could have to utilize a different technique other than bounce lighting.
Final Words | Why Bounce Flash Photography?
Bouncing light can be a great way to create soft light in various situations requiring artificial light.
It’s often a preferred look to the harshness of direct light.
As we discussed above, in addition to the soft, broad light that you can create, bounce light is versatile and doesn’t require a lot of lighting gear.
If you’re in a fast-paced situation where you must move around quickly, a bounced light can save the day.
 Best Wedding Photography Gear
 Expert Guide to On-Camera Flash (How, When & Why to Use)
 How to Use Flash Effectively for Wedding Photography
 Wedding Photography Tips: How to Photograph a Wedding in 2023
 Soft Lighting Photography: Top Techniques for Dreamy Portraits
 Mastering Off Camera Flash: A Beginner’s Guide

Brenda Bergreen is a photographer, videographer, writer, and storyteller based in Colorado. She specializes in Colorado wedding photography and adventurous storytelling. When she’s not behind the camera or the keyboard, you can find her adventuring with her family.

WELCOME TO SHOTKIT
Enter your email to be sent
today's Welcome Gift:
19 Photography Tools
🔥 Popular NOW:


Shotkit may earn a commission on affiliate links. Learn more.