


Guide to Tilt-Shift Photography: Tips, Examples & Ideas
Dive into the world of tilt-shift photography, mastering techniques and understanding its how it can transform ordinary scenes into miniature masterpieces.
Learn | By Ana Mireles
If you’re interested in experimenting with tilt-shift photography, this beginner’s guide will help you out.
Here, you’ll find all the information you need to get started. You’ll understand what is tilt-shift in photography and how to achieve this with cameras, lenses or editing processes.
You’ll also find some of the most common uses for this type of photography – all with visual examples. Lastly. I’ll give you a list of apps to apply the effect and I’ll answer some common questions.
Are you ready to get started? Let’s dive in!
Table of Contents
What Is Tilt-Shift Photography?
Tilt-shift photography is a photographic genre that uses camera movements to do creative or technical effects.
Most cameras have the focal run parallel to the camera’s sensor or film. However, when you’re doing tilt-shift photography you can change the position or the direction of these planes.
Using the tilt-shift effects, you can extend the depth of field or do extremely selective focus. You get perspective control or do miniature faking,
The tilt function and the shift function are available in large format cameras because many of them have the lens and the back support separated. They’re only connected by flexible bellows.
If you want to add tilt and shift movements to a mirrorless or DSLR camera, you need a tilt-shift lens.
How Does a Tilt-Shift Lens Work?
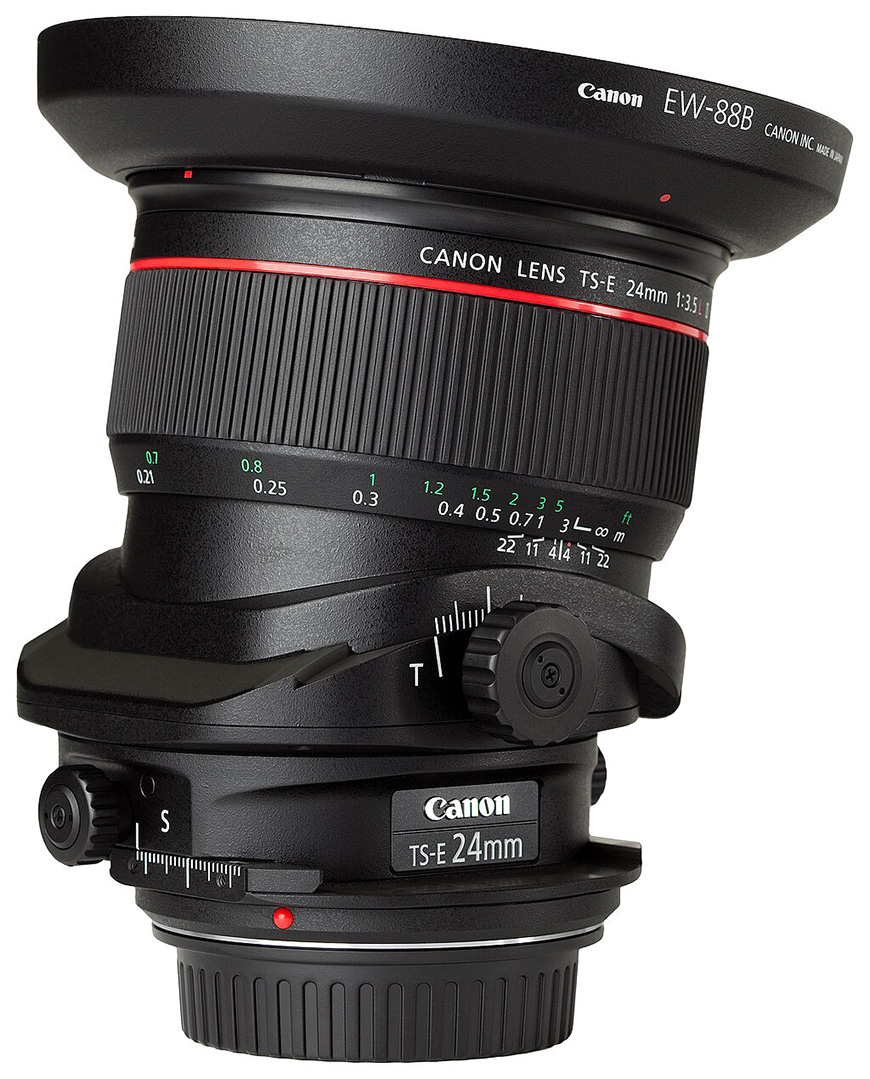
Canon TS-E 24mm f/3.5L II lens, with its hood in place. Credit: Charles Lanteigne, CC BY-SA 3.0, via Wikimedia Commons
Tilt-shift lenses offer you some of the camera movements usually available only on large format cameras with bellows. You can sometimes find them abbreviated as TS lenses.
In this case, the image plane stays the same as the back of the camera can’t move. However, the tilt-shift lens allows you to manipulate the focal plane.
The tilting movements rotate the lens, while the shifting ones move it up and down or right and left while maintaining the focal plane in the same direction as the film or sensor.
This means that the tilting function affects the focus, while the shift knob gives you perspective control. You can learn more in our article on how to use a tilt-shift lens.
Keep in mind that by setting the tilt and shift values to zero, tilt-shift lenses work as regular prime lenses. However, they don’t support auto-focus.
So, you need to focus your images manually regardless of whether or not you’re using the shift or tilt effect.
It’s worth mentioning that tilt-shift lenses deliver the highest image quality and sharp focus. The clarity and sharpness of these lenses is much better than it is in other lenses. Also, they introduce less chromatic aberration – sometimes, none at all.
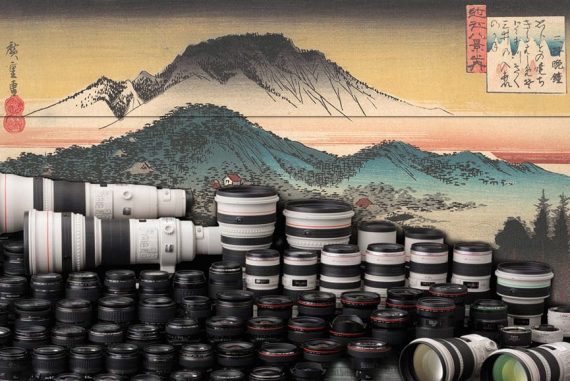
What Are Tilt-Shift Lenses Used For?
While tilt-shift lenses seem to be a niche accessory, they actually have quite a lot of uses.
Of course, they’re not for everyone either. They do have some disadvantages such as the high price, the fact that they only exist as prime lenses, the manual focus, and the small variety of focal distances.
However, if you’re specializing in any of these types of photography, you may want to invest in a tilt-shift lens at some point in your career.
Architecture
You’ve probably noticed when you’re photographing tall buildings that instead of being straight, you get converging vertical lines. This effect is called perspective distortion.
The taller the building is, the more you’ll notice the effect. It will also be more pronounced if you’re close to the bottom of the building, and when using a wide-angle lens.
When you use a tilt-shift lens, you can correct the perspective distortion and get perfectly parallel lines. While you can fix the converging lines in post-processing, professional photographers prefer to use tilt-shift lenses and correct things from the start.
To shoot architecture photography with a tilt-shift lens, you need to use a tripod. Then, make sure the camera is perfectly levelled.
Using the manual focus, make sure the subject is tack sharp. Now, you need to fix the vertical lines by doing a positive shift on the lens. The amount of shifting is different on each shot, simply keep doing it until the upper part of the tall building looks straight.
The same concept applies to interior photography. Using a tilt-shift lens keeps the vertical lines straight while it’s also helpful to prevent reflections on the windows or mirrors.
The Miniature Effect

Credit: David McBee
The miniature effect or miniature faking is an effect you can create in-camera using a tilt-shift lens. It allows you to make an urban scene look like it’s a miniature scale model.
The effect is achieved by using a shallow depth of field at the right angle. Let’s review the process step-by-step.
First, you need to take the photo from the right perspective – that is, from a higher angle. So, you’ll need to find a vantage point that’s high such as a bridge that’s looking into your subject.
Any tilt-shift lens can achieve the miniature model look. However, a longer focal length creates a more realistic effect when turning a real-life scenario into a miniature scene.
Once you have your camera on a tripod and framed the scene, make sure the tilt-shift lens can move vertically. Then, use the tilt knob to determine how much lens blur you want. When you’re satisfied with how it looks, start taking your pictures.
Landscape Photography

Credit: Rizknas
Contrary to the miniature effect, in landscape photography, you’ll want to use a tilt-shift lens to increase the depth of field and achieve an infinity focus.
Using a standard lens, keeping in focus the foreground and the background when they have such different distances is impossible.
To solve this problem, most landscape photographers use a technique called focus stack. The focus stacking technique involves taking a series of images where you move the focal plane on each one. Then, you blend them together to create one fully-focused photo.
Using tilt-shift lenses, you can achieve a fully focused landscape scene in a single shot. This is because you can use the tilt function to match the focal plane to the perspective of the scene.
This way, even if the sensor is on the same plane, the focal plane extends from front to back – instead of running on a horizontal line parallel to the image plane.
To achieve this, you need to set up your camera on a tripod and compose your image. Then, put the focal point in the nearest object.
Now, tilt down the lens until the background is in focus as well. Then, zoom in to check the foreground and adjust the focus again.
Now, check the focus of the background and tilt again if it’s needed. You might need to do some fine-tuning going back and forward with the focus and the tilting until everything is perfectly sharp.
Portraits

Credit: SoulPhotoBr
Using tilt-shift lenses for portrait photography isn’t that common. However, it’s been used by photographers to better convey their creative views.
Mostly, tilt-shift lenses in portraiture are used to create a shallow depth of field. You might think that this is something you can do with a wide aperture and a telephoto lens. However, using a tilted lens allows you to apply the selective focus in a different direction.
For example, using a regular camera lens where the lens is parallel to the camera’s sensor, everything that’s on the same plane.
So, if you want the subject face in focus, the shoulders and torso will be in focus too – unless the subject pushes the head forward or pulls it back. Instead, using tilt-shift lenses you can have the face in focus and blur the torso.
Another example would be to take a portrait of a person leaning against a column. Typically, the person and anything else that that’s at the same distance to the camera is in focus. Instead, the columns in front and behind the person would be blurred.
With tilt-shift lenses, you can shift the lens so that the line of columns in perspective are all in focus, while the rest of the picture is blurry.
Other photographers use tilt-shift lenses to achieve the miniature effect even when doing portraits. This has become a trend amongst wedding photographers. This way, the happy couple looks like they’re in a small city – a dream world of their own.
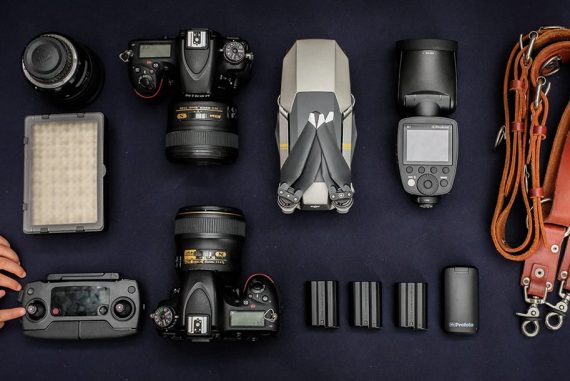
Product Photography
Tilt-shift lenses are used by product photographers in both ways. On the one side, they can use them to extend the depth of field and get everything in focus – which is very important so that a potential customer can see every detail.
However, they can also use them to achieve a very selective focus that allows them to guide the viewer’s gaze to the brand or to a specific characteristic of the product.
The latter is a less common application, though. Mostly, product photographers use tilt-shift lenses to have to extend the depth of field and prevent perspective distortion.
Another useful feature is that you have a bigger control over reflections. This is because you can move the camera out of the line of reflection and correct the perspective so that it looks as if you were in the original place.
Think about a mirror. If you stand in front of it to prevent the perspective distortion from affecting the shape of the mirror, the camera will reflect on it.
Using a tilt-shift lens, you can put the camera to the side so that it’s not reflected anymore. Then, correct the perspective so that the mirror looks in the same way that it would if you were standing in front of it.
This ‘trick’ can be useful for all sorts of products made with reflective materials. While I’m using product photography as the main genre, the same advantages apply to still-life photography.
Wedding Photography
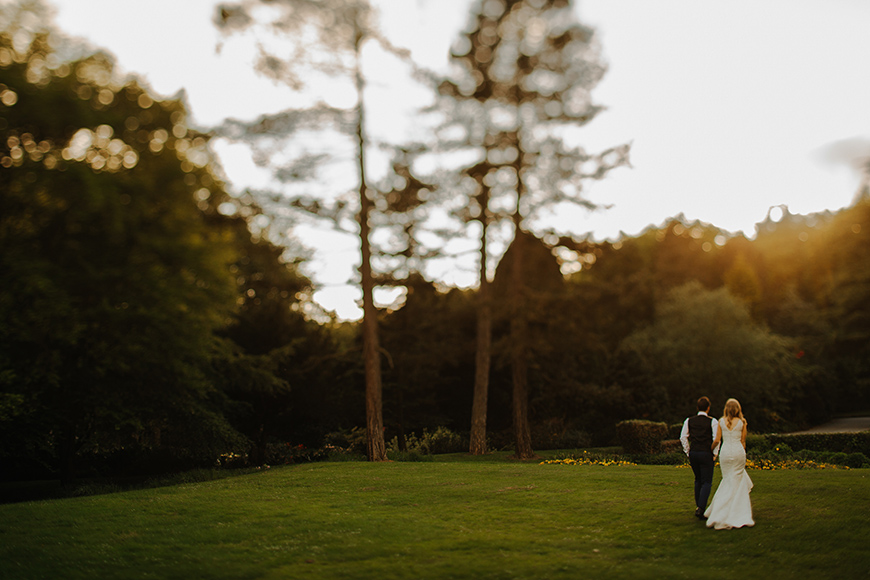
Tom Pumford
Tilt-shift lenses have found a niche in the realm of wedding photography.
Primarily, they are employed to manipulate the plane of focus, allowing photographers to emphasize the bride and groom while subtly blurring out background distractions.
This selective focus not only highlights the couple but also adds a dreamy, ethereal quality to the images.
However, some wedding photographers harness the tilt-shift lens for its miniature effect.
By selectively blurring parts of the image, they can render grand wedding venues or expansive outdoor settings with a whimsical, toy-like appearance.
This technique, though less common, offers a unique perspective on the wedding narrative, portraying the couple as central figures in their own enchanting world.
Beyond these creative applications, tilt-shift lenses are practical tools. They can correct perspective, especially in grand venues with towering structures, ensuring vertical lines remain straight and true.
This is crucial in preserving the architectural beauty of a location, be it a cathedral or a lavish hall.
What Settings Should I Use for Tilt-Shift Photography?
You need to consider that tilt-shift lenses don’t work with auto-focus mode. So, you’ll have to manually focus your images to achieve tack-sharp focus.
Also, not all tilt-shift lenses work with automatic aperture control. This means that you can’t use the auto-mode to expose your images. However, this isn’t always the case – Canon lenses, for example, are compatible with auto mode.
2 Tips for Getting the Best Tilt-Shift Photos
If you decide to give tilt-shift lenses a try, here are some tips that will help you get better results.
Position the camera at the right angle
To achieve the desired effect from tilt-shift lenses, you need to start from the correct standpoint. In the case of architecture, for example – you need to have the camera’s sensor parallel to the building.
This way, when you use the tilt
Fine-tune the composition
You can roughly compose your photo at first, but won’t know how it will look until after you’ve tilted or shifted the lens.
This is one thing that can be frustrating the first few times you use tilt-shift lenses. However, it’s a matter of practice and patience.
Using a standard lens, you can see the final composition from the start. This isn’t the case when you take a tilt-shift photo.
After you’ve become more experienced, you’ll be able to imagine more or less how the final image will look after using the shift or tilt function – so, it does get easier.
The best advice you can get is to practice and be patient.
Tilt-Shift Apps

There are many apps that allow you to fake the tilt-shift effect. Some have a dedicated feature, others have it as a setting inside another feature. In any case, you can achieve the look and give free rein to your creativity.
- Instagram – When you upload an image to create an Instagram post, you can access the editing tools. Here, you’ll find a tilt-shift feature.
- Tilt-Shift Camera – This is one of the best dedicated apps to do a tilt-shift effect. You can choose between linear and round focus, and you it has a live preview.
- Awesome Miniature – This dedicated app allows you to use a linear blur to create miniature scenes with the free version. If you update to the paid version, you’ll also access the oval and round focus.
- Snapseed – This free editing app doesn’t have a feature called tilt-shift. However, you can use the Lens Blur to achieve the effect. There’s a linear and a round version which can be customised in strength and transition.
FAQs about tilt and shift functions
How do you make a tilt-shift effect?
To make a tilt-shift effect in post-processing, you need a photo editor that lets you manipulate the lens blur. For example, using Adobe Photoshop, you can go to Filter > Blur Gallery > Tilt-Shift.
Do you need a tilt-shift lens for architectural photography?
If you’re serious about architectural photography, a tilt-shift lens could be a wise investment. Another possibility is to use a large format camera which also allows the camera movements required for architecture photography.
If you’re on a budget or you don’t intend to specialise in architecture photography, you can shoot with a normal lens and correct the perspective in post-processing.
Can you do tilt-shift photos on your phone?
You can mimic the effect of tilt-shift lenses with editing apps on your phone. You’ll find a list of the best tilt-shift apps in this article just above the FAQs.
How do you use a tilt-shift lens for landscape photography?
Landscape photographers use a tilt-shift lens to achieve an infinite focus. You need to place the focal point on the closest element and tilt the lens down. This will change the direction of the focal plane so that it runs from front to back instead of parallel to the sensor.
What is tilt-shift in-camera?
Tilt-shift in-camera means that you achieve the effect with camera movements or by using a tilt-shift lens. This is in contrast to doing it with an editing app or software such as Adobe Photoshop.
How do you do tilt-shift video?
You can do tilt-shift video in the same way you do tilt-shift photography. You can attach a tilt-shift lens to your DSLR and use this to record your video instead of taking pictures. If you don’t own one of these lenses, you can shoot with a regular lens and apply a tilt-shift effect in post-production. For example, if you use Final Cut Pro, the effect is called Focus.


Ana Mireles is a Mexican researcher that specializes in photography and communications for the arts and culture sector.

WELCOME TO SHOTKIT
Enter your email to be sent
today's Welcome Gift:
19 Photography Tools
🔥 Popular NOW:


Shotkit may earn a commission on affiliate links. Learn more.