


What Is Image Stabilization? (How and When to Use it)
Tired of blurry or out of focus pictures? Image stabilization lets you shoot at slower shutter speeds and nail a sharper shot, whatever the conditions.
Learn | By Jeff Collier
This guide to image stabilization will help you put blurry images in your rearview mirror.
Using lenses with image stabilization, you can get rid of image blur and take your photography skills to the next level.
Lens-based and camera-based image stabilization technology uses sensor movement to correct the slightest movement caused by pressing the shutter button and other factors.
In turn, they have a significant impact on image quality.
Read on to learn more about each form of image stabilization.
We’ve included valuable insights on how image stabilization methods work, what to consider when using them, and when to avoid them.
Table of Contents
What Is Image Stabilization?

Used in the right way, you can even use a camera strap as a stabilizer.
Image stabilization is a feature that manufacturers include in lenses and cameras to reduce the blurriness of images taken by them. In the case of smartphone cameras, image stabilization is often built into the device’s software.
You may see different names for image stabilization depending on the camera’s brand.
For example, Nikon refers to image stabilization as Vibration Reduction, while Sony calls it Optical Steady Shot (OSS) technology.
Regardless of the name, the objective is the same. Image stabilization uses gyroscopic sensors to allow photographers to take sharper shots using slower shutter speeds, and without needing a tripod or a gimbal (camera stabilizer).
However, tripods are sometimes the best stabilization option as we’ll see later on.
You may wonder why slow shutter speeds are desirable. The answer is that they typically result in high-quality photos due to the lower ISO value involved.
Types of Image Stabilization
There are two main types of image stabilization: optical image stabilization and in-body image stabilization.
Here’s what you need to know about each type:
Optical Image Stabilization (OIS)
Optical image stabilization technology, also known as lens-based stabilization, is incorporated into the camera lens itself.
It consists of a microprocessor that can detect the degree of camera shake and movement. This hardware is accompanied by a floating lens element that compensates for the camera shake and makes sharp images possible.
Lens-based image stabilization is typically the most effective. This is particularly true when using lenses with longer focal lengths for portrait photography or when you use older DSLR cameras.
Note that there’s a limit to the focal length that any type of image stabilization technology will work well with. We’ll discuss this in more detail later in the guide.
However, it doesn’t come cheap. It’s expensive because lens-based stabilization systems are custom-made for each specific lens.
In turn, this means you pay for a full-blown optical stabilization system every time you buy a lens.
In-Body Image Stabilization
Now let’s move on to in-body image stabilization, which is also called camera-based stabilization.
This technology uses a sensor that cancels out camera shake and allows you to take crisper images with less blur.
The main advantage of camera-based stabilization is that you only need to buy the hardware once. Camera-based image stabilization systems aren’t customized and you can use them with any lens you have in your collection.
Higher versatility is another edge that in-body image stabilization has over its lens-based counterpart.
While lens-based stabilization technology can only compensate for horizontal and vertical motion, in-body stabilization can also correct any rotational motion that occurs when taking pictures.
Things to Consider When You Use Image Stabilization
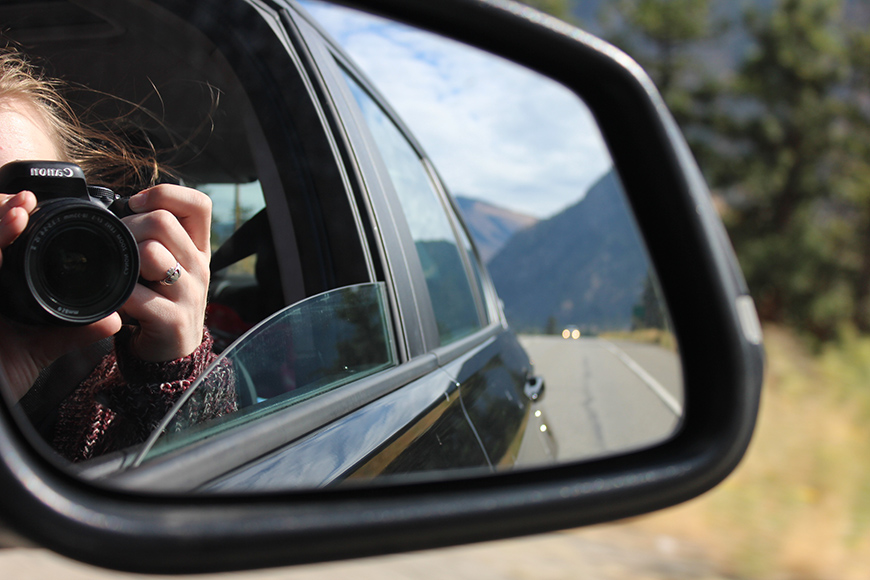
Taking photos out of a car window is one situation where image stabilization can help | Megan Capewell
There are several factors you should keep in mind when you use image stabilization. Failing to consider these things when taking your photos means you won’t get the clearest and sharpest images possible.
Here are the most important aspects:
1. The Type of Image Stabilization to Use
When deciding which type of image stabilization to use, you have three options. You can use lens-based stabilization, camera-based stabilization, or a combination of both.
For the purposes of still photography, both types of stabilization will allow you to snap crystal-clear shots at low shutter speeds.
However, keep in mind that not all stabilization systems are created equal. Your stabilization system’s effectiveness depends on the brand, lens model, and camera model.
In some cases where one stabilization type is typically more effective, the other will work better because the camera or lens is newer.
When taking videos, you’ll likely need to use a combination of lens-based and camera-based stabilization.
2. If Your Subject Is Moving
Another thing you should know about image stabilization is that it doesn’t do anything to freeze the motion of fast-moving subjects. It’s designed to help you photograph static subjects at slower shutter speeds.
In such cases, you actually need high shutter speeds to effectively capture the subject’s motion.
You also shouldn’t use image stabilization during panning shots where you’re going to move the camera intentionally.
If your image stabilization system can’t detect this automatically and adjust, you should switch it off when taking panning shots because it’ll counteract your efforts.
Therefore, both lens-based and camera-based image stabilization aren’t suitable when taking live-action sports photos, for instance.
3. The Type of Lens You’re Using
Whether or not image stabilization will work well for you also depends on the type of lens you’re using.
Both lens-based and camera-based stabilization don’t work well with telephoto lenses, particularly ones with a focal length of more than 100 mm. These stabilization techniques become less effective in general as the focal length gets larger.
Since telephoto lenses often have ultra-focal lengths like 400 mm, the best stabilization option when using them is usually faster shutter speeds.
You may wonder why this is the case.
Telephoto lenses are larger and heftier than other lens types. In turn, they’re more difficult to hold in hand and get photos with no camera shake.
Therefore, the best option to stabilize photos with a telephoto lens is to use a tripod.
With wide-angle lenses, image stabilization works like a charm.
4. Your Camera’s Battery Level
Before turning on image stabilization, check how much battery power your camera has left.
Since image stabilization systems are electronically controlled and require power to measure motion and vibrations, they’re energy-intensive and reduce battery life significantly.
This issue is compounded when using larger lenses.
Stabilization systems compatible with these lenses are larger and heavier. As a result, they need more energy to move and compensate for camera shake.
If your camera’s battery is low, forgo using image stabilization. After all, a blurry photo is better than no photo at all.
5. The Reciprocal Rule
The reciprocal rule is another important aspect to consider when using image stabilization.
The rule states that you should set the shutter speed to be equal to or higher than the lens’ focal length. For example, if you’re using a 40 mm lens, your shutter speed should be 1/40 seconds or higher.
When you do so, you may not need to turn on image stabilization.
However, your hold can only be so steady when taking handheld shots. As a result, you may still end up with blurry pictures due to the vibrations of the shutter button.
By using image stabilization, you can override the reciprocal rule. Image stabilization systems allow you to shoot at slower shutter speeds even when using a high focal length lens.
In turn, it’ll be easier for you to take handheld shots without them turning out blurry.
When to Use Image Stabilization
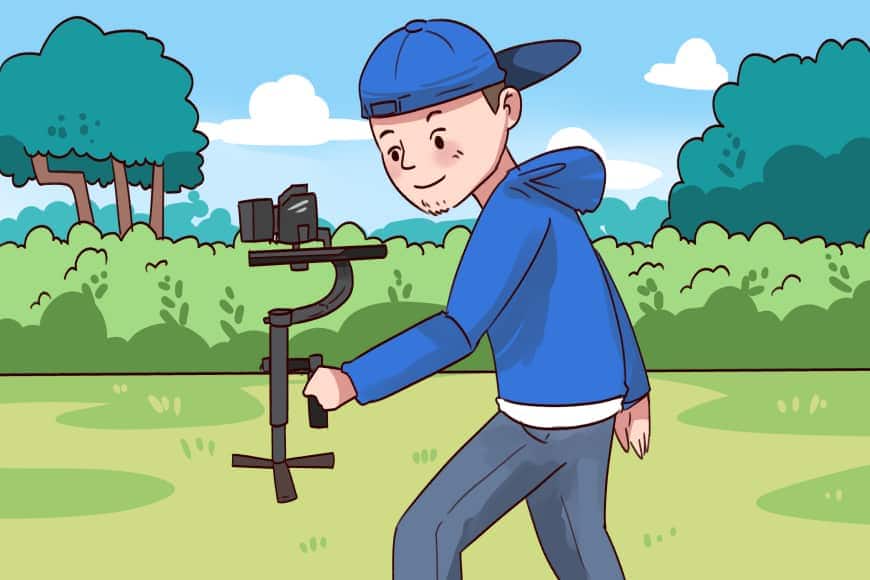
In-camera stabilization can’t compare to using a gimbal, but it’s still useful in some situations.
Just because you have image stabilization features available doesn’t mean you should use them all the time.
Only use image stabilization when the situation calls for it.
You’ll need image stabilization when taking handheld shots or taking photos in low-light conditions. A good example of this is when you’re taking handheld photos of a sunset.
Additionally, you should use image stabilization with wide-angle lenses but not with longer focal-length telephoto lenses.
Another situation in which you’ll need image stabilization is when using a monopod.
Monopods are convenient because they’re more portable than tripods. However, they’re less stable and more prone to vibrations, hence the need for image stabilization.
When to Avoid Using Image Stabilization
There are certain times when you should avoid using image stabilization altogether.
Firstly, you should never use image stabilization when you take photos using a tripod. We say this because the stabilization sensors’ job is to detect slight vibrations and compensate for them.
When you use a tripod, there won’t be any vibration. In turn, your image stabilization system will correct vibrations that aren’t there and may actually cause vibrations and shake the camera.
You may wonder when it’s best to use a tripod instead of relying on lens-based or camera-based image stabilization.
The rule of thumb is that a tripod is the better option if you’re using a shutter speed that’s lower than the equivalent focal length.
As previously mentioned, you should also avoid using image stabilization when your camera’s battery power is low.
How Much Do Cameras With Image Stabilization Cost?
Cameras with image stabilization don’t come cheap.
If you want a camera with optical stabilization from a reputable brand, such as Sony or Canon, you can expect to pay anywhere between $$2,500 and $6,000.
Despite the steep prices, you get your money’s worth. These cameras are top-of-the-line and will allow you to take stunning images without distortion or blur.
You can also find cheaper options that’ll only set you back less than $2,000. However, you shouldn’t expect to receive the same quality of stabilization you would get with premium brands.
Is Image Stabilization Worth it?
As previously mentioned, you can achieve what image stabilization offers you by simply using a tripod when taking your photos. Naturally, this is much less costly than buying a camera equipped with any type of image stabilization.
However, tripods are large and aren’t typically very portable. Therefore, you’re likely to encounter situations in which it’s not practical to haul your tripod with you.
The added convenience of having image stabilization built into your camera is the main reason why it’s worth your money.
On the other hand, if most of the photos you take involve moving subjects, then image stabilization technology isn’t for you.
For example, those involved in sports photography will find themselves turning the image stabilization features on their cameras off most of the time because they actually get in the way of panning and similar types of shots.
What about Image Stabilization for Video?
Camera image stabilization for video is a useful feature that ensures buttery-smooth, shake-free footage, especially vital when filming on the move or in challenging conditions.
As video requires capturing a series of images rapidly, even minor jitters can result in distracting and unprofessional footage.
Image stabilization, whether optical, digital or a combination of both, compensates for unwanted camera movements.
Optical stabilization adjusts the lens or sensor’s position in real time, while digital stabilization processes the video post-capture to eliminate shakes.
For videographers, from vloggers to filmmakers, this image-stabilizing technology is indispensable, turning potentially shaky clips into polished, cinematic sequences.
Frequently Asked Questions
Here are a couple of questions that people often ask about image stabilization:
Does the iPhone 14 camera have image stabilization?
The iPhone 14 and iPhone 14 Pro Max cameras have image stabilization features built in. Apple calls this feature Enhanced Stabilization and has also included it in some earlier iPhone models.
Enhanced Stabilization improves sharpness and reduces camera shake when taking still photos and recording in Video or Cinematic mode.
You don’t need to turn on this feature on your iPhone since it’s on by default.
Optical image stabilization vs. electronic image stabilization: Which is better?
Whether optical image stabilization or electronic image stabilization is best for you depends on the purpose you’ll use them for.
Optical image stabilization systems physically correct camera shake within each frame. In turn, it helps you take better handheld still photos in low-light conditions.
On the other hand, electronic image stabilization is better when taking videos. It increases video stability by smoothing the transition from one frame of the video to the next.
Does a mirrorless camera need image stabilization?
When using a mirrorless camera, there’s less need for image stabilization because such cameras have less camera shake. This is because the only component that can cause vibration in these devices is the camera shutter.
However, you may still need to use image stabilization in some cases when using your mirrorless camera to get sharper images. One situation where this is true is when taking portraits in less-than-ideal lighting conditions.
Naturally, image stabilization is no longer required if you use a tripod. See also: How can I stabilize my camera without a stabilizer?
 Best Sony Lenses in 2023: Ultimate E-Mount Guide
 10 Best Canon Lenses in 2023 (EF Mount DSLR)
 Best Lens for Portraits (People Photography)
 12 Best Fuji Lenses in 2023 for Fujifilm X Mount (All Budgets)
 Best Wide Angle Lenses in 2023 for Nikon, Canon & More
 Best Point and Shoot Camera (P&S) for Simplified Photography

Jeff Collier is an experienced film photographer who enjoys experimenting with modern digital photography equipment, software and apps. He’s also an ex-world champion triathlete and avid cyclist, clocking hundreds of km each week in the beautiful Tweed Valley of northern NSW, Australia.

WELCOME TO SHOTKIT
Enter your email to be sent
today's Welcome Gift:
19 Photography Tools
🔥 Popular NOW:


Shotkit may earn a commission on affiliate links. Learn more.