


Travel Photography Tips, Ideas, Examples & Jobs
Have a passion for travel photography but not sure how to take it further? This post covers careers, what gear is best, and tips for improving!
Learn | Photography Guides | By Ashley Darrow
Travel photography is one of the most exciting styles of photography, but it can also be one of the most intimidating to get started with.
I’m at my most inspired as a photographer when I’m on the road.
Even when I’m not headed to an exciting new location, I’ve started to think about all of my photography from the standpoint of travel.
This guide is going to give you everything you need to know to get started with travel photography.
I’ll be covering everything from the basics, to the equipment you need, to 20 travel photography tips that will improve how you approach taking photos.
When you’re ready to hit the road, we’ll start our adventure with some travel photography 101.
Table of Contents
What Is Travel Photography?
Defining travel photography can be a little bit challenging as this is one of the most open and free categories of photography.
In general, travel photography involves documenting people, landscapes, and cultures anywhere in the world.
Your travel photography counts whether you have to hike for thousands of miles or you took a 10-minute bus ride from your home.
Travel photography can be done by career professionals working for major magazines like National Geographic or it can be done as part-time freelance work.
Many travel photographers make their money by taking contract work from tourism departments or brands looking for product photography shot on location.
Travel photographers often find themselves working in challenging conditions. There’s a good chance that you’re going to be snapping pics in low light conditions, rough weather, or even half a world away from the comfort of your own bed.
What Does Travel Photography Include?
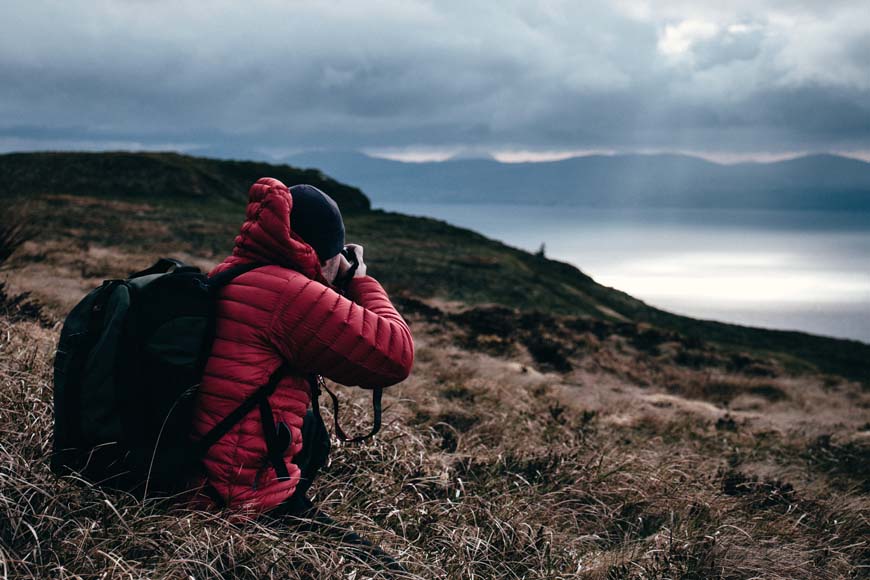
Image Credit: Sam Forson
Travel photography incorporates countless different styles.
Travel photographers often take landscape photographs, architectural photographs, as well as street photography. It’s also common to see food photography and documentary work being done by travel photographers.
As a travel photographer, your goal is to capture and express the story of a particular time and place. You’ll be giving people a taste of what’s happening in the moment while you’re in a particular location.
How Much Do Travel Photographers Make?
Travel photography is made up of a wide range of styles, but it’s also made up of a wide range of pay rates.
If you’re lucky enough to land a staff photography job with a major magazine, you could wind up with a six-figure salary. However, freelance travel photographers can make as little as around $18,000 a year.
Beginner travel photographers often make even less than that as they start to piece together their career.
Part of your pay as a travel photographer will come in the form of comped travel expenses. It’s pretty common for travel photographers to take a job with a tourism department that includes free transportation and lodging as part of their payment.
Is travel photography in demand?
Travel photography is in high demand.
This demand is being driven by tourism departments, brands looking for more engaged lifestyle photography, and the rise of social media making travel photography a viable path for a content creator.
There are more people taking travel photos than ever before which means that you’re also going to have a lot more competition despite there being more job openings.
How Do I Become a Travel Photographer?
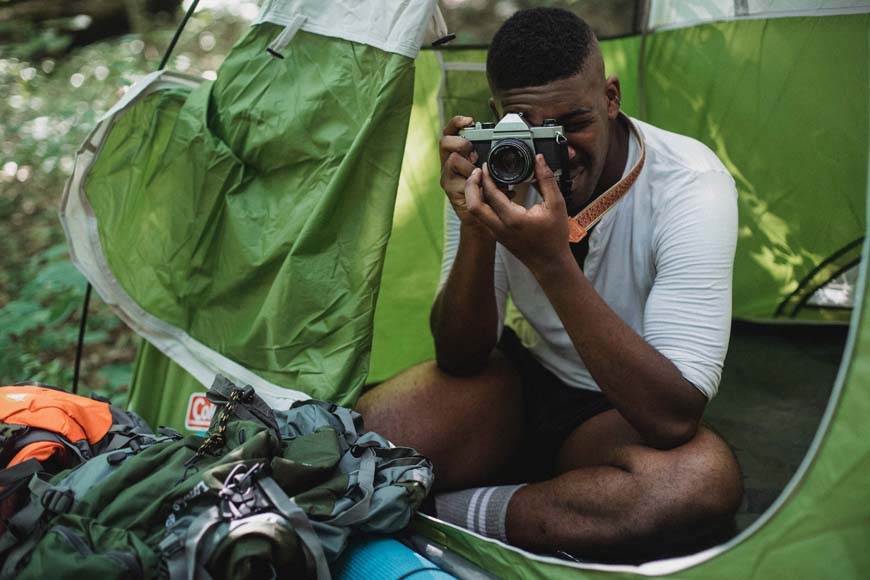
Image Credit: Kamaji Ogino
Becoming a travel photographer is pretty similar to how you would start up almost any photography career.
If you’re a total beginner, you want to start by mastering the craft of working behind the camera. This means learning how to stay in control of your exposure, frame captivating shots, and just get comfortable taking pictures wherever you go.
Here’s a basic outline of the steps you’ll take to start your travel photography career.
- Learn your photography basics
- Identify your travel photography niches
- Build your portfolio
- Grow a social media presence
- Begin reaching out to clients
- Publish your photography
- Grow your business by reaching out to bigger clients
- Continue to promote your work
- Have fun traveling!
I should note that plenty of travel photographers also crowdfund parts of their career.
Building a presence on social media sites like YouTube and connecting that to your crowdfunding platform of choice is a great way to bring in some additional money.
What Equipment is Needed for Travel Photography?
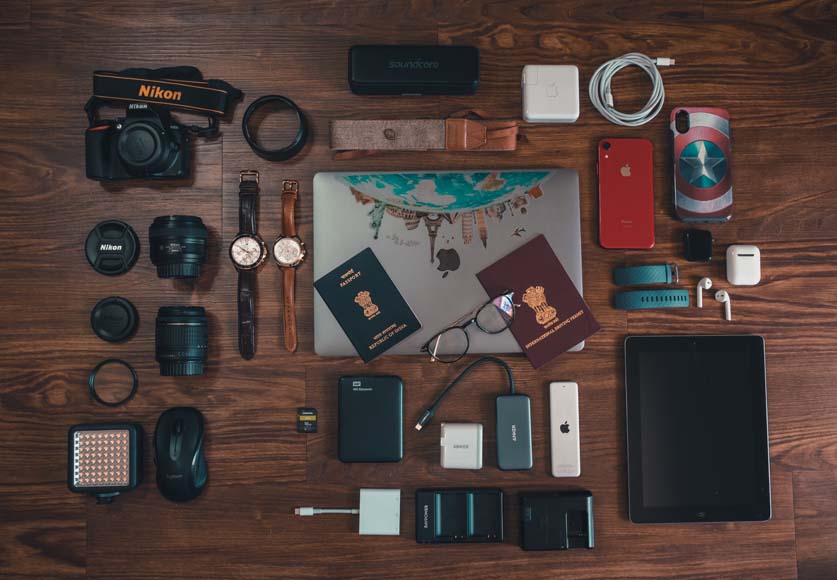
Image Credit: Hiren Lad
In all my years of photography, the one thing I’ve learned is that if there’s anything photographers love nearly as much as taking pictures, it’s talking about their gear.
Whether you see this equipment as the tools of your trade or the raw materials of your art, you’re going to need some equipment to get started with travel photography.
I’m going to cover the standard gear that most travel photographers will gravitate towards, but I’ll also be talking about different setups for film photographers and mobile photography.
I’m going to kick things off with the absolute must: a camera.
Camera
You’re not going to get very far in your career as a Travel Photographer without a camera. I’m being a little silly here, but it’s not just as simple as picking up any random mirrorless camera for travel blogging.
So, what camera is best for travel photography?
The absolute best cameras for travel photography are going to be, no surprises here, the latest mirrorless releases from the big-name brands like Sony, Camera, and Nikon.
Those cameras are packed full of the latest features and offer some of the best image quality.
You can also get amazing results, and save money, by picking up older cameras. My Sony a7s II is still my main camera body and my Canon 5D Classic, which was released way back in 2005, still takes pictures that get people asking me “How did you do that?”
You don’t need to spend a lot of money on your travel photography camera. A skilled photographer will be able to take amazing pictures using a point and shoot digital camera from the 90s. It’s craft that makes the photographer, not gear.
Travel photography can also be done with your smartphone. There are plenty of professional photographers out there primarily shooting on smartphones.
I also want to highlight film cameras. Film is the historic origin of our art form. Any film camera from a toy lomography camera to a professional large format camera can help us see our travels in a new way.
With all of that said, there are a few important features that you should look for in a travel photography camera.
- Weather sealed designs are much more important when you’re trekking through unknown territory than when you’re at home in the studio
- Your camera should also be ready for the road. Just like your car, you should take your camera in for a tune-up before a long trip
- Double-check for the specs that matter most to you. For me, that’s low-light performance and color science
Your camera is only half the equation which means we need to take a look at the lenses that will be going on this journey with you.
Lens
I bet you’re wondering which lens is best for travel photography? You don’t need to worry, I’ll walk you through my top pics for a travel lens whether you’re shooting on a brand-new Sony mirrorless camera or you plan on taking a Canon 5D Classic on the road.
The first place you need to start is by asking yourself the most essential question in photography: What types of pictures do I plan on taking?
Here’s a quick breakdown of my recommendations for travel photography lenses based on my experience for a variety of photographic styles and budgets.
- Standard Zoom Lens—A standard zoom lens like the classic 24 to 70mm is the go-to travel lens for so many photographers I know. This lens easily handles street photographs, landscapes, and portraits. Pick this to make a flexible one-lens kit
- Wide Angle Zoom Lens—Wide angle zooms are better suited for photographers who know they’ll be shooting landscapes and architecture. If your wide angle zoom goes up to 35mm, then you can even get away with using that as your every-day lens
- Wide to Telephoto—These lenses have focal length ranges like 24 to 105mm. They are usually affordable alternatives to pro-level lenses that can still capture stunning images. You’ll want this lens if your main concerns are budget and stylistic flexibility
- Telephoto Zoom Lenses—These massive lenses typically top out at 200mm or 400mm focal lengths and are ideal for wildlife, bird, and sports photography. Their size, weight, and cost make them less flexible than other options, but these lenses are a must-have for photographers interested in the styles I just mentioned
- Pancakes and Nifty Fifties—Pancakes lenses have such a small profile they double as a body cap while the iconic Nifty Fifty is a budget 50mm with a huge fanbase. These lenses are perfect for photogs who want to stay ultralight or for anyone who wants an emergency backup lens.
- THAT lens—We all have a lens that, despite never getting much use, we just can’t seem to leave at home. Mine is the Helios 44-2. I take that lens on pretty much every trip even if it doesn’t get much use. Allow yourself a little room for that “fun” lens and you might be surprised by how much use it gets over time
I always have at least two lenses on me when I’m traveling—just in case.
I once dropped an expensive prime lens and watched it roll off the edge of a mountain in the desert. Luckily, I had a pancake lens in my bag so the photography trip wasn’t a total loss.
Ever since then, not only do I treat each of my lenses with the utmost care, but I also make sure but I’ve got backup options on hand.
- Related: How to choose a camera lens
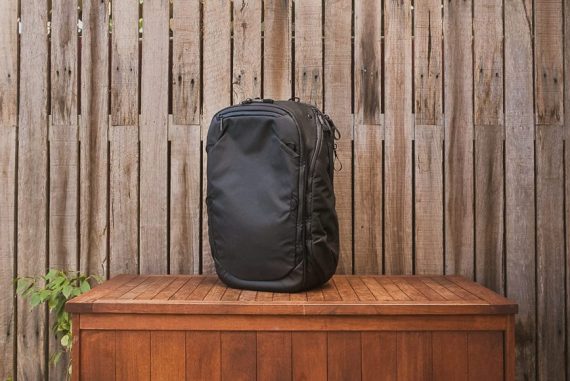
Travel Photography Bag
Just like with lenses and camera bodies, you have a few options to consider when it comes to picking the right travel bag for your next adventure.
Before I get too far into talking about camera bags, here’s the five things I always consider when I’m packing a bag for my next trip.
- Camera Bag Size—Size is one of the most important things to look at when shopping for a new travel photography bag. You want to find a bag that’s going to comfortably fit all of your equipment without causing too much strain on your back. Sling bags are great for days out in the city with light gear, but you should look for a comfortable backpack if you plan on covering some serious distance with your gear
- Pack Weight—Here’s a quick piece of advice I picked up from hiking. Your maximum pack weight should only ever be 20% of your total body weight. This means that if you weigh 200 lb, the heaviest your camera bag should ever be is 40 lb. The lighter, the better
- Features—There are some features that I consider an absolute must have in any of my travel camera bags including rugged build quality, plenty of padding and protection for my gear, and easy access to at least my main camera body and lens so I can shoot on the fly
- Style—You could buy the most technically perfect travel camera bag, but if you don’t actually like the way it looks you’re never going to take it on a trip. I definitely believe that form should be second to function when it comes to camera bags, but I’d also be lying if I said it wasn’t a huge factor in my camera bag purchasing decisions
- Your Gear—Your gear is actually going to dictate the type of bag that you’ll be looking for. A travel photographer shooting on a Leica Q2 can get away with a much smaller bag than a photographer shooting with a Canon 1DX
I also typically bring a packable backpack with me as part of my kit. This could be a really lightweight sling bag or something like the Lowepro Runabout.
This lets me leave the bulk of my gear at my hotel when I just want to have a quick trip around a new city taking pictures.
- Related: How to choose a camera bag
Tripods for Travel Photography
Tripods are an interesting—and somewhat contested—piece of the travel photography puzzle. I never used to take a tripod with me while traveling and that’s because most of my photography was shot street style which means lightweight and handheld.
However, the more I get into film photography and more interesting exposures, the more I find myself relying on my travel tripod.
My absolute number one pick for an adventure tripod would have to be the Peak Design Travel Tripod. It’s fairly lightweight, intelligently designed, and packs down small enough to fit in most of my bags.
Depending on the type of photography you’re looking to capture, you can also use tripods like a gorilla pod or even just take the tripod you have—even though it might be a little larger and heavier than would be ideal for travel.
This roundup of the 7 best travel tripods is a great place to get started if you’re shopping for something designed for the road.
Do I Need a Tripod for Travel Photography?
I’m going to dig into this mild controversy for just a moment. The question of whether or not you need a travel tripod to begin with is the source of some debate for photographers.
Honestly, the answer is maybe. It really depends on the type of pictures that you’re hoping to capture and your personal style as a photographer.
If you like to run and gun while capturing slices of life on busy city streets, you probably don’t need to bring a tripod with you.
Styles of photography that are highly mobile and rely on fast composition changes typically ditch the added stabilization that a tripod brings because it just slows them down too much.
Tripods might also not work for certain events and organizations. Trying to set up a tripod during a rock concert is a recipe for disaster and some museums won’t even let you bring in a tripod unless you pay their professional photography fees.
Then again, there are a few types of photography that absolutely need a tripod in order to work. Long exposures, shooting in dimly lit situations, and using some telephoto zoom lenses pretty much mandate shooting on a tripod.
The long and short of this is that owning a tripod and learning how to use it will make you a better photographer, but it’s not quite a mandatory piece of your travel photography kit.
The Camera Accessories I Always Forget for Travel Photography!
There are so many small accessories that are vital for digital photography that I find myself constantly forgetting. Far from being little odds and ends, these are essential parts of my kit that I’ve started to just leave in my travel bag so I never have to worry about packing them.
I’m talking about SD cards, microfiber cloths, sensor cleaning kits, and all those other little things that you might not miss until you’re in the field and you’ve got a speck of sand on your sensor ruining your shots.
I’ve started making a checklist that contains all these little items before I pack out. There’s nothing more defeating than being in some beautiful destination and realizing you only have enough space on your memory card for a few dozen more shots.
This is the checklist that I use for your average trip. Feel free to adjust things based on the gear that you use.
- Sensor cleaning swab x 2
- Lens cleaning Spray
- Microfiber cloth
- Spare camera batteries for each camera
- Memory cards—one in each camera, extra in the bag
- External SSD if I’ll need to backup files while traveling
- iPad for editing, emailing, and posting pics on socials
- Camera strap
- Camera body cap and rear lens cap
- Remote shutter release
- Chargers and cables
Lighting for Travel Photography
Lighting is a bit of an interesting topic when it comes to travel photography. We don’t often associate this incredibly mobile genre of photography with the piece of equipment that defines studio work, but there’s some great reasons to take some lights with you on your next trip.
Photographers like Briscoe Park are doing incredible work mixing bold, almost giallo, lighting styles with travel photography. There’s also a wealth of photographers using the dark nights of remote locations as canvases for their light paintings.
I started taking a few small lights with me when I hit the road and it’s definitely pushing my abilities behind the camera.
Lights like the Aputure MC and MC Pro are great for adding lights to portraits, throwing splashes of color into images, or creating other-worldly scenes. The Infinibar or MT Pro, also from Aputure, are solid choices for light painting.
Even something small like the Lume Cube can help gain control over lighting while away from the studio. Just don’t try to haul around your old tungsten lights on your next trip!
Mobile Travel Photography Gear
Before you start thinking travel photography requires a mountain of expensive equipment, you might be reading this article on the only device you need to get started with travel photography.
That’s right, smartphone cameras have come a long way and they are perfectly capable of being your main camera body for traveling adventure photography.
Even though your smartphone is essentially a pocket camera that can surf the internet and make phone calls, you still might want to add some extra gear to make the most out of being a mobile travel photographer.
My biggest recommendation would be to pick up a Moment smartphone case and a few Moment lenses.
These lenses will dramatically change your composition and help make your images look a bit more professional and a bit less like a quick shot on a smartphone.
A lightweight Gorillapod, a photo editing app like Lightroom mobile, and a power bank to keep you charged are a few must-haves.
This might sound a little unconventional, but my smartphone is one of the cameras I use the most. It’s lightweight, can take high quality pictures, and it can be a great budget alternative to expensive cameras because you probably already own one.
I almost never leave the house without throwing one or two Moment lenses in my bag. This is true whether I’m going on a 10-minute walk to the store or I’m about to hop on a 10-hour flight.
Travel Film Photography Gear
Is there any sound more relaxing than the shutter of a film camera when you’re deep in the woods or on top of a mountain ridgeline?
I don’t think so and that’s one of the reasons why I tend to travel with film photography equipment.
Film photography is almost a completely different animal than digital photography. You have to be much more engaged with your subject, composition, and exposure since you only have a few frames before your roll is spent.
Here’s a quick list of the film photography gear that I travel with. Just as a quick note, I’m leaving out things like tripods and camera bags that overlap with digital photography.
- Gallon zip-top bag to store film
- Permanent marker to jot notes on the side of a film canister
- Light meter
- Film (I always try to bring one more roll than I think I’ll need—just in case)
Read our guide to film photography for more tips.
20 Tips to Help You Improve Your Travel Photography
Want to improve your travel photography? I’ve put together 20 travel photography tips to help you up your game the next time you take your camera on vacation.
These tips are going to cover everything from advice for total beginners to some really interesting things that caught me by surprise while I’ve been on tour with my camera.
Tip 1—Get Comfortable With Your Gear Before You Travel

Image Credit: Amar Preciado
This is my number one tip for travel photography because it applies to experienced photographers as well as beginners. Before you head out on your big trip, take some time to get comfortable with your equipment.
This means packing your camera bag just like you’re going to for your travel photography trip and wearing it around your home city or just walking around your neighborhood.
There’s nothing worse than being hundreds, or thousands, of miles from home only to find out that you actually don’t like that brand new camera bag you bought.
Giving all of your gear a comfortable trial run ahead of time ensures that you don’t run into any sudden surprises while you’re traveling.
I’ve started doing this with all of my travel photography gear and it’s hard to express just how much it’s helped me. Most of the time I’m just adjusting my backpack to make sure it’s got a comfortable fit for a long day of hiking, but there have also been times where I realized that piece of my equipment just wasn’t right for me.
This will also help make things easier when you’re out there taking pictures.
It can be a little stressful to try and line up the right composition in a busy downtown neighborhood of a foreign city. Knowing your gear inside and out will give you a huge confidence boost when you need it the most.
Tip 2—Set Your Travel Photography Intentions
This might seem like a silly question to ask, but why do you want to do travel photography?
Setting some intentions and being aware of your goals ahead of time is going to help improve your career as a photographer.
If you need some inspiration for your goals, here’s a few that I’ve used in the past.
- Have at least 5 new pictures that I can turn into prints once I’m home
- Spend two days on location, day one focuses on lifestyle photography while day two is all about landscapes
- Get out of my comfort zone and network with other travel photographers shooting the same location
Remember that goals are a lot like onions. They have layers.
Your ultimate goal might be to become a world famous travel photographer with National Geographic calling you every day, but you’ve got to start somewhere.
Let’s say that your goal is to start getting freelance travel photography contracts with tourism departments. You can start from scratch by pretending that you’re on contract to take photos of a particular location.
This will help you with your future goals as well as allow you to build your portfolio in the now.
Tip 3—Always Bring (Your) Camera
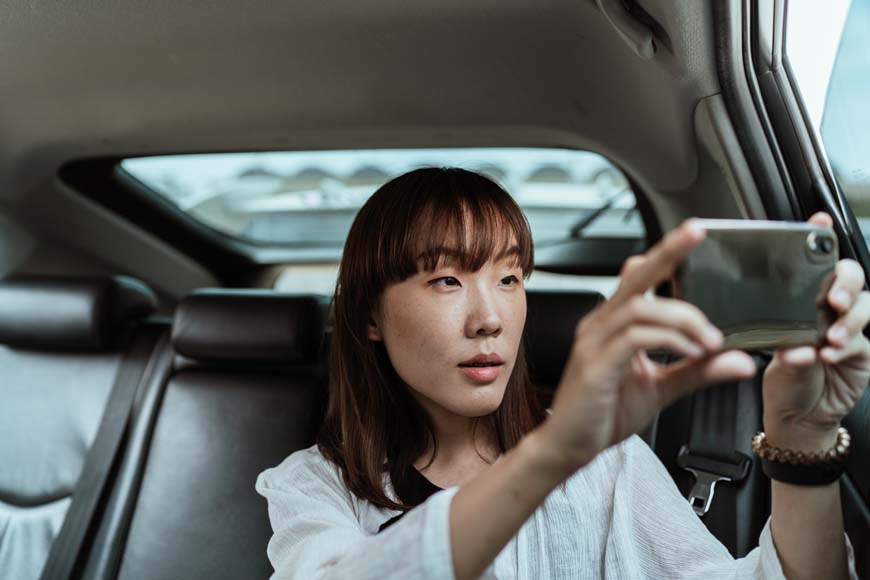
Image Credit: Ketut Subiyanto
Everything starts with the ABCs and for travel photographers this means to Always Bring (your) Camera and always be taking pictures.
You really never know when the right moment is going to strike for your photography. There have been countless moments where I wish I would have had a camera on me to capture a moment that was either beautiful or could have even been historic.
Whether you’re carrying your main camera body, a pocket camera, or even your smartphone, you should always have a camera on you when you’re traveling. Be ready to start snapping pics at a moment’s notice if you spot something that catches your eye.
Worst case scenario, you’ve got another few hundred pictures to sort through when you get home. Best case scenario, you’ve caught the once-in-a-lifetime shot that you might have otherwise missed.
Tip 4—Be Patient with Your Shots
Here’s something that’s happened to me nearly every single time I’ve gone on a travel photography trip.
I’ll be at a historic ruin or in a national park with the perfect shot framed only for there to be dozens of other tourists cluttering up my shot.
When I first started with photography, I didn’t have enough patience just to wait it out. I thought that I would have to spend hours standing at a particular spot waiting for people to disperse.
As it turns out, the longest I’ve really ever had to wait for a shot to clear up has been about a half hour. If you’ve got someone to talk to or a book to read, that’s no time at all.
Don’t pass up on the shots that you want to capture just because there’s something cluttering your frame. Patients will reward photographers every single time.
Pro travel photography tip: Using an ND filter on your camera can let you lower your shutter speed which will cause fast-moving cars and people to “vanish” from your shots!
Tip 5—Learn How to Photograph People
This travel photography tip can be one of the most challenging to incorporate. Getting comfortable cold approaching strangers takes a lot of social energy.
I know extroverted photographers that have a dozen model release forms printed and ready to go in their backpack. They have no problem chatting up strangers, but it took me some time to build up that confidence.
Here’s a quick template that you can use for approaching strangers for portraits.
Be cheerful and open about being a photographer. You can say something like “I’m a photographer taking portraits today in [Location] and I’d love to take your picture.”
If you’re on a freelance contract or working for a client, feel free to name drop them to give yourself some added credibility.
After snapping their pic, I like to give people my business card, email, or Instagram handle so they can contact me later if they’d like a copy of their photo.
If they say no photos, that’s just business.
It also really helps if you can speak just a little bit of the local language. You’ll be shocked how much more accommodating people can be if you can handle a few lines of the local tongue.
Tip 6—Study Local Laws and Customs
Photography laws and customs are different the world over. As a travel photographer, you’re going to need to familiarize yourself with local laws and customs—especially when you’re traveling abroad.
Remember that the letter of the law and the local customs might not necessarily be a one-to-one match.
I’m based in the United States and here it’s perfectly legal to take pictures of strangers as long as you’re in a public location. However, social customs dictate that it’s considered rude to take someone’s picture without asking their permission first.
When in doubt, always default to asking permission first. This means asking someone’s permission before taking their portrait or asking permission before taking pictures at a historic site or museum.
Tip 7—Get in Frame
Image Credit: Dominika Roseclay
This is something I’m still working on becoming more comfortable with.
When I’m in the studio, I’ve got no problem hopping in front of the lens and doing some self-portraiture. However, once I’m out in the field I’m a little bit reluctant to stand in as my own model.
Travel photography is about telling your story. This means that you’re going to need to get in frame for some of your photographs.
Even if it’s just a few shots of you setting up, traveling to your destination, or getting dinner after a long day of shooting, people want to see the photographer behind the camera.
If you’re traveling with other photographers, why not consider making this a game? Challenge each other to see who can take the most interesting photos of your fellow photographers.
You can even take some quick selfies on location to contrast your professional photography. This will make your self-portraiture a little more intimate and warm while your travel photos show off your full talent.
Tip 8—Scout Travel Photography Locations with Your Smartphone
A great way to dramatically improve your travel photography is to scout your locations ahead of time. Before you haul all of your gear on a quest for the perfect photo, go out there with just a day pack and walk around soaking up the scenery.
Location scouting gives you a strong understanding of what speaks to you as a photographer about this location before you even start pressing the shutter button.
I recommend carrying your smartphone or a point-and-shoot camera when you’re out scouting locations.
This lets you take some test shots of a travel location before bringing all your gear out.
Tip 9—How to Always Pack the Right Lenses
I used to be so worried about not bringing the right lenses on a trip, but it’s been years since I’ve felt like I picked the wrong lens for the job.
Part of this is knowing your lenses inside and out. You should learn the basics of your lenses like aperture, how their focal length compresses an image, and which focal lengths are ideal for different styles of photography.
Lenses like the Sony FE 24-70mm f/2.8 make a great choice for travel. The focal length options on that lens easily handle majestic landscape panoramas and street photography portraiture.
I also recommend taking at least two lenses with you for most travel photography trips. I’ll take one primary lens with me that I plan on doing most of my shooting with and a secondary lens for those “just in case” moments.
Tip 10—Staying Safe While Traveling with Camera Gear
Being a tourist always carries some risk when it comes to crime. Being a tourist that happens to be carrying $3,000 in photography equipment carries a little bit more risk.
Here’s a few tips that I stick with when it comes to staying safe while shooting with expensive camera equipment.
If you can, try to do your travel photography with a group. Even if you have one other person traveling with you, that company is usually more than enough to deter most would-be thieves.
This might seem a little obvious, but you always want to keep your gear in sight. Unless I know I’m alone in the wilderness, my camera bag is never further than an arm’s reach away.
I’ve got a tip for you that I don’t see a lot of people talking about when it comes to traveling safely with your camera equipment. I like to stay discreet when I’m traveling with my camera gear.
This means I leave the branded Sony strap at home and opt for a much more neutral Peak Design strap. I also throw a velcro patch over things like the LowePro logo on my backpack that might otherwise announce that there’s some expensive camera equipment in there.
If you stay smart and aware of your surroundings, your odds of having an unfortunate encounter while carrying camera equipment will be greatly reduced.
Tip 11—Shoot Some Short Format Video
We’re all photographers here. This means I can be a little honest with you about shooting short form video.
It might not be your main stay, but social media platforms are putting a lot of emphasis on TikTok style videos. If you can incorporate a little short form videography into your travel photography routine, you’ll have that much better performance online.
There are countless ways that you can build short form video production into your photography routine. You could record a 60 second video demonstrating your setup for the shot or even just an interesting voice over on top of a still image.
Shooting short videos can also be fun. Building this into your photography routine is a great way to improve your skill set while you’re also increasing your social media following.
Tip 12—Find Your Voice by Getting Lost
Some of the best travel photography stories happen because you get lost. Getting turned around is a great way to change your perspective on things and improve you or travel photography.
This is easily one of the most underrated travel photography tips. Best of all, you can do this from the comfort of your hometown.
Try getting lost on purpose by walking through a neighborhood you don’t usually go to or checking out a city that you might have otherwise overlooked.
While all the other travel photographers are gathered at the tourist traps we’ve all seen a thousand times on Instagram, you’ll be exploring something new while catching refreshing pictures of your travels.
Tip 13—How to Fly With Film
If you plan on doing some film photography while you’re traveling, you’re going to need to know how to transport your film while traversing through airports safely.
The x-rays used in airport security scanners can damage undeveloped photographic film. The more x-rays undeveloped film is exposed to, the more haze and distortion starts to pop up on the final image.
Film with an ISO 800 and above can be damaged by any airport X-ray machine. Expired and experimental films can also be damaged by x-ray equipment.
Some airports now use more powerful CT scanners. These are often used for checked baggage, but they can also be used for carry-on as well.
CT scanners put out enough x-ray radiation to damage film of any ISO. You should always bring your film with your carry-on luggage in its own zip-top bag.
When you’re traveling through security at an airport, you can ask the security personnel for a hand examination of your photographic film. In my experience, they almost always say yes no matter how busy the airport is.
However, it is at the discretion of airport security and I have had them turn down a hand examination of my film. One trip through an X-ray scanner won’t damage your film, but multiple trips will.
This is why I recommend buying film on location if possible. You can also have film mailed to your hotel or to a friend’s address who lives near where you’re traveling.
Tip 14—Become a Traveler at Home
Traveling is expensive and it’s not always available for us. However, this doesn’t mean that you have to stop your travel photography plans.
If you’re looking for the true zero-budget way of starting a travel photography career, you have to start in your home city.
While this might not seem exciting at first, keep in mind that the city that you live in is an exotic travel destination for someone else.
Try using all of the travel photography tips and tricks I’ve talked about in this article while taking pictures of your home city. Even if you live in a sleepy little town, there are compelling stories that you can tell by documenting the life and history of the place you live.
Tip 15—How to Find Travel Photography Inspiration
No matter what style of photography you’re in, it’s easy to get stuck in a rut. What should you do if you’re running out of inspiration before your next big travel photography trip?
Here are five quick ways I stay inspired and motivated as a photographer.
- Start following more photographers on social media to see what other people are doing
- Research historic photographers and get inspired by how they were shooting when our medium was still new
- Check out international photographers to see how people are shooting across the world
- Get experimental by looking into the weirder side of photography with things like film soup or databending
- When I’m heading to a new location, I like to look at the history, upcoming events, and what photographers are shooting for that local
Tip 16—Turn Regular Trips into Travel Photography Trips
If you’ve always got your camera with you, and you’re always shooting, every trip you go on is a travel photography trip.
A great way to stay active as a travel photographer who has yet to break into the full-time business is to transform every trip you go on into an opportunity for travel photography.
Whether you’re heading across town for a family dinner or going on a work trip, you’ve got an opportunity to do some trouble photography.
Not everything has to be a grand adventure. You could use that trip across town as an excuse to work on catching shots of yourself in transit, for example.
Tip 17—Becoming a Better Photographer
Every photographer has an area that they can improve on. Whether you’ve always wanted to be one of those photographers who only ever shoots on full manual mode or you’ve been hoping to add sports photography to your travel routine, now’s the time to start working on those skills.
Skills building exercises can be a great activity during your travel photography downtime. You’re not always going to be on the road to an exotic destination and that time in between trips is vital to your success.
Even if you’ve been a professional photographer for decades, there’s still countless things about this art form that you can learn.
Tip 18—Get Your Photos Seen
Now that you’ve got a portfolio of travel photography images, how do you get people to see them?
As with most freelancing gigs, the name of the game is networking. Here’s a few tips for getting your pics in front of more eyes.
- Be more consistent with social media by posting regularly and using hashtags strategically
- Enter into photography competitions
- Ask local shops if you can display your work
- Get your photos published
- Reach out to travel agencies, tourism boards, and parks departments for freelance work or partnerships
- Network with other photographers
As the old saying goes: It’s not what you know, it’s who you know.
Tip 19— Travel Photographer Tips for The Business Side of Things
Making it as a working travel photographer has gotten harder in recent years, but it’s not out of reach. Here’s a few business tips to help you stay on top of your budding photography career.
Always try reaching out to new clients. Keep in mind that bigger clients are harder to land, but there are plenty of smaller travel destinations that are ideal for a beginner photographer.
You should create a budget for your travel photography work. If you’re just starting out, you don’t need a fancy app. A simple spreadsheet is more than enough for you to stay on top of your money.
You can also try becoming a content creator while you’re working on landing clients. Building up a social media following and generating some income through a site like Patreon can help you stay on the road longer.
Tip 20—How to Tell Your Travel Photography Story

Image Credit: Ena Marinkovic
You’ve reached the end of my travel photography tips. The last tip, and the most important one, that I’m going to give you is some advice on how you can tell your story.
Travel photography is all about storytelling. This means documenting your journey, engaging your audience, and finding your voice.
Taking captivating pictures without context isn’t enough. Your travel photography needs to speak to people on a deeper level and communicate something yet untold about the experiences behind your journeys.
It’s going to take time to figure out how you want to represent your adventures. The best thing you can do is get started today.
Even if you’re just taking travel photos a few blocks from your home, you’ll be breaking the ice and taking those important steps in finding your voice as a storyteller.
FAQ
What is the purpose of travel photography?
The purpose of travel photography is to share your journey with the world. Travel photographers help to tell the story of not only their adventures, but also the people and places they encounter whether they are traveling around the world or within a few miles of where they grew up.
Is travel photography a good career?
Travel photography can be an amazing career that is rewarding and potentially very lucrative. It can be challenging to get started, but there are countless photographers who do travel photography as both their main job as well as a side gig.
What is the single best lens for travel photography?
The single best lens for travel photography is the wide angle to telephoto zoom like the Sony FE 24-105mm f/4 G OSS Lens. This lens allows you to capture everything from sweeping landscape panoramas to sports and wildlife photography.
Is travel photography a job?
Travel photography can absolutely be a job. You can make money as a travel photographer by freelancing for clients, photographing destination weddings, or working as a photojournalist.
Is GoPro good for travel photography?
A GoPro can be great for travel photography especially if you’re interested in capturing video and using stills from that footage for your photography.
Even though a GoPro is a good choice for travel photography, you’re probably going to be better served by a dedicated camera if your main goal is photo rather than video.
Final Words
I hope this guide gives you everything you need to hit the ground running with travel photography. If you’re an experienced travel photographer, I hope you’ve picked up a few new tricks that can help improve your next adventure.
I’ve tried to cover travel photography from nose to tail in this blog, but I’m sure I left a few things out.
I want to hear your travel photography tips, tricks, and experiences in the comments. If you like this article, make sure to check out my other photography blogs.


Ashley is a photographer, writer, and film critic. When Ashley’s not writing essays on photography, cinema, and theory, he’s out taking pictures with retro film cameras.


WELCOME TO SHOTKIT
Enter your email to be sent
today's Welcome Gift:
19 Photography Tools
🔥 Popular NOW:


Shotkit may earn a commission on affiliate links. Learn more.