


How to Export in After Effects (2 Best Ways)
Unlock the secrets to flawless video production with our step-by-step guide on how to export your projects seamlessly in After Effects for optimal quality.
After Effects | Software | By Ashley Darrow
One of the trickiest things to master is how to export in After Effects.
However, learning how to export a single composition, master the output module settings, and even export multiple versions of a file are essential steps to becoming a pro-level video editor.
Best of all, it’s way easier than it seems!
I’m going to walk you through the basics of exporting through both the Render Queue and the Media Encoder.
Don’t worry, exporting video clips is much more simple than it seems!
Download the latest version of Adobe After Effects to follow along with this simple tutorial.
Start a free 7-day trial today
Table of Contents
How to Export in After Effects With Render Queue
Exporting is arguably one of the most important parts of editing video.
Nailing the right exporting settings can make or break the difference between a finished project that people can enjoy and something that looks pixelated and is hard to watch.
Let’s start things off with the easiest, and fastest, way to export in After Effects: the Render Queue.
Open Your Project
You can’t export your video if it’s not open, right?
All jokes aside, you don’t have to finish your project before you export it. I often send unfinished, exported files to clients and colleagues when I want them to check out certain aspects of a project.
This can either be when I’m looking for client approval for the direction I’m taking a video or what I want to make sure that an effect is working the way I see it to a wider audience.
It’s always a good idea to test out your video projects like this before launching them to the public. This is especially the case when you’re trying out new special effects using Adobe video editors.
Open the Render Queue Menu
You essentially have two separate menu options for sending your project to the Render Queue.
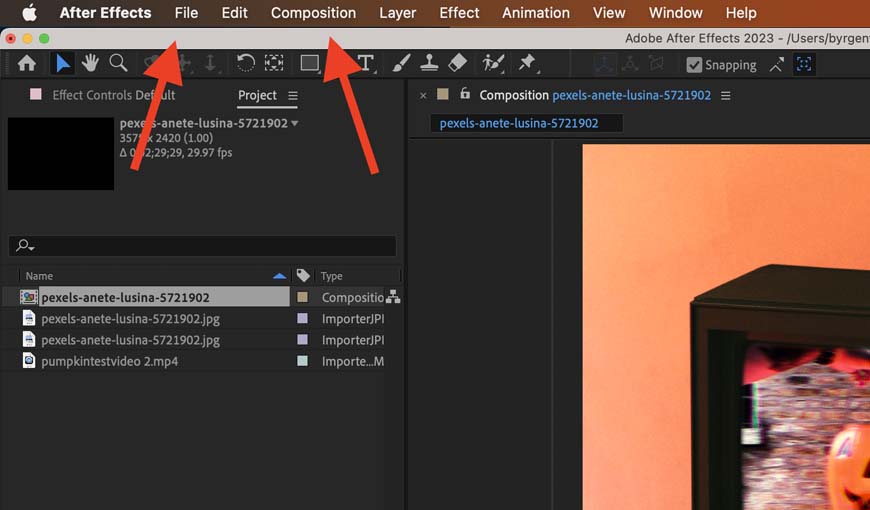
You can either navigate to File > Export > Add to Render Queue or open the Composition menu and select “Add to Render Queue.”
Both of these options are going to send your composition over to the Render Queue so it can be processed and converted into a watchable video file.
Since I work with so many other video, audio, and photography editing programs, I usually navigate through the File menu when I’m looking to export a project.
However, I know plenty of people who primarily do video editing and they’re used to handling things to the Composition menu.
Then again, this only applies if you have one composition. Larger, more complicated, projects can be entirely exported through the File menu while only single compositions get exported through the Composition menu.
Add to Render Queue
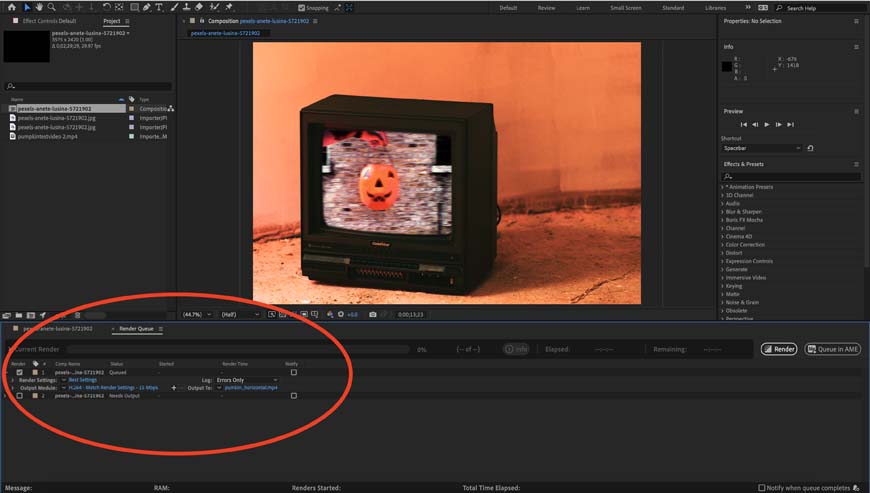
Once you select Add to Render Queue, a new menu is going to pop up on the bottom of the Adobe After Effects screen.
This menu allows you to make your rendering settings.
Before I get into settings, the most important thing that you can select here is where your file is going to export too. I’ve had to go digging for finished video files when I’ve accidentally exported them to the wrong folder so many times before.
Always double-check your export destination so that you don’t have to deal with this problem when you’re done editing.
It’s also good practice to have a consistent file naming strategy in a given project. You never want to accidentally lose track of things because you gave your project files confusing names.
I prefer to stick with simple descriptive names when working with assets and file names with client names and version numbers when things are being sent to a third party.
Adjust Your Render Settings
Next, you’re going to pick your render settings in the Effects Render Queue menu.
In my experience, it’s best to leave your render settings set to, well, “best settings.” You can find two things if you have specific needs in mind, but the best settings feature is often a great place to start.
Right beneath that you’ll see a few basic encoding options. This video is set to h.264 which is a great file format for social media and sites like Youtube.
There are a few more options down there including “lossless” which is another common choice.
Export Your File
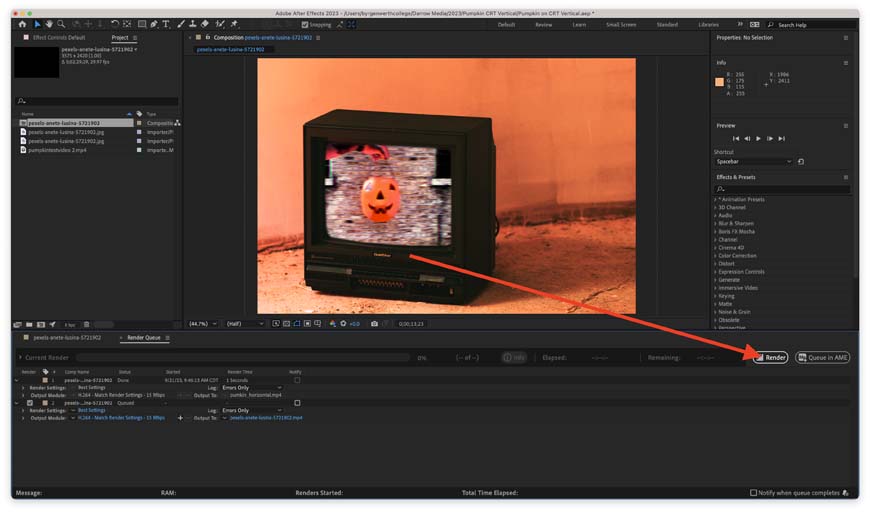
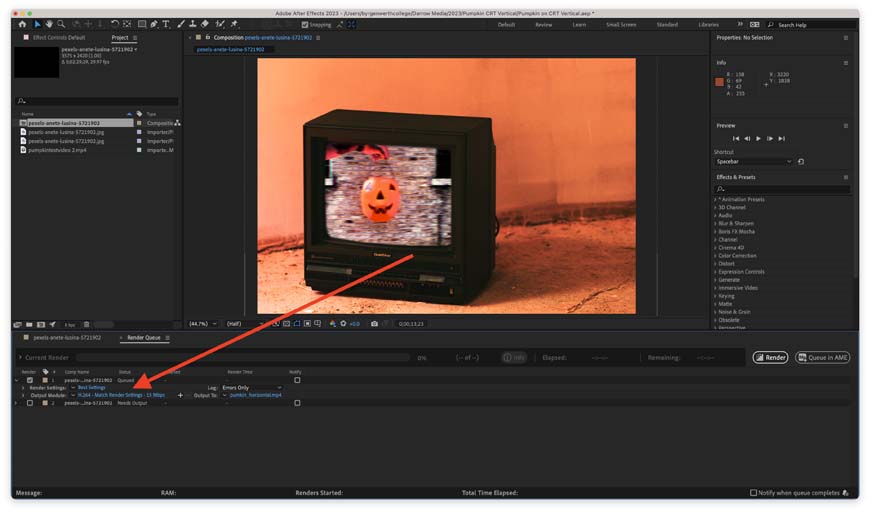
The last thing you need to do is click the render button. This will automatically start rendering every project that you have in your Render Queue that is ready to go – see how to render in After Effects.
You’ll see a blue bar pop up on the top of the render menu that shows you how much progress has been made during the rendering. The longer and more complicated your output file is, the longer it’s going to take to render.
Once a project is finished, you’ll hear an upbeat musical cue letting you know that your rendered file has been finished.
Now, you should check out your mov file or other finished video project. You want to make sure that your output settings are right.
Look for common problems like frame rate issues, file sizes being too large to use, or problems with things like the video codec for playback. If there is a problem, just go back to the encoder and adjust your settings.
How to Export After Effects with Adobe Media Encoder Queue
Before I start talking about the Media Encoder, I want to talk about the difference between the Render Queue and the Media Encoder.
The Render Queue is a simplified version of the Media Encoder that exists inside and as part of Adobe applications. you can think about the Render Queue as being the easy-to-use little brother of the Media Encoder.
The Media Encoder is much more powerful and is ideal for handling complicated projects or videos that are being exported to something more nuanced than your standard social media websites.
The Media Encoder is also ideal for projects that need more work beyond After Effects. This includes when you’re continuing to edit the footage in Adobe Premiere Pro or if you’re sending these files on to another artist for them to finish the project.
To export using the Media Encoder, navigate to File > Export > Add to Adobe Media Encoder Queue.
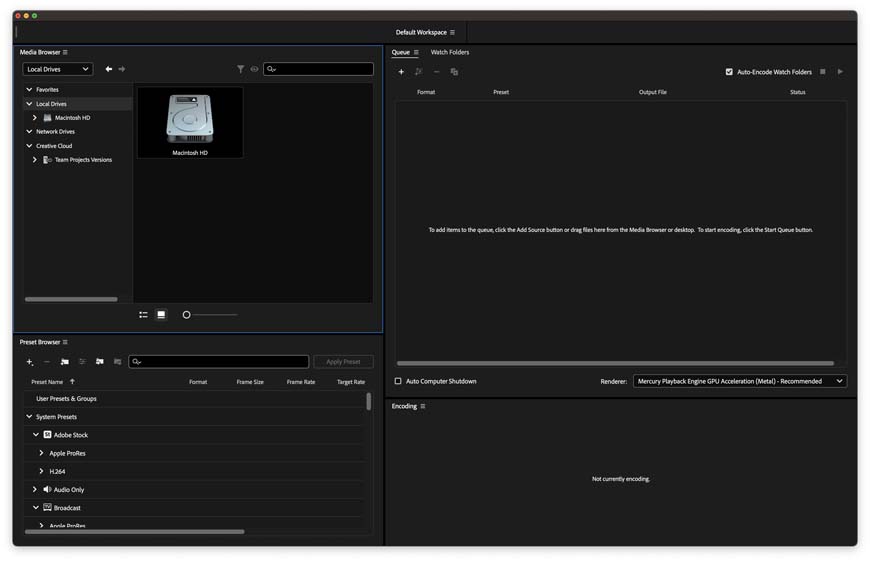
The Adobe Media Encoder will then open up. Yes, it is a standalone app that exists separately from other Adobe programs and needs to be installed on its own before you can use it.
Once the Media Encoder is open, all you need to do is select your file type settings and hit the green play button in the upper right corner to start encoding!
How to Export After Effects With Transparency
After Effects is all about creating exciting special effects and motion graphics. This means that you’re going to want to export video with transparency a lot of the time.
I’ve got some great news for you. Exporting a video with transparency and after effects is really easy.
All you need to do is follow all of the steps I outlined above for rendering a video using the render queue and then make two simple changes.
The first is to select QuickTime as your output format. QuickTime is a great option for working with transparencies, but you might want to choose a different format depending on what you need the file for.
Then, navigate to Video Output > Channels and select RGB + Alpha. This menu will be in the Output Module settings.
All you need to do now is export your video. It will retain all of the transparencies that are visible in your composition.
However, you might need to adjust elements of your composition if you find that the transparency isn’t coming through.
How to Export After Effects to Premiere Pro
Adobe has a unique feature known as Dynamic Link that can connect elements of a Premiere Pro project to After Effects for more specialized editing.
This might sound complicated, but it’s actually really easy. Here’s how it’s done.
The first thing that you need to do is make sure that you’re using the same version of Adobe After Effects and Adobe Premiere Pro. If the apps are mismatched, you cannot create a Dynamic Link between them.
Next, find a clip in Premiere Pro you want to replace with an After Effects composition. Right-click on that video clip and select “Replace With After Effects Composition.”
After Effects will now open up with the selected clip loaded up as an after-effects composition. any changes you make to that composition will be reflected in your Premiere Pro project.
This does mean opening up both of Adobe’s video editing software at the same time, so make sure your computer is ready to handle the additional strain to avoid the risk of crashing it.
Rendering with After Effects | Conclusion
Rendering with After Effects seems really intimidating the first few times you look at these menus.
There are countless options to pick from but to be honest, you’ll probably be only using a handful of these different settings throughout your editing career.
A great way to get some practice is to experiment with different rendering settings for a project you’ve already completed just to get some experience.
If you’re looking to export some more video editing questions, try rendering them down in the comments below. my puns might be a little hit or miss, but my video editing tips and tricks are always spot on.
 Adobe Media Encoder: What It Is & How to Use It
 How to Render in After Effects (Fastest Way)
 Final Cut Pro vs Adobe Premiere in 2023: Which Video Editor?
 How to Buy Adobe Premiere Pro in 2023 (Options for all Budgets)
 Best Video Editing Software Tools for Movie Making
 How to Render in DaVinci Resolve (+ Best Export Settings)

Ashley is a photographer, writer, and film critic. When Ashley’s not writing essays on photography, cinema, and theory, he’s out taking pictures with retro film cameras.

WELCOME TO SHOTKIT
Enter your email to be sent
today's Welcome Gift:
19 Photography Tools
🔥 Popular NOW:


Shotkit may earn a commission on affiliate links. Learn more.