


How to Use the Luminar Focus Stacking Extension
You can use the Luminar Neo Focus Stacking Extension to create incredibly sharp product and macro images in record time. Here's how to do it.
Luminar | Software | By Jeff Collier
If you haven’t used Luminar Neo’s Focus Stacking extension yet, you’re missing out on an exciting new tool that can take your photography to a new level.
As the name suggests, the image stacking tool helps you to stack multiple photos and create one photo with a large depth of field.
Follow along with this simple tutorial to focus stack your first images using Luminar Neo.
Use code shotkit10neo to save $10
What’s more important here is the convenience and the relative ease it offers photographers to transform, edit and fine-tune their work.
The technique can be used in landscape, product, macro, and real estate photography, among other genres.
Table of Contents
How to Install Luminar Neo’s Focus Stacking Extension
Luminar Neo’s Focus Staking Extension isn’t available as a Lightroom or Photoshop plugin.
You can only download it as an extension from within Luminar Neo.
You can sign-up for the Pro Plan and get this extension for free, or if you have purchased the Lifetime Plan, you can purchase the Extensions pack add-on.
Check the pricing in your currency here >> (Use code shotkit10neo to save $10)
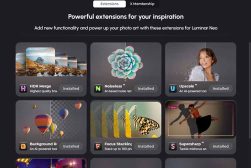
To install the Focus Stacking Extension, open Luminar Neo and click on Extras on the top right.
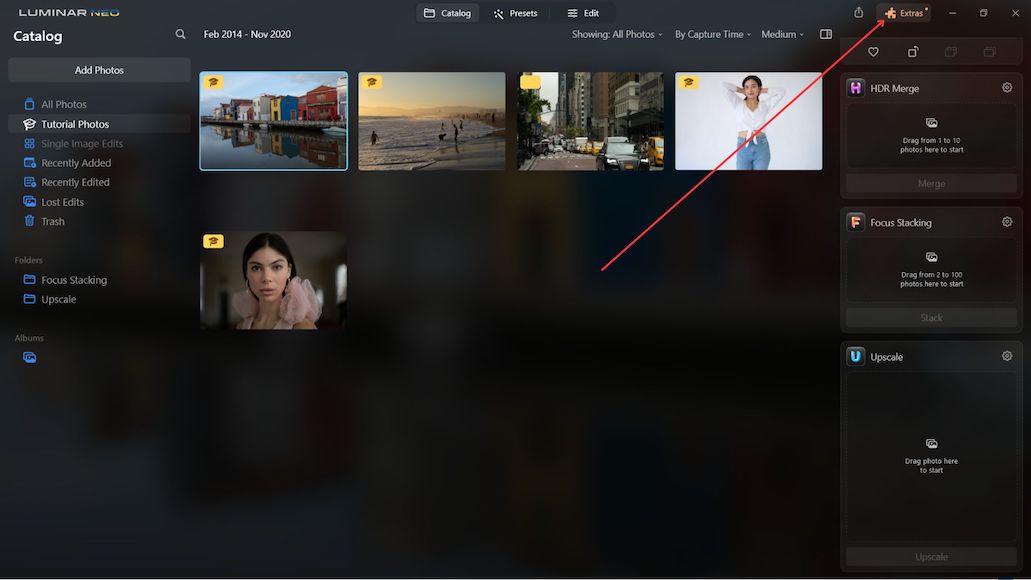
Click Install on the Focus Stacking thumbnail. It’s the fifth thumbnail on the page. It only takes a few seconds for the extension to install.
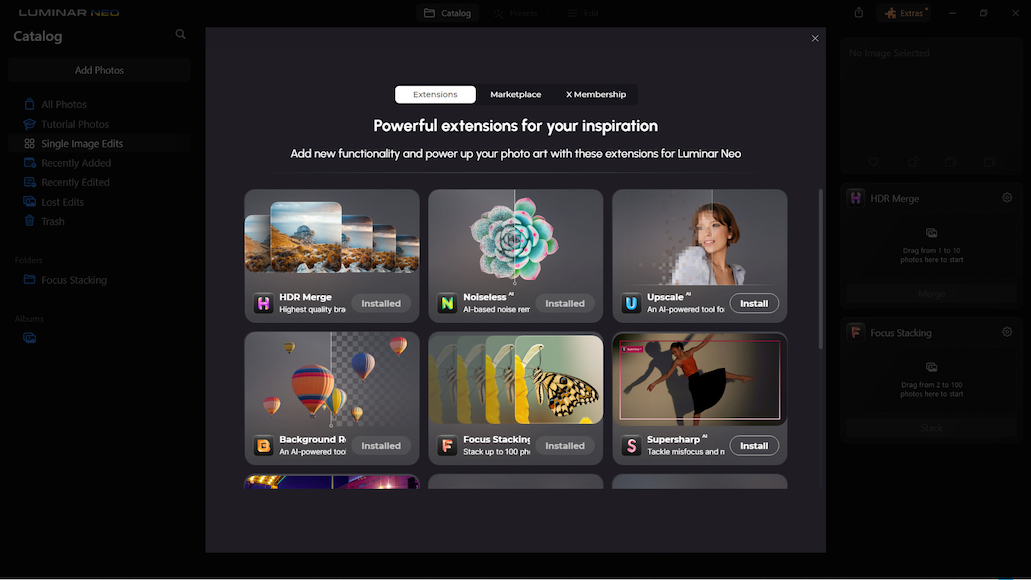
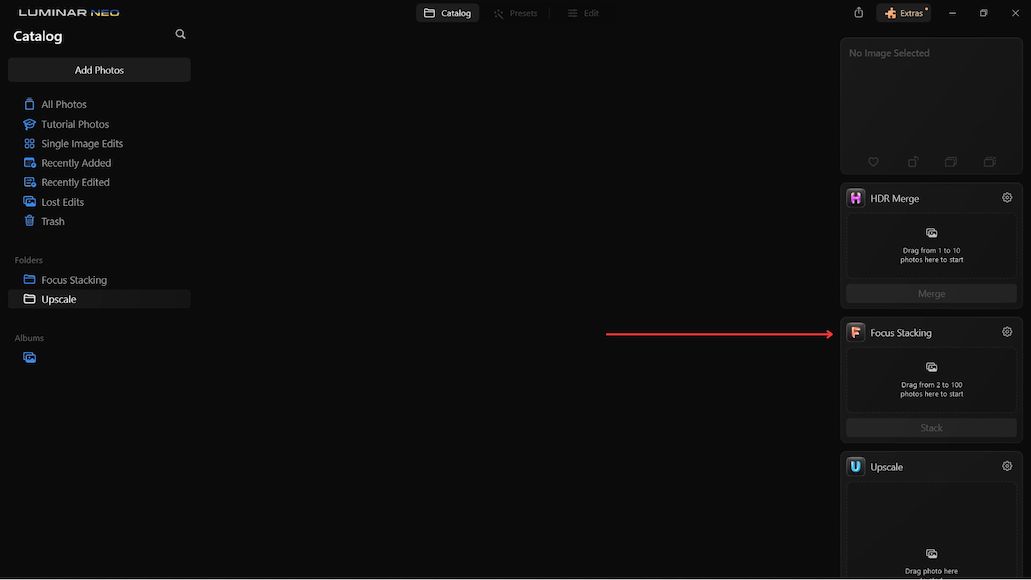
Once installed, return to the Catalog menu to confirm that the Focus Stacking extension has been installed.
(More focus stacking techniques and examples.)
How does the Focus Stacking Extension work?
The focus stacking process involves using multiple images of a scene/subject/product where each frame has been focused at a different distance from the next in the series. Ideally, a minimum of three images should be used.
However, the number of shots you need will depend on the subject and the composition.
Luminar Neo’s Focus Stacking Extension can handle a maximum of 100 shots and merge them together to create an image that’s perfectly sharp from the foreground to the background.
The extension can also take care of alignment issues and correct chromatic aberrations to deliver a sharp photo (much like when using the Supersharp AI extension). Additionally, the images are balanced automatically so that the resulting stacked image looks perfect.
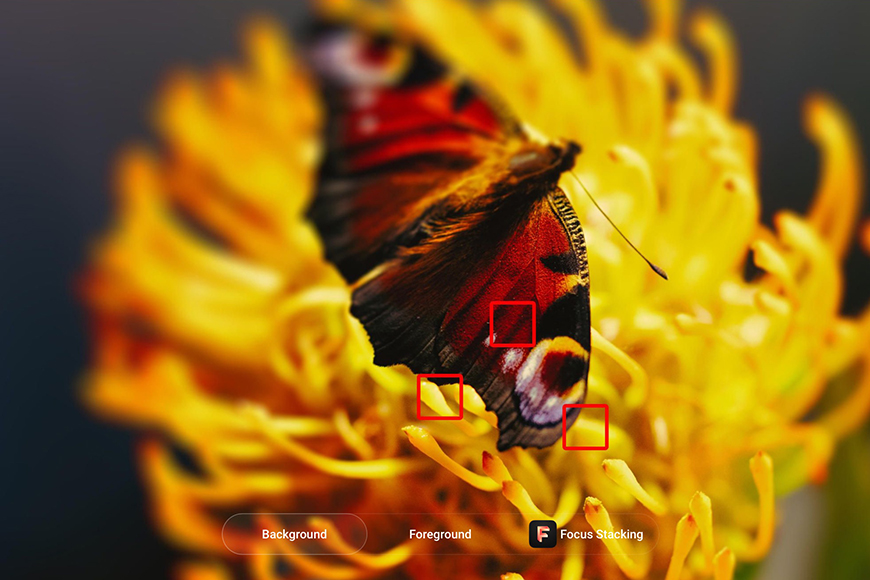
In the example below, six images were stacked together using the Focus Stacking Extension. The decision to use more or fewer shots depends on the complexity of the composition, the subject, and the depth of field you need in the final image.
Do note that the higher the number of images used in the stacking process, the longer the processing time required by the Focus Stacking Extension to complete the process.
Here are the six original images selected for stacking –


If you look closely, focusing was set at a different point in each of the six images.
None of these images have been edited before they were stacked. They are simple JPEG exports of the original RAW files from Luminar Neo. The original plan was to edit the final image after stacking.
- Related: How to focus stack in Photoshop
How to use the Focus Stacking Extension to stack images
Step 1 – Open Luminar Neo and go to the Catalog module.
Step 2 – Import the images you want to stack to the Catalog module.
The Focus Stacking Extension supports all the file formats that Luminar Neo supports. So you should be able to use JPEGs, RAW, PNG, BMP, and Tiff, among other file formats.
To import the images to Luminar Neo, click Add Photos and find your images on your hard drive/external storage/memory card.

Step 3 – Select all the images that you need to stack
Select the first image and then press and hold the shift key while you select the last image in the series. All the images would now be selected.
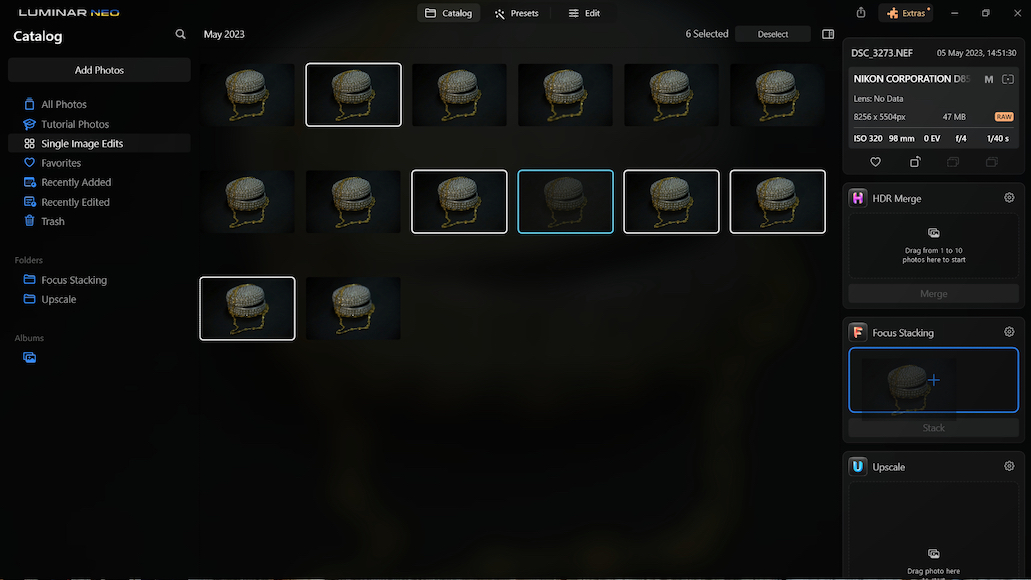
Step 4 – Drag and drop the images onto the Focus Stacking tool.
Once the images have been imported into Luminar Neo, the next step is to drag them to the Focus Stacking Extension.
You can now see the images in the tool area. You can scroll through them using the arrow buttons if you want to. You can even remove some photos at this stage if you want to.
Step 5 – Additional options
After the images have been placed in the Focus Stacking tool, there are a couple of other things you need to do before you hit the Stack button.
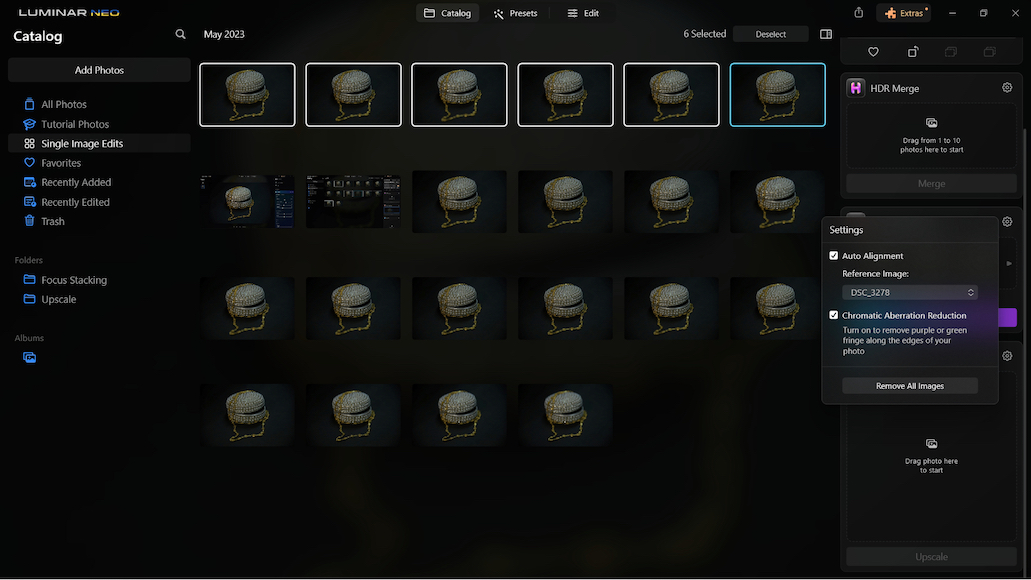
First is to check Auto Alignment and Chromatic Aberrations Reduction.
Second, select a Reference Image for the Auto Alignment feature. You can do this from the drop-down on the Settings option.
Step 6 – Hit Stack.
This is the exciting bit. Focus Stacking Extension will now work to stack your exposures, auto-align them, remove chromatic aberrations, balance, crop, and deliver a stacked image with a large field depth.
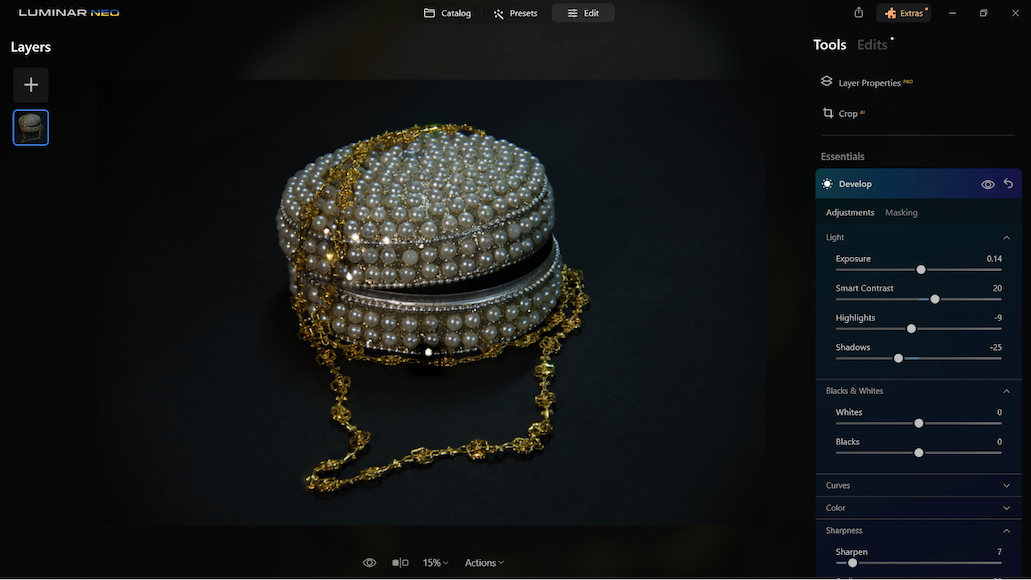
The final image is delivered in Tiff format. Once the image is ready, you can edit the Tiff file and fine-tune the results. In the above photo, I adjusted the exposure slightly. I wanted a very contrasting look where the background appears dark and the subject subtly brighter.
Here is the final edited image.

Concluding thoughts
Focus stacking, as a technique, is software-dependent. Of course, it’s even possible in the first place because we have digital photography. It makes stacking multiple images that much easier.
Having said that, because it’s a software-intensive technique, the tool’s ease of use and reliability significantly affect the outcome.
With the Focus Stacking Extension, stacking images becomes extremely easy and convenient.
Now, it takes only a fraction of the time you would have to spend otherwise to stack them using conventional methods, you’ve more encouragement to try different techniques and camera angles and experiment with different subjects.
You can do much more in a short time frame because it’s faster to achieve the desired results and fine-tune them to your taste.
I strongly recommend the Focus Stacking Extension to any macro, food, product, and landscape photographer. I am sure that the application of this extension does not limit itself to these genres alone and that photographers will find other creative uses for this tool.
Follow along with this simple tutorial to focus stack your first images using Luminar Neo.
Use code shotkit10neo to save $10


Jeff Collier is an experienced film photographer who enjoys experimenting with modern digital photography equipment, software and apps. He’s also an ex-world champion triathlete and avid cyclist, clocking hundreds of km each week in the beautiful Tweed Valley of northern NSW, Australia.

WELCOME TO SHOTKIT
Enter your email to be sent
today's Welcome Gift:
19 Photography Tools
🔥 Popular NOW:


Shotkit may earn a commission on affiliate links. Learn more.