


How to use Luminar Supersharp AI to Fix Misfocus and Blur
Whether it's unintentional motion blur or you didn't focus on your subject correctly, help is at hand with the Luminar Supersharp AI extension. Here's how to use it.
AI | Luminar | Software | By Jeff Collier
When we’re shooting subjects that are constantly moving, we often miss out on shots – either missing focus or getting blurry images that we’re not particularly proud of.

Follow along with this simple tutorial to sharpen your first image and fix unintentional blur with Luminar Neo.
Use code shotkit10neo to save $10
While blaming a constantly moving subject is convenient, sometimes the fault is in us.
An inadvertent hand movement when we’re exposing for a shot or an image stabilization that did not do its job – the reasons could be anything.
The result is a moment that’s lost. Well, not quite.
Luminar Neo’s Supersharp AI is a tool that’s designed to take care of just that. I’ll show you how.
(Check our full review of Luminar Neo if you haven’t heard of this software before.)
Table of Contents
How to Install Luminar Neo’s Supersharp AI Extension
First, the installation part, which is thankfully very straightforward.
You need to subscribe to a valid plan that includes Extensions or purchase the Extensions pack add-on to the Lifetime plan in order to access Supersharp.
Check the pricing in your currency here >> (Use code shotkit10neo to save $10)
To install the Supersharp AI extension, open Luminar Neo and click on Extras on the top right.
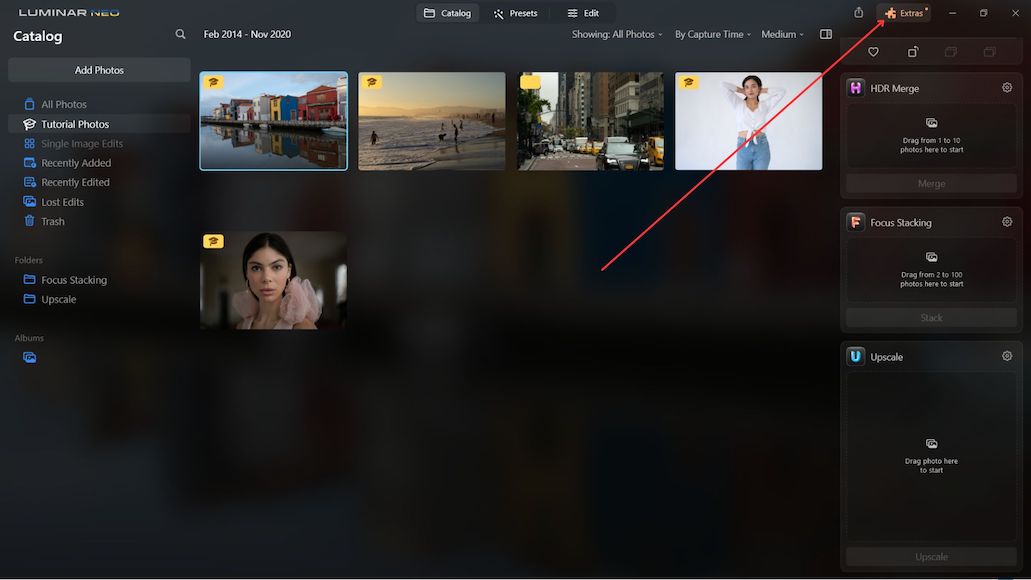
Next, click Install on the Supersharp AI thumbnail. It’s the sixth thumbnail on the page. It only takes a few seconds for the extension to install.

Once the tool is installed, you’re ready to fix your misfocused and blurry images.
There are multiple adjustments and tweaks that you can work with. Not every adjustment will work with all photos. So, feel free to experiment with it till you get your process flow right.
Here goes mine for this particular case.
This is an image that I shot on a birding trip.
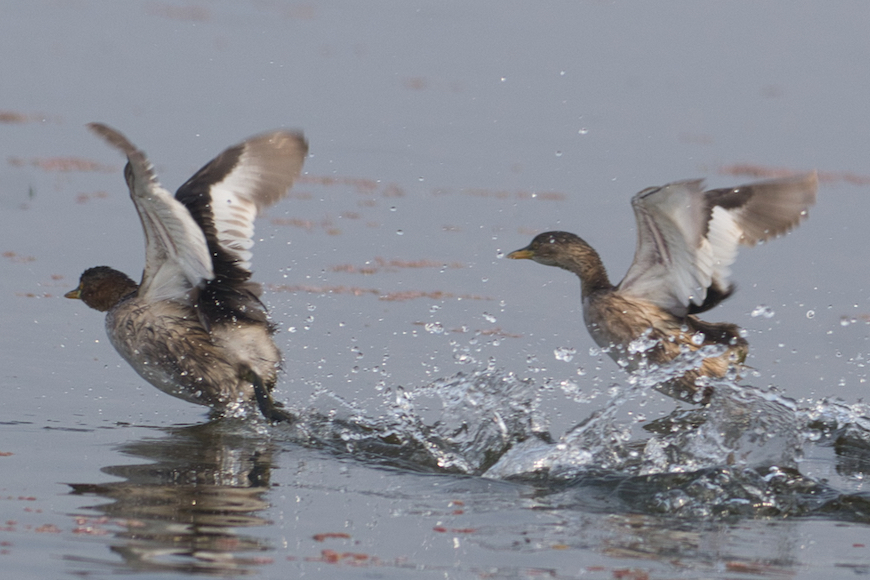
This is the original image without any edits. I just cropped it to enlarge the part of the image that I was going to work on and highlight for this process.
As you can see, the birds were not perfectly in focus. The wings lacked sharpness. I could also do with some extra sharpness in the area where the water drops were.
Of course, once the misfocus and blurriness were taken care of, I planned to make some extra adjustments to fine-tune the image.
So, the first step is to use the Supersharp AI tool.
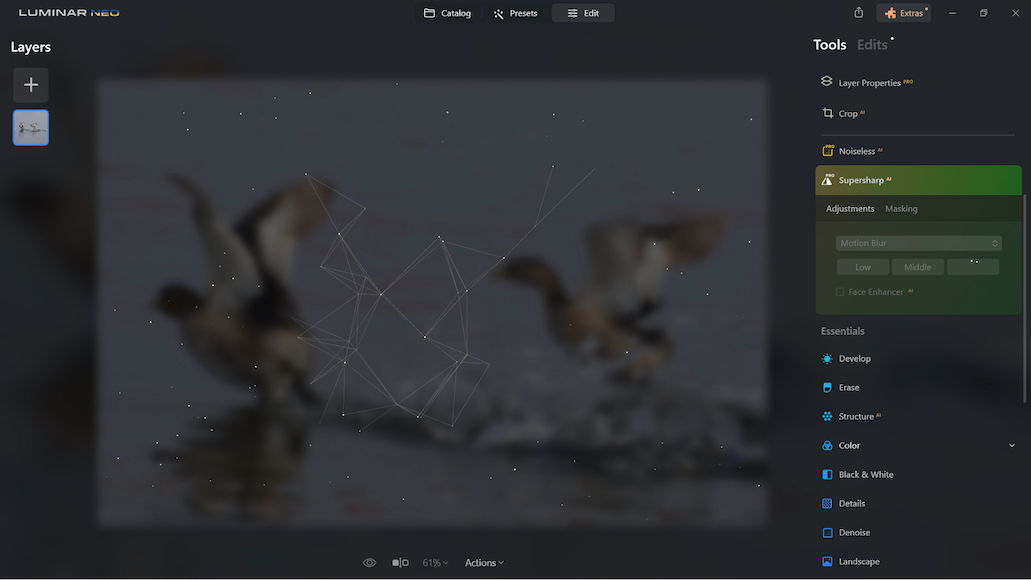
I can see the Supersharp AI tool after I click on Edit.

There are two options under the Adjustments tab – Universal and Motion Blur. Choose Universal if you want to work on the entire image. For issues related to motion blur affecting only a segment of the image, choose Motion Blur.
There are further options like Low, Middle, and High. In my experience, I have seen that the High option works the best for me for the kind of result that I prefer. Plus, I need to use the Motion Blur option only, as I don’t need to work on the whole image.
Two more options – Face Enhancer and Masking are also available. I will come to those later on.
Ok, now I am ready to start the process. I hit High under Adjustments and let the magic happen.
I love this part when the cool graphics takes over!
Once the Supersharp AI tool has finished working on the image, this is what I received.
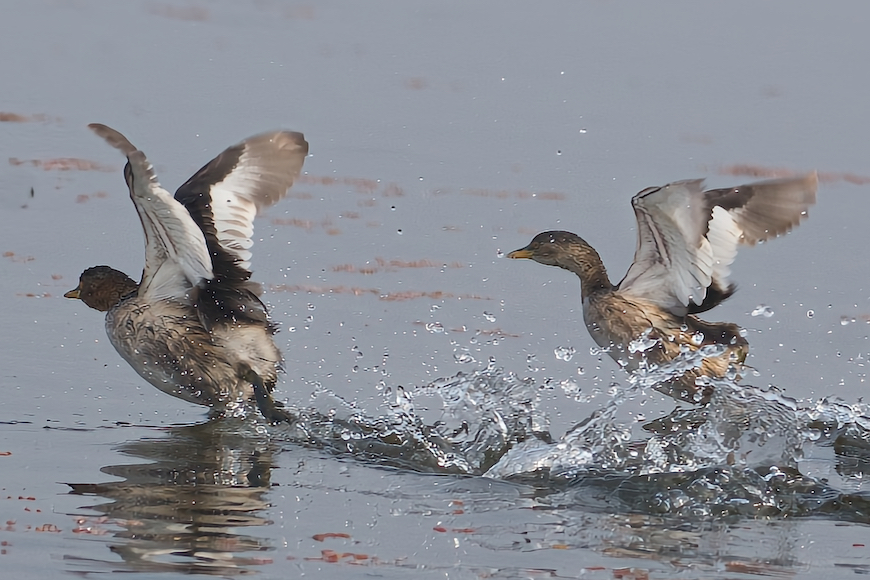
As you can see, the tool has done an excellent job of sharpening the water drops as well as the feathers of the birds. They’re looking distinctly sharp now.
Needless to say though that I am not happy with the rest of the image. So, I spent a few more minutes on the Development sliders. And here is the final edited image. This one shows the final image and not the cropped version.
The Masking tool has many options you can choose from – Brush, Linear Gradient, Radial Gradient, and the Masking AI tool.
The Masking AI tool asks you for additional choices – Sky, Architecture, Water, Mountains, and Natural Ground. Each of these options is designed for photos featuring a specific type of subject.
I will demonstrate how the Brush tool works under the Masking tool tab.
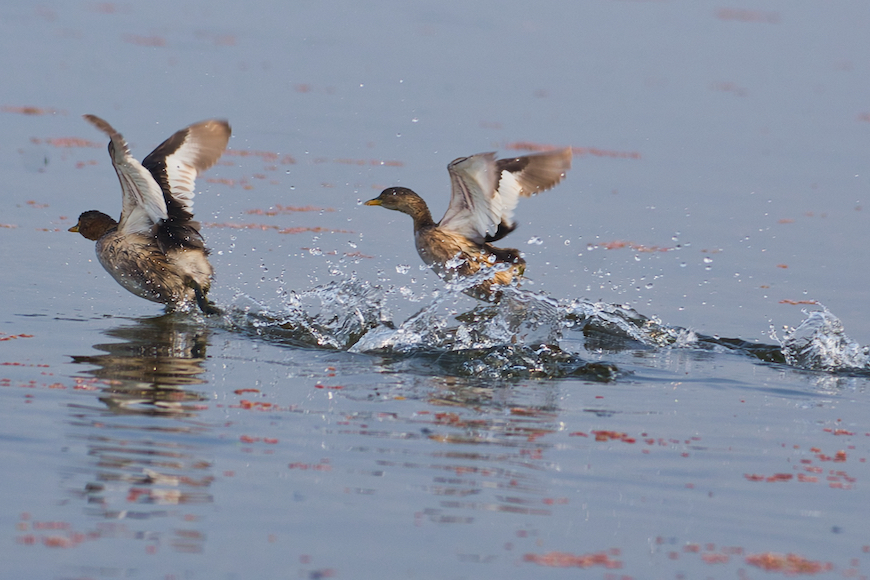
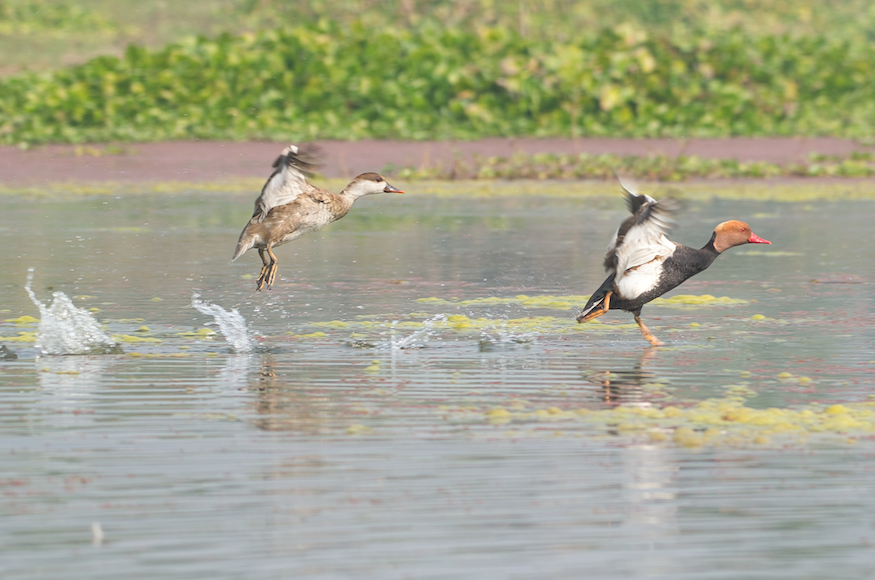
Here is another image I shot from the same trip.
As you can see, the birds were taking off from the water at high speed, and the camera missed focus to some extent, and there was some blurring. I need to rectify as much of both as possible.
I click on the Masking tab, and it opens up the four options that I mentioned above – Brush, Linear Gradient, Radial Gradient, and the Masking AI tool.
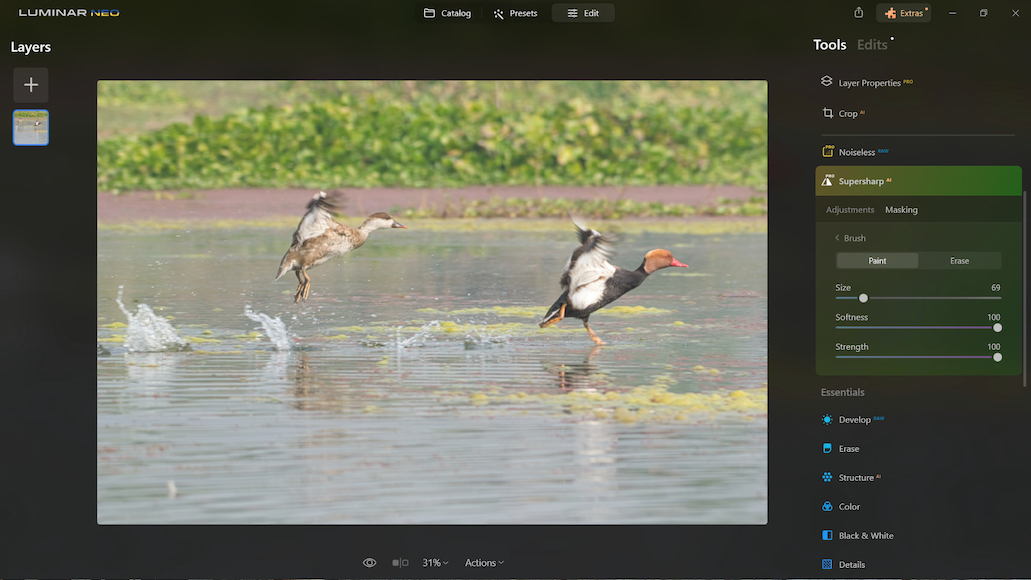
Choosing the Brush option throws up a few other options of its own.
You need to choose a brush size, softness, and strength. Choose an appropriate brush size and softness depending on the subject that you’re going to mask.
The next step is to paint over the areas that I need to adjust for focus and blur.
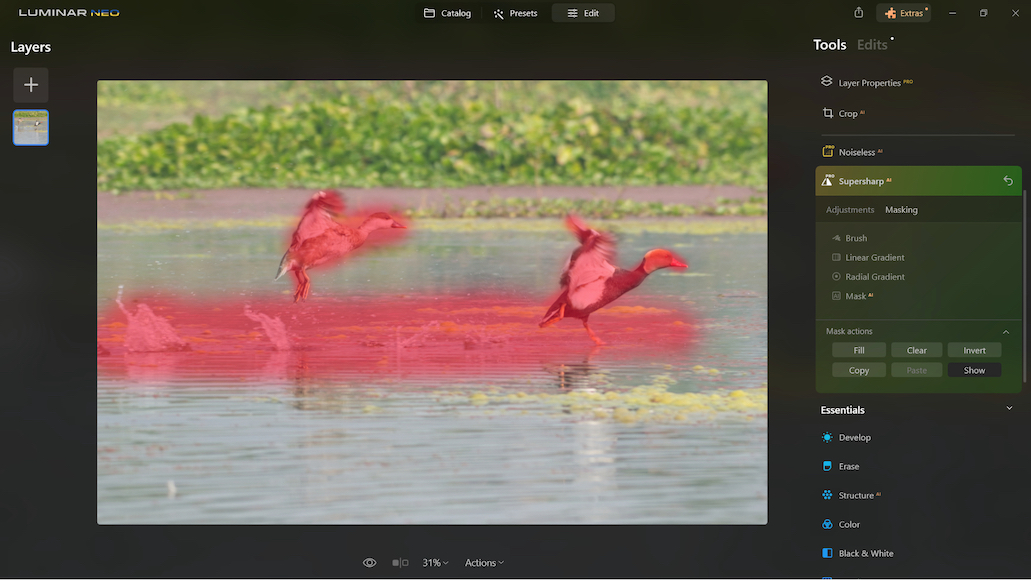
There is a mask Actions section right under the Masking section. You can Invert the mask, Clear it or Show it. There are two more options – Fill and Copy.
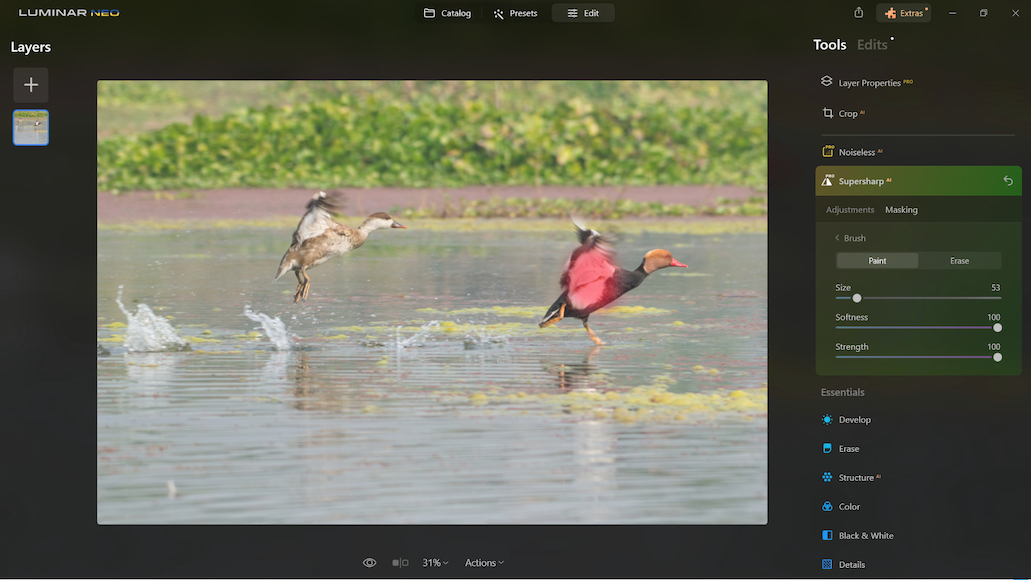
The masking is done, and I am ready to hit the Adjustment process. I chose the High button under the Adjustments tab. The Supersharp AI tool takes over from here.
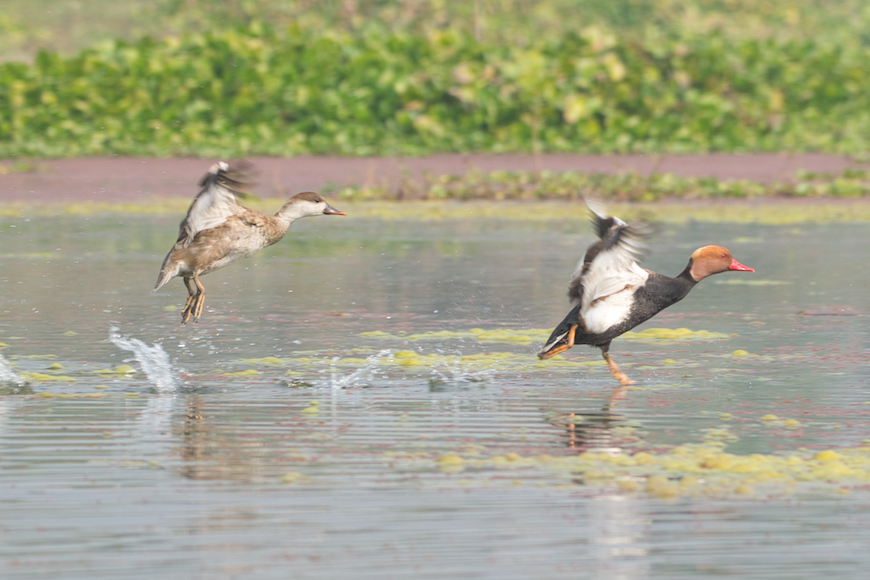
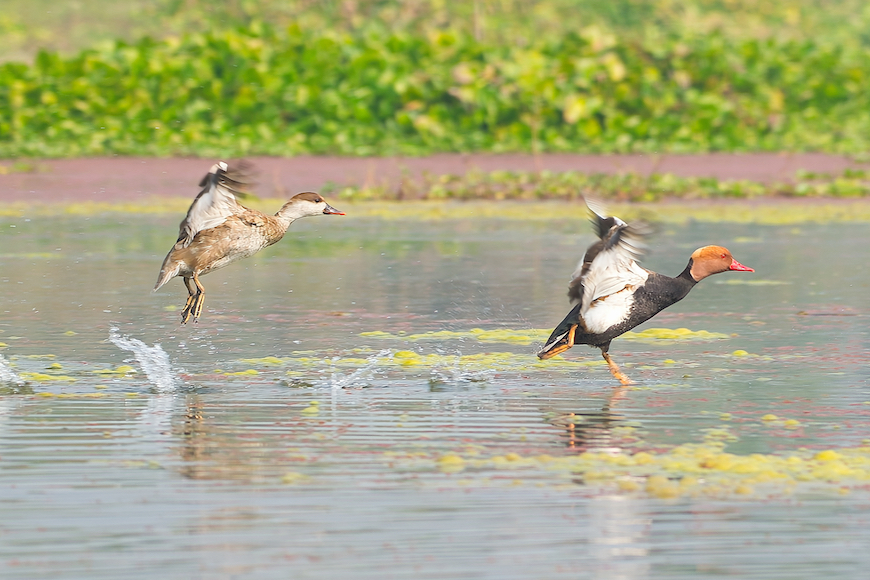
Here is the resulting image.
Significantly better than the original image.
After a few more edits, here is the resulting final image.
Concluding thoughts
The Supersharp tool can be a very useful one when you’ve missed focus on your images or when your images have blur induced for any of the reasons mentioned above.
It becomes difficult to remove these “flaws” using a traditional editing process, not to mention the amount of time that it requires. This is where Luminar Neo’s Supersharp tool comes in very handy.
With its smart AI that detects the areas that demonstrate blur or misfocus, it can make the process of selection and then correction fast.
You can either depend on the AI tool without any intervention or use one of the masking tools to fine-tune the selection to give it just the right amount of human nudge to produce a better result.
Either way, the tool can save a significant amount of time for a photographer stuck with blurred and misfocused images.
After you’ve sharpened your image, you may want to use the Luminar Upscale AI Extension to make a giant print, or Noiseless AI to remove any grain or image noise, or even Magic Light AI to add some visual interest to street lights.
Follow along with this simple tutorial to sharpen your first image and fix unintentional blur with Luminar Neo.
Use code shotkit10neo to save $10


Jeff Collier is an experienced film photographer who enjoys experimenting with modern digital photography equipment, software and apps. He’s also an ex-world champion triathlete and avid cyclist, clocking hundreds of km each week in the beautiful Tweed Valley of northern NSW, Australia.

WELCOME TO SHOTKIT
Enter your email to be sent
today's Welcome Gift:
19 Photography Tools
🔥 Popular NOW:


Shotkit may earn a commission on affiliate links. Learn more.