


Testing Luminar Background Removal AI Extension
Removing the background from an image used to be a tedious and fiddly process, but now with Luminar Neo's Background Removal AI it's simple.
AI | Luminar | Software | By Jeff Collier
This will be a test of Luminar Neo’s Background Removal AI Extension.
Luminar already has a wonderful Portrait Background removal tool I have used in my work, and I’ve been impressed by the results.
So it’s no wonder I wanted to check this new AI-powered Extension and couldn’t wait to see what it can do for my workflow.
Once in a while, we all need to remove the background of a few of our images.
Be it for use with any other application, transposing the image with another image, creating social media posts, or other creative purposes.

Fast, simple and fun way to remove backgrounds with just one click.
Use code shotkit10neo to save $10
Removing backgrounds from your photos isn’t exactly a clean and efficient process all the time, not to mention the amount of time it takes to do this manually using any of the other available tools.
This is where Luminar Neo’s Background Removal AI Extension tool comes in.
Other related Luminar Extension guides:
- How to use Luminar Supersharp AI
- How to use Luminar Upscale AI
- How to use Focus Stacking Extension
- How to buy Luminar
Table of Contents
How to use Luminar Background Removal AI Extension
Luminar Neo’s Background Removal AI tool is a part of the Luminar Extensions pack.
You can download it if you’re subscribed to the right plan.
Check the pricing in your currency here >> (Use code shotkit10neo to save $10)

Simply click the Extras icon on the top right corner of the software interface.
A pop-up will open. Click the Install button on the fourth option that says Background Removal AI.
It just takes a few seconds for the extension to download and install.
Open an image, go to Edits, and then under Tools, click on Layer Properties. Click on Masking to find Background Removal AI under it.
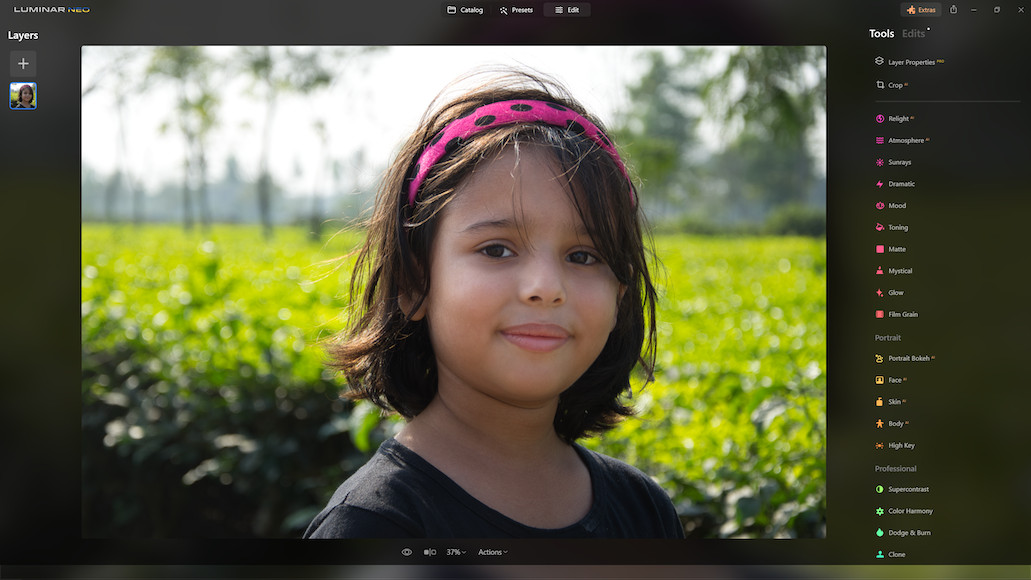
This could have been an easy job – testing out Luminar Neo’s Background Removal AI tool with a simple image.
All I needed to do was lay out a few square building blocks against a neutral background and take a photograph for Luminar Neo’s Background AI tool to disappear that neutral background magically.
But I wanted to make this difficult for the software and really test it out to its limits. So, I selected an image that would allow me to do just that.
As you can see, the image I have chosen has areas that will test any background removal software to its limits unless you can manually refine the selection area.
Even then, this was going to be difficult. I am keeping my fingers crossed.
I did a few necessary edits as this was a RAW image straight out of the camera.
I am now ready to start with the Background Removal AI tool.
First impressions using the Background Removal AI tool
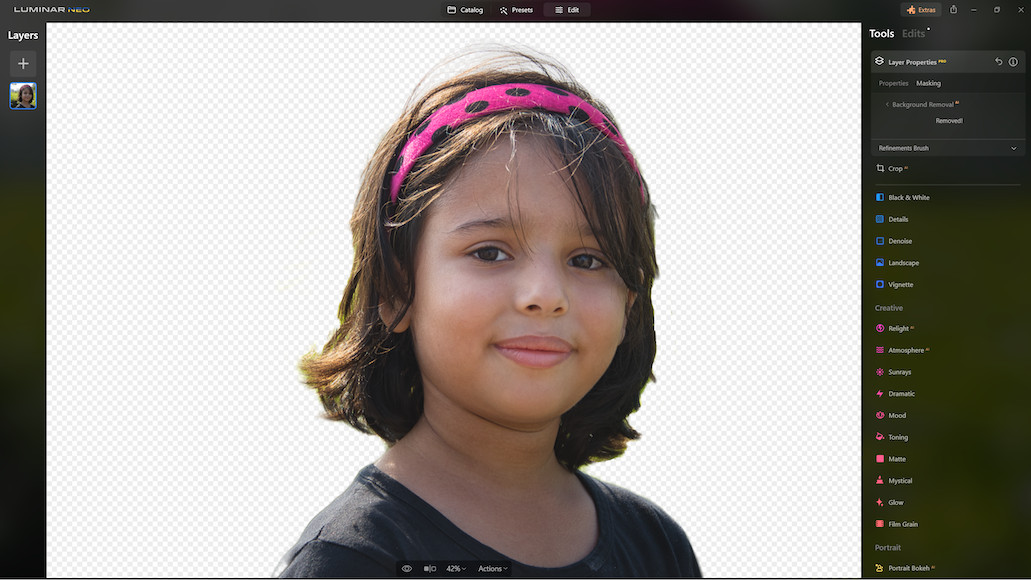
So, I go to Layer Properties and then to Masking and select Background Removal AI – and this is what the tool comes up with.
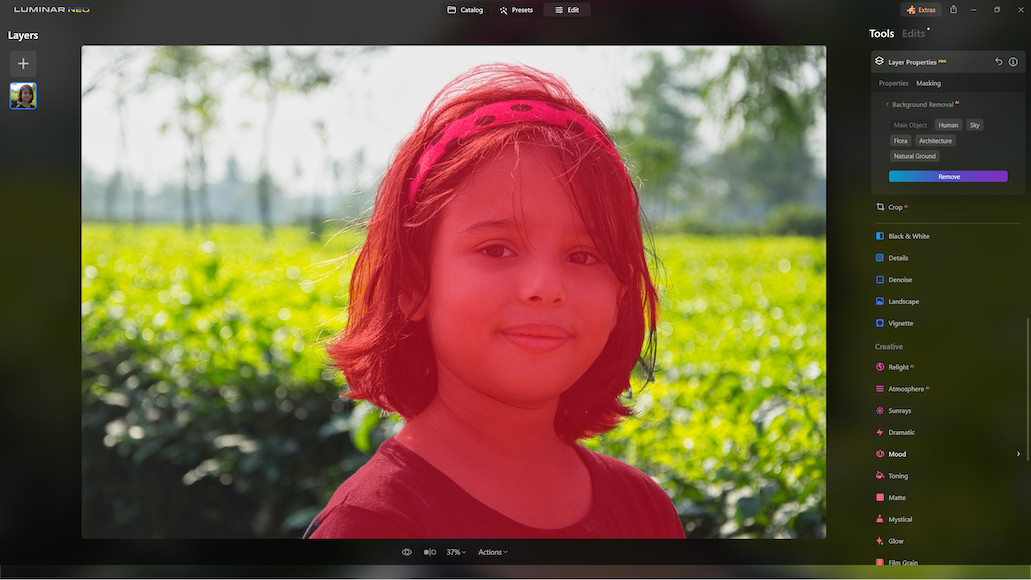
It masks the areas of the image ready for the background removal tool to do its job.
I’d say that I am 85% happy with what the tool has come up with, and that too with just a few mouse clicks.
But it’s not entirely without a few failings. I can still notice that there are strands of hair that the tool failed to include in the masking process, and this is perhaps the first sign that the image is a bit too complicated for the tool to handle, and you need human hands to fine-tune it.
Another thing I noticed is that if I click on the Human option, the tool can include additional areas of the head and mask out strands of hair that it missed out on during the initial selection process, like the strands of hair on the right of the frame.
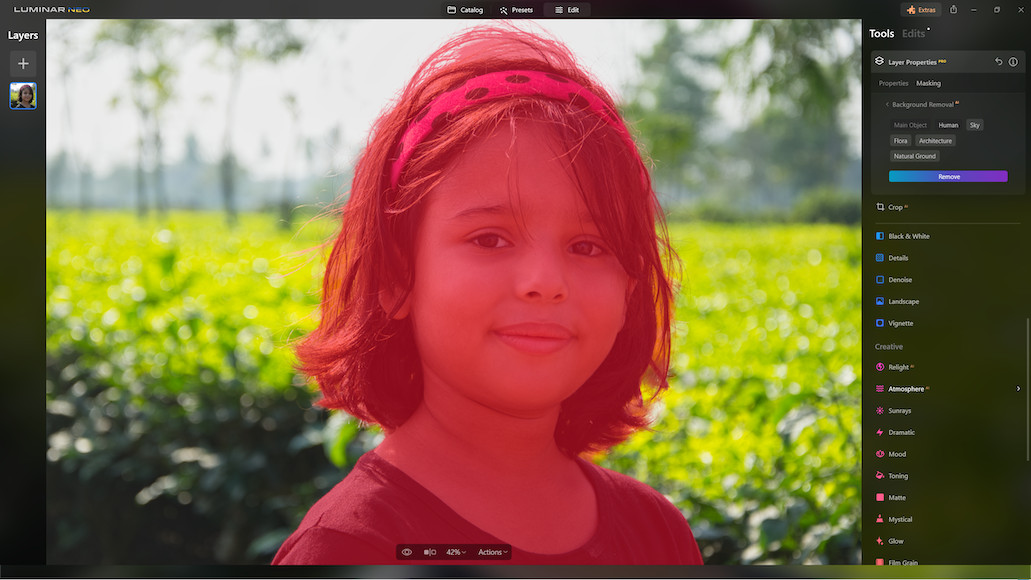
I must say that the tool is very powerful, and what it can achieve with so little input is impressive.
It detects most of the stray strands of hair on the left of the frame and correctly masks them. Very impressive.
I am happy to overlook the ones on the right of the frame that it failed to detect on the first attempt. But it does make a better selection when I enable the Human option.
You do have the option to refine the selection manually. I will come to that after this.
When you’re happy with the selection, hit the Remove button for the tool to do its job.

I am sure you can see what the tool came up with. There are areas where it failed, though, but I am not inclined to blame it for it.
This is why I said at the start of this discussion that this image would be a nightmare for any tool to correct, especially because the strands of hair overlap the scenery behind, which can be difficult for any tool to correct on its own.
Using the Refinement Brush tool
I am coming down now to the refinement option.
The Refinements Brush option is just below where you get the message “Removed.”
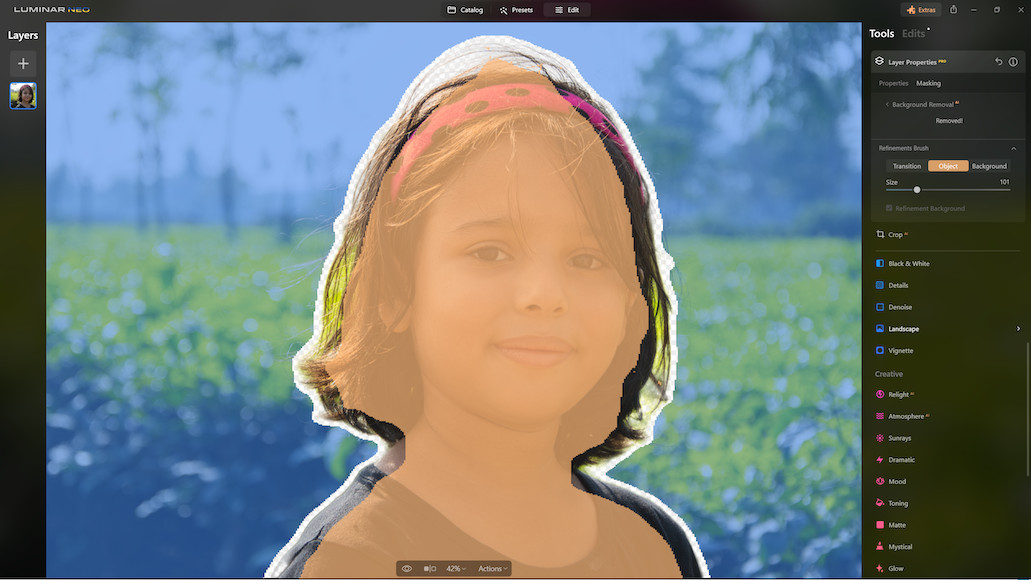
You will notice that the subject of the image is earmarked as the Object.
This is the part of the image that’s in orange. The transparent areas are the Transition areas, and the area that appears in blue is the background.
Now there is a small thing to understand here. These orange, blue, and transparent areas are not masked.
It just indicates how the software determines which areas are which. You can always click one of the tabs and fine-tune the selection.
I clicked on the Object, selected a brush size, and painted over the areas I felt needed a bit of fine-tuning, practically playing the role of a hairdresser because I had to trim the troublesome areas.
I sincerely hope my daughter wouldn’t mind.
Here is the final image –
As you can see, I had to fine-tune and eliminate some of the selections the tool included in the Object area and push that to the Background area. This ensures that the green scenery in the background is noticeable through the hair.
To Conclude
Now, you could choose a more “well-defined” image with an “edgy” main subject, which will help you make an easier selection and processing.
For images such as those with a more clearly defined edge, Luminar Neo does an even better job, and all it takes is a few mouse clicks, and you’re done.
Your image is ready to be exported, and whatever else you want to do with it.
Again, I reiterate that I deliberately chose a tough image to test this tool. Given the results, I can only imagine that it would be a short waiting time before the tool becomes even more powerful and be able to work on those stray strands of hair around the frame and make a cleaner selection.
I can’t wait to see when that happens!
Fast, simple and fun way to remove backgrounds with just one click.
Use code shotkit10neo to save $10


Jeff Collier is an experienced film photographer who enjoys experimenting with modern digital photography equipment, software and apps. He’s also an ex-world champion triathlete and avid cyclist, clocking hundreds of km each week in the beautiful Tweed Valley of northern NSW, Australia.

WELCOME TO SHOTKIT
Enter your email to be sent
today's Welcome Gift:
19 Photography Tools
🔥 Popular NOW:


Shotkit may earn a commission on affiliate links. Learn more.