


How to Use Luminar Neo HDR Merge
HDR Merge is an exciting way to create high-dynamic-range images from within your Luminar Neo workflow. Here's a beginners guide on how to use it.
Luminar | Software | By Andrew Dilks
The Luminar Neo HDR Merge tool is an exciting way to create high dynamic range images easily.
One of the best ways to get more vibrant and dynamic results when shooting landscape photography is to shoot a scene with exposure bracketing.
As a landscape photographer, I’ve found this technique allows me to bring out far more detail than I can achieve from a single image, opening up editing options for exposure, highlights, and shadows.
Download the latest version of Luminar Neo to follow along with this simple tutorial.
Use code shotkit10neo to save $10
With Luminar Neo’s HDR Merge extension, I’ve been able to take this process to the next level, saving valuable time and optimizing high dynamic range to achieve creative versatility.
Read on, and I’ll break down the simple steps you need to follow to use the HDR Merge tool in Luminar Neo to open up new editing possibilities for your landscape and architecture photography.
For a more thorough look at this exciting software, check out our full review of Luminar Neo, and our guide to the differences between Luminar AI and Neo.
Table of Contents
Bringing new depth and detail to photographs with Luminar Neo HDR Merge
Luminar Neo’s HDR Merge tool is simple and intuitive to use, requiring no technical knowledge or complicated processes to achieve great results.
All you need to do is add several versions of the same image taken at different exposure levels to merge, then sit back and let Luminar Neo’s artificial intelligence do the hard work.
Here are the steps you should follow to get HDR Merge up and running with Luminar Neo and process your batched images for optimal editing:
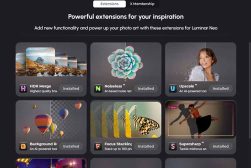
Install the HDR Merge extension

Luminar Neo HDR Merge tutorial – extensions
Before you can start using the tool, you need to make sure you’ve installed the extension in your version of Luminar Neo.
To do this, head to the Extras puzzle piece in the top right corner of the screen to bring up the list of extensions, then install HDR Merge.
Once you’ve done this, the HDR Merge box will appear listed in the right-hand column ready for you to use.
Load the exposure bracketed photos into Luminar Neo
Next, it’s time to load up the exposure bracketed photographs you wish to merge so they are available in your Luminar catalog.
Select the Add Photos button and highlight all the exposure bracketed photographs you want to use, and load them into the catalog.
Select and drag the images in the HDR Merge
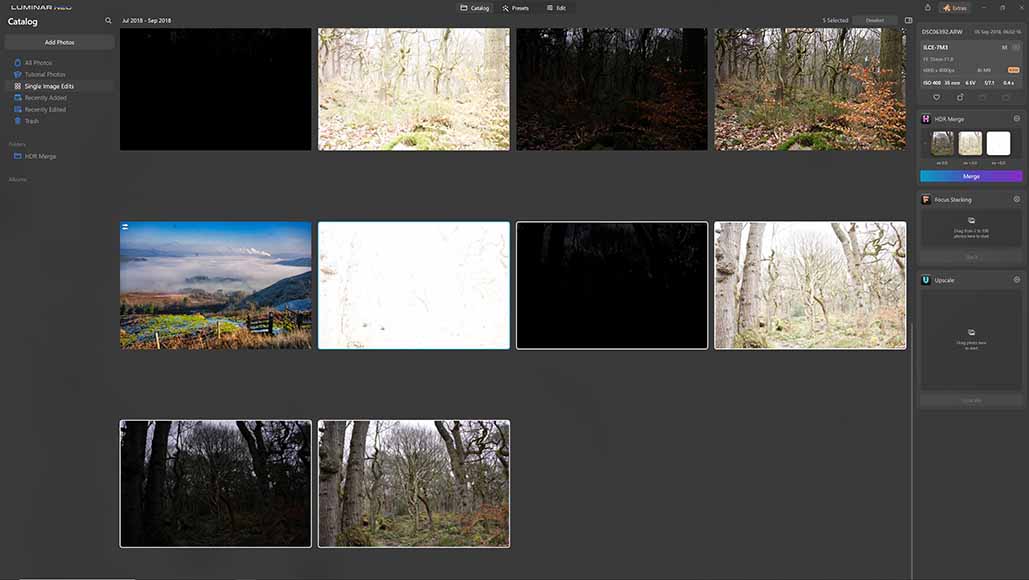
Luminar Neo HDR Merge tutorial – drag and drop images into HDR merge
From the catalog, select the images you intend to merge, then click and drag them into the HDR Merge box on the right side of the screen.
Once you’ve done this, it will take a few seconds for Luminar Neo to process them before you can proceed.
Check the HDR Merge settings
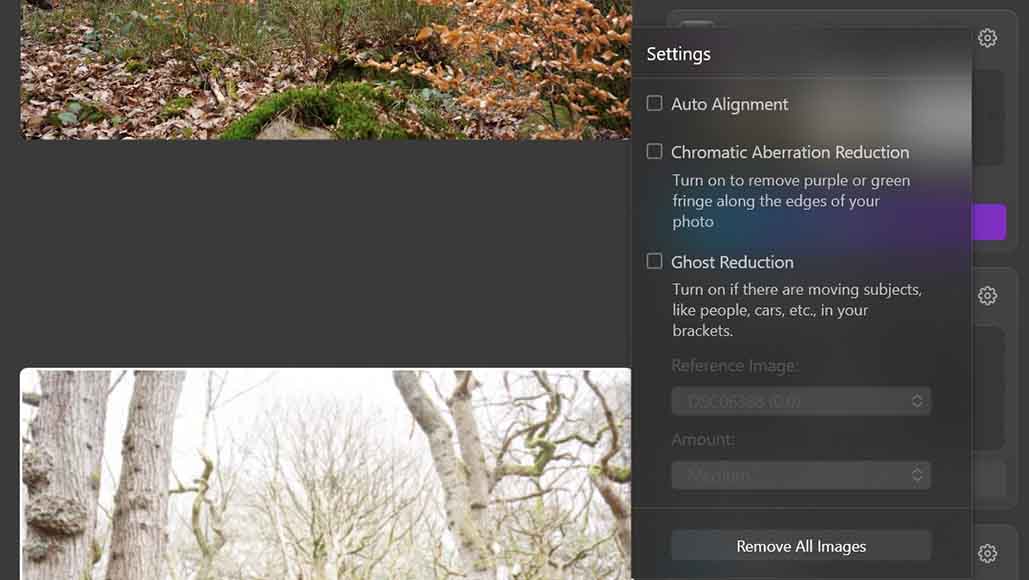
Luminar Neo HDR Merge tutorial – HDR Merge settings
Before you go ahead and merge the selected images, click on the cog icon to bring up the HDR Merge tool settings, so you can make sure these are correct.
There are several useful settings you can change in HDR Merge to ensure you get the best results. These include:
- Auto Alignment. Check this box and Luminar Neo will adjust for slight differences in the framing of each image being used for the merge. While you should be shooting exposure bracketed images on a tripod, sometimes slight movements are unavoidable, so this setting will help keep the images lined up correctly.
- Chromatic Aberration Reduction. This setting will automatically remove any purple or green fringes that might be featured on the edges of your photographs.
- Ghost Reduction. Select this setting if there were any moving objects or subjects in your bracket images to reduce the degree of ghosting from the finished merge.
You can also select a reference image that Luminar Neo can use to better assess the desired results you’re going for to adjust the merge algorithm.
If you’ve accidentally added the wrong images to HDR Merge, you can simply click the Remove All Image button to delete these from the tool and add the correct images.
Once your settings are correct, go ahead and click the Merge button, and Luminar Neo’s AI system will process the new image.
Open the new image in the HDR Merge folder
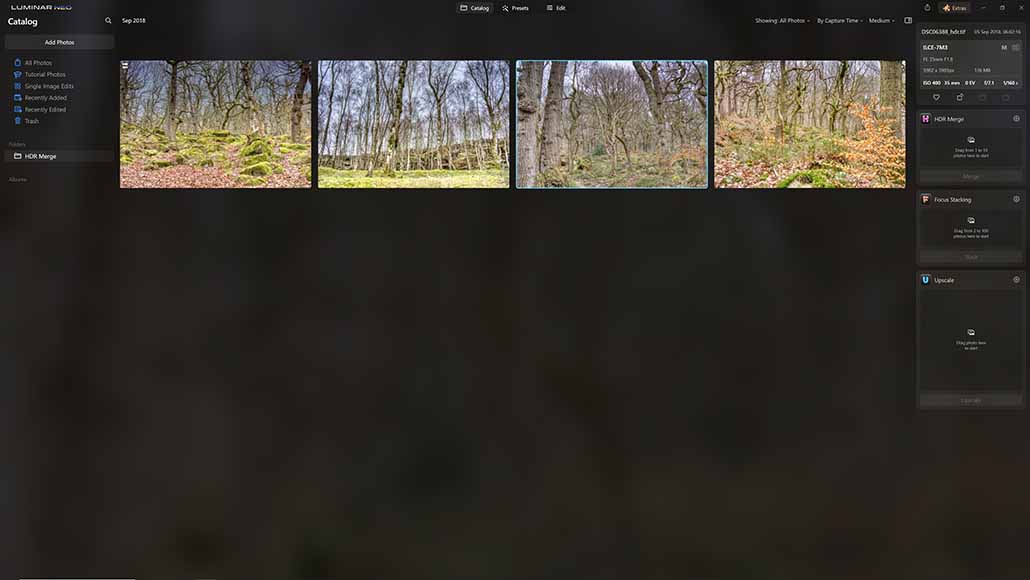
Luminar Neo HDR Merge tutorial – HDR merge folder
With the new image now processed, it’s available for you to view and make additional edits or apply presets.
Images processed through the HDR Merge tool are automatically saved in their own folder, so to view them, select the HDR Merge folder on the left-hand side of the screen.
Finalize the image in Presets and Edit
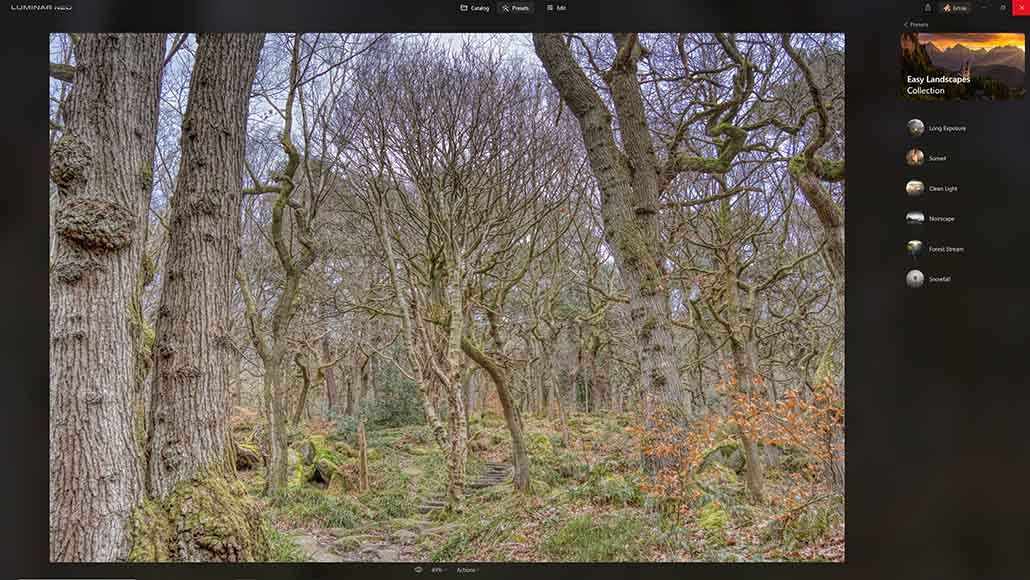
Luminar Neo HDR Merge tutorial – final edits
Once you’ve finished merging the bracketed images, you can make any final adjustments you desire in the Presets and Edit tabs.
The process here is exactly the same as you’d use for any standard image you wish to edit, with the full range of tools available for your merged image.
When you’re happy with the final edits and adjustments you’ve made, the image is ready to be used in whatever medium you choose.
Using HDR Merge in Luminar Neo – Frequently Asked Questions
Using the HDR Merge tool in Luminar Neo is incredibly easy and delivers excellent results in a short space of time.
In case you have any questions, here are some answers to the most frequently asked questions centered around the HDR Merge tool:
Luminar Neo doesn’t come with HDR Merge as a standard feature of the basic package, so if you want to use this, you’ll need to purchase it and add it as an extension.
If you’re using the standard version of Luminar Neo, you can add the HDR Merge extension to the suite for £39, while paying £79 will grant you access to all extensions.
Users who have already signed up for the full package but haven’t yet added the HDR Merge extension can easily do so from the list of extensions in the software.


Andy Dilks is an experienced landscape photographer and former games industry veteran. When he isn’t taking photos or reviewing the latest tech gadgets, you can find him hiking and wild camping in the Peak District.

WELCOME TO SHOTKIT
Enter your email to be sent
today's Welcome Gift:
19 Photography Tools
🔥 Popular NOW:


Shotkit may earn a commission on affiliate links. Learn more.