


How to Remove a Background in Luminar Neo
In order to isolate the subject of a photo to use on other images you'll need to learn how to remove the background. Here's how it's done using Luminar Neo.
Luminar | Software | By Andrew Dilks
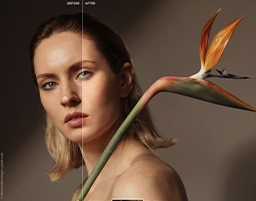
Learning how to remove backgrounds in Luminar Neo can help create fresh and interesting images, replacing boring backgrounds with stunning vistas or beautiful sunsets.
I’ve used a variety of methods to achieve this result, and Luminar Neo’s AI-based tools allow me to get the job done in a matter of seconds, freeing up time for more creative processing.
Read on, and I’ll break down how you can easily remove backgrounds from your images in Luminar Neo with these simple step-by-step instructions.
Download the latest version of Luminar Neo to follow along with this simple tutorial.
Use code shotkit10neo to save $10
Table of Contents
How to Remove a Background in Luminar Neo
Removing backgrounds from images allows you to reposition your subject in new situations, getting rid of unwanted skylines and backdrops to replace with something better.
It’s a commonly-used post-processing technique used by a wide range of photographers and graphic designers who want to place their subjects over the best background possible.
Using Luminar Neo’s tools to remove backgrounds can be achieved by following these steps:
Choose the image you wish to remove the background from
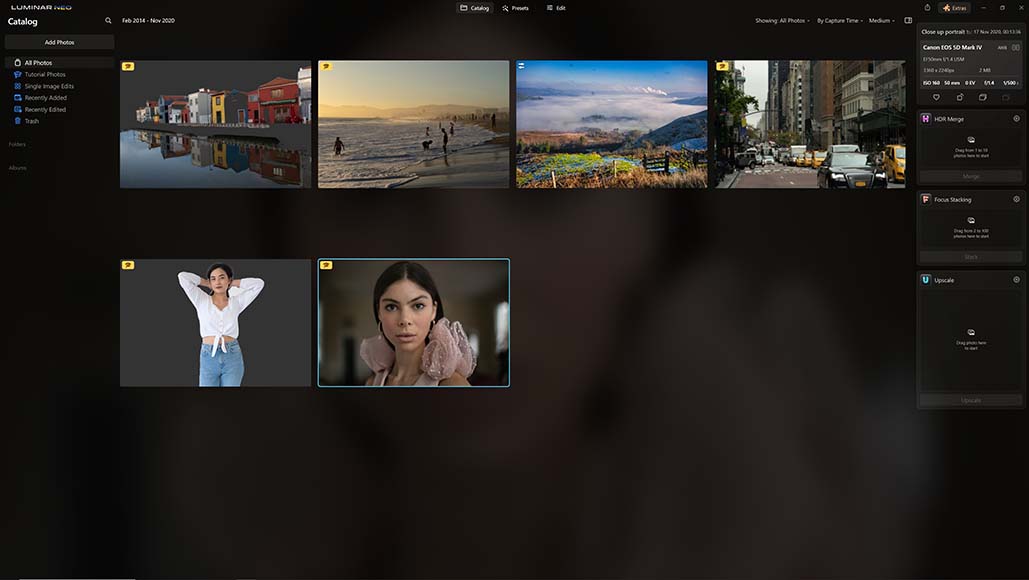
Luminar background removal – image selection
Luminar Neo’s background removal tool works for a wide range of images, from portrait photos to landscapes and cityscapes.
To begin, head over to the Luminar Neo Catalog, then select the image you wish to remove the background from. Once you’ve done this, move across to the Edit tab.
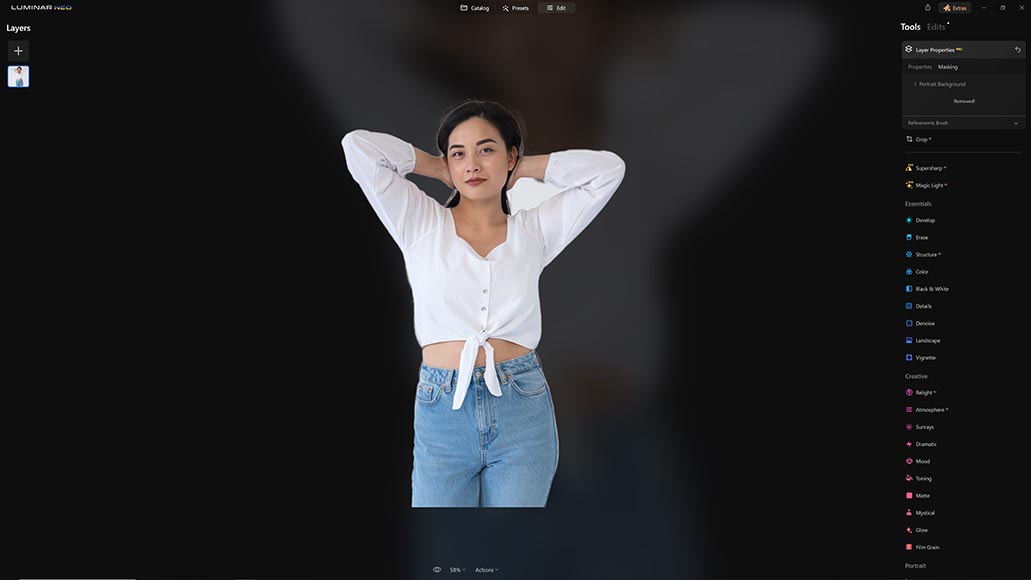
Select the background removal tool from Layer Properties

Luminar Neo background removal – layer properties tool
Once you’ve loaded up the desired image in the Edit tab, select the Layer Properties and go to the Masking option, where you’ll find Background Removal AI.
Click on the option and wait while Luminar Neo’s AI system processes the image’s background, and you’re then presented with additional options to refine the mask.
These can include elements such as Sky, Water, and Architecture, which can be added to the mask by simply tapping on the desired element.
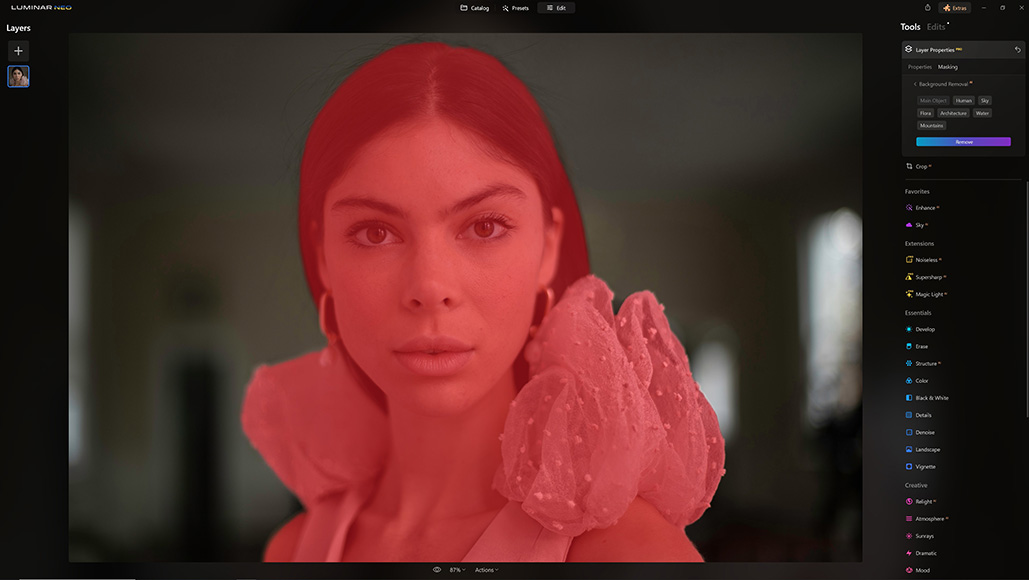
Luminar background removal – AI masking
If necessary, refine the mask

Luminar background remover – refine the mask
Luminar Neo’s AI detection is incredibly accurate, but in case you need to further refine the mask before you remove the background, you can do this with the Brush tool.
Click on the Refinements Brush drop-down menu, then adjust the brush size to fine-tune the level of adjustments you wish to make to the mask.
You can adjust brushes to alter the Transition, Background, and Object to make these refinements as accurate as possible.
Remove the background
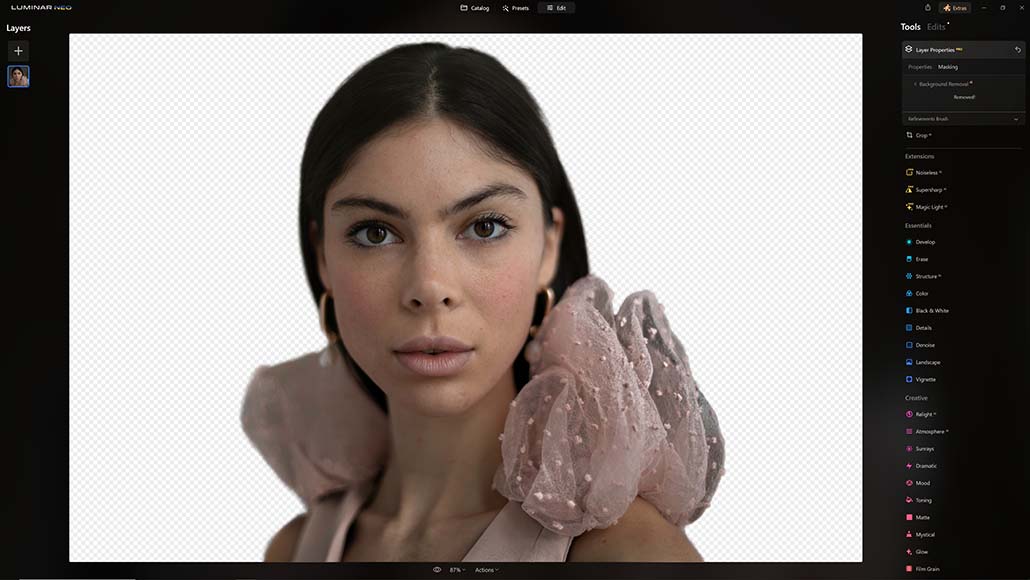
Luminar background remover – delete the background
Once you’re happy with the mask, click the Remove button and Luminar Neo will complete the process and remove the background from the image.
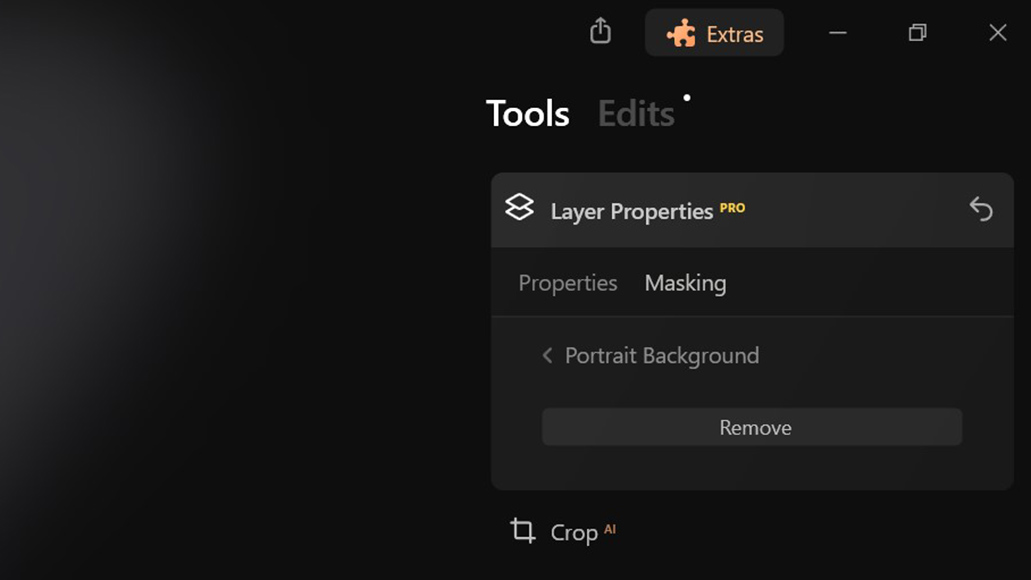
Using the portrait background removal tool
Luminar background removal – portrait background tool
While the Background Removal AI tool is an all-purpose background remover, which can be used with landscapes and portraits, Luminar Neo also features a dedicated Portrait Background removal tool.
This can be accessed from the same Masking menu in Layer Properties by selecting Portrait Background then clicking on the Remove button.
Luminar background remover – portrait removal mode
As with the Background Removal AI tool, you can use the Refinements Brush drop-down menu to alter the mask using brushes and tailor it to your requirements.
Frequently Asked Questions about removing backgrounds in Luminar Neo
If you’re still uncertain about the techniques and processes you can use to remove a background in Luminar Neo, check out the answers to these commonly-asked questions.
You don’t have to use the AI tool to remove a background in Luminar Neo, and this can also be achieved by opening and aligning two layers and turning down the opacity of the new layer to 50%.
Then, use the brush tool to paint over the original background from the main image to reveal the new background beneath this, and click Done to view the result.


Andy Dilks is an experienced landscape photographer and former games industry veteran. When he isn’t taking photos or reviewing the latest tech gadgets, you can find him hiking and wild camping in the Peak District.


WELCOME TO SHOTKIT
Enter your email to be sent
today's Welcome Gift:
19 Photography Tools
🔥 Popular NOW:


Shotkit may earn a commission on affiliate links. Learn more.