


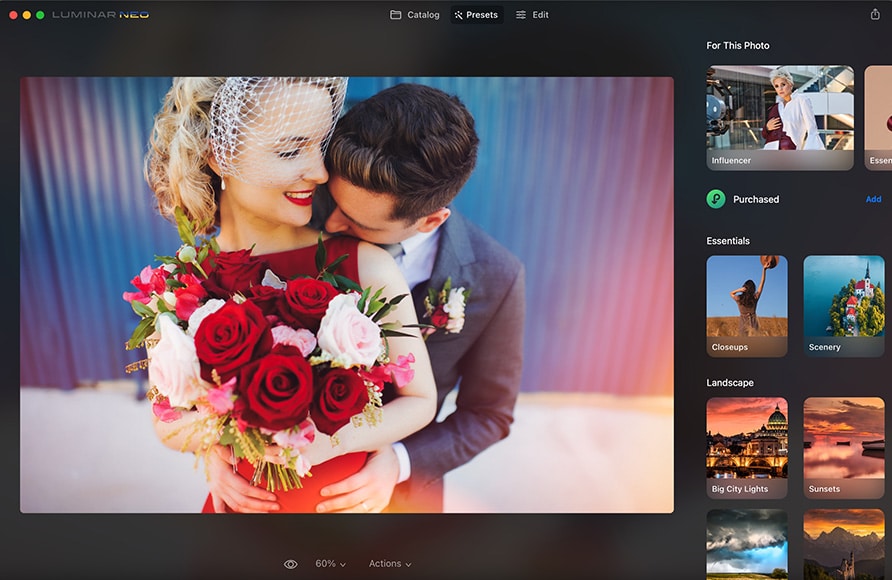
How do you mask in Luminar Neo?
Learning how to mask in Luminar Neo is a great way to remove objects or make your image edits have more impact. Here's how to do it efficiently.
Luminar | Software | By Jeff Collier
Masks in Luminar Neo can be applied to tools or Layers.
You can deploy a mask to define certain areas of your image and apply a tool only to those areas.
You can also deploy a mask to define which areas of a Layer to show or hide.
Mask AI is one of the powerful features exclusive to Luminar Neo, unavailable in previous versions (see: Luminar Neo vs Luminar 4)
Powerful AI editing tools improve photos in less time. Affordable one-time price and expandable features.
Use code shotkit10neo to save $10.
Table of Contents
What Tools to Use to Mask in Luminar
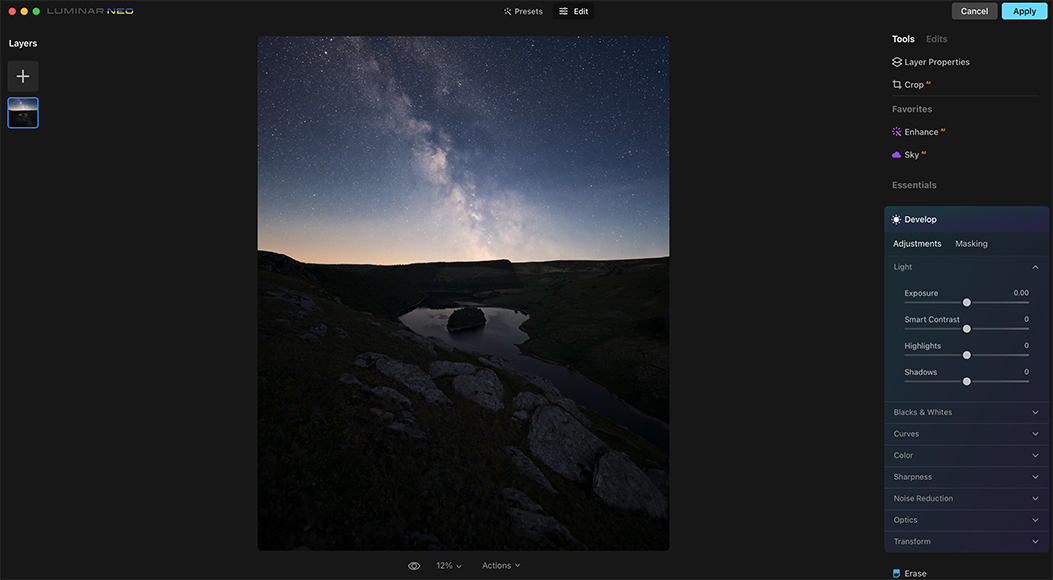
Every tool in Luminar Neo has a Masking tab, with which you can apply the tool selectively based on a mask you define.
Here’s an example of an image that was exposed for the sky, but as a result the foreground is badly underexposed.
Under ideal circumstances, a photographer might use a flash to light the foreground to achieve the desired look in-camera.
Since that wasn’t possible with this shot, a mask can be used to boost the exposure of the areas in shadow.

First, we will adjust the Exposure slider until the foreground is as exposed as you want it to be.
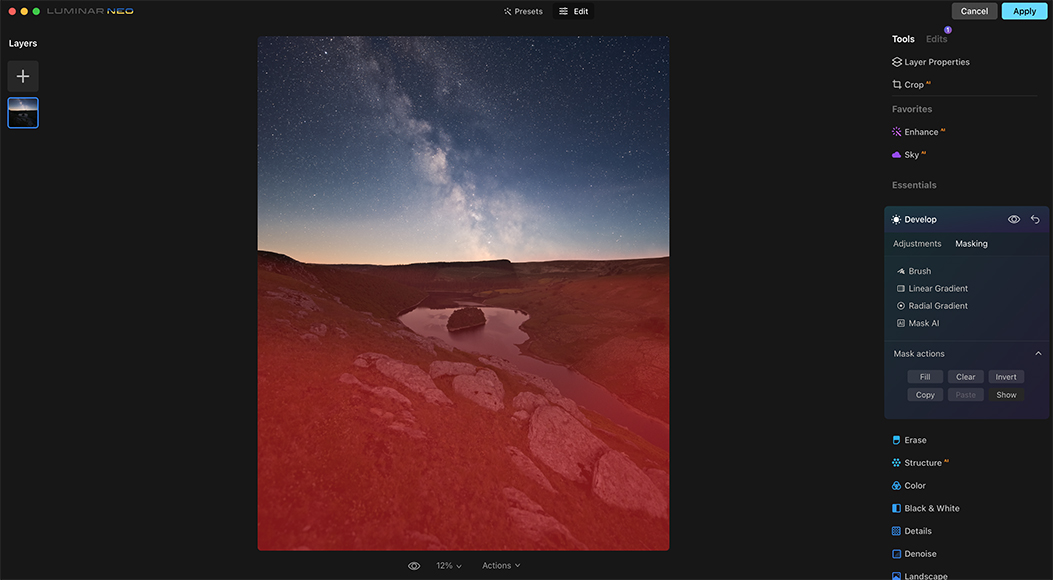
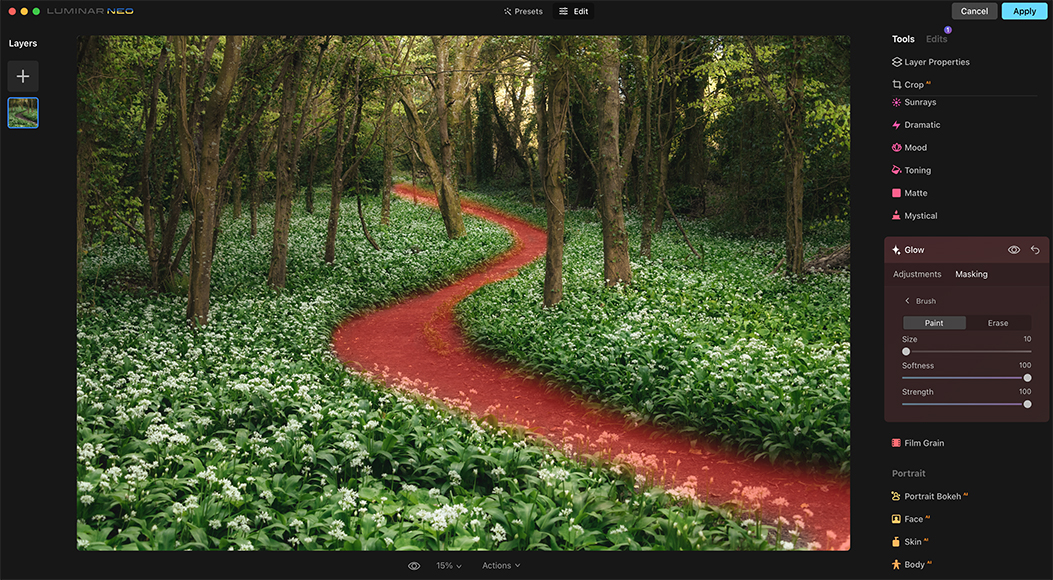
Next, we will mask out the areas we don’t want to affect. Head to the Masking tab, then select Brush.
A brush tool will appear on the screen, allowing us to paint in the areas that require the exposure boost.
If you make a mistake, use the Erase tool to remove the mask and start over.
Try reducing the Strength slider so you can create overlapping strokes that gradually build up your mask.
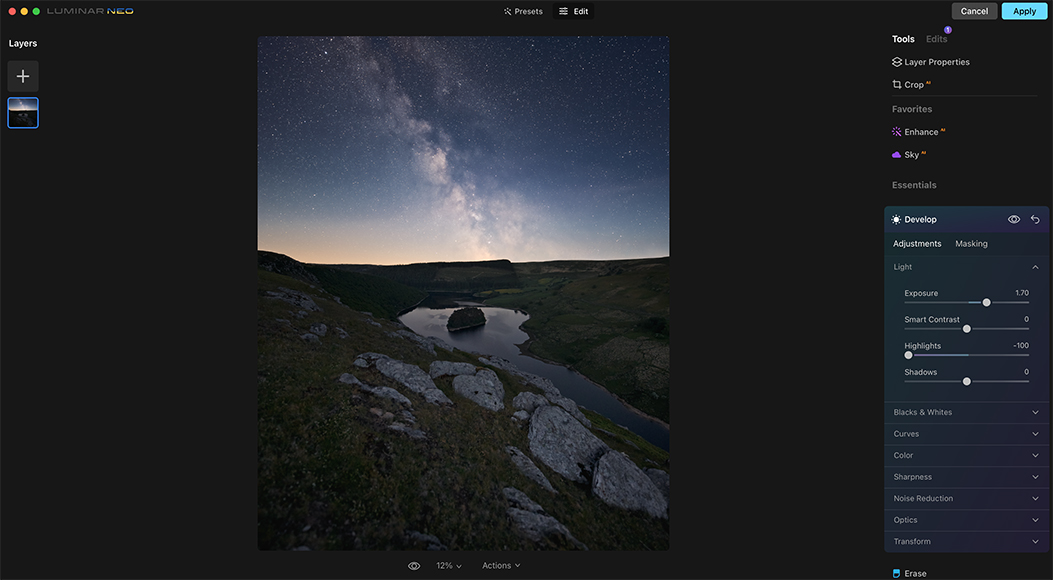
We have now increased the foreground exposure without affecting the sky.
How to mask Layers
Luminar Neo gives you the ability to add as many Layers as you need to realize your creative vision, and each Layer can have a mask applied to it.
Note that masks can also be applied to each tool within a Layer, so the possibilities are endless.
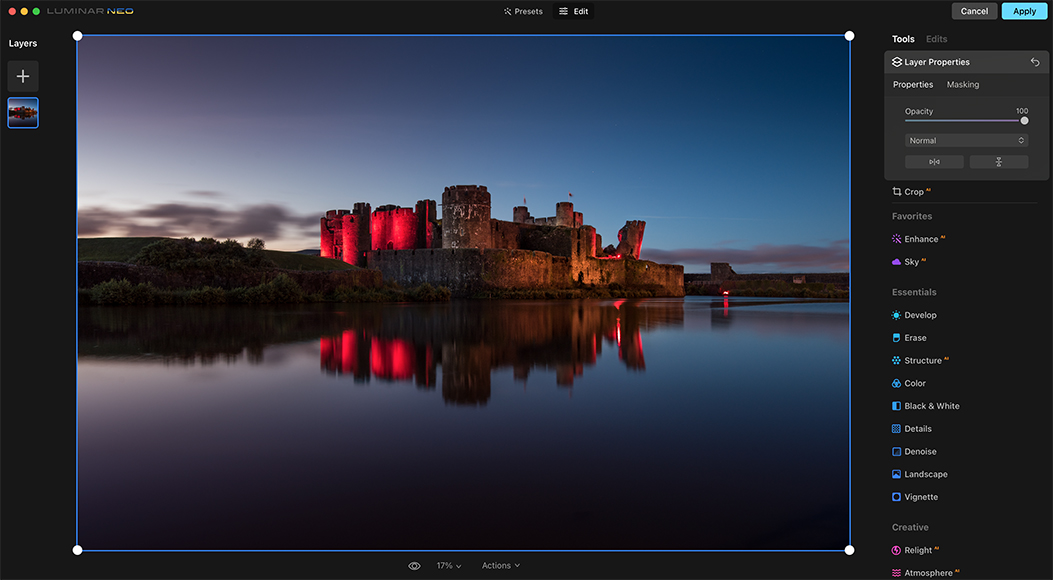
In this simple example, we will take an image of a castle at night and add one of Luminar Neo’s preinstalled Overlays as a new Layer.
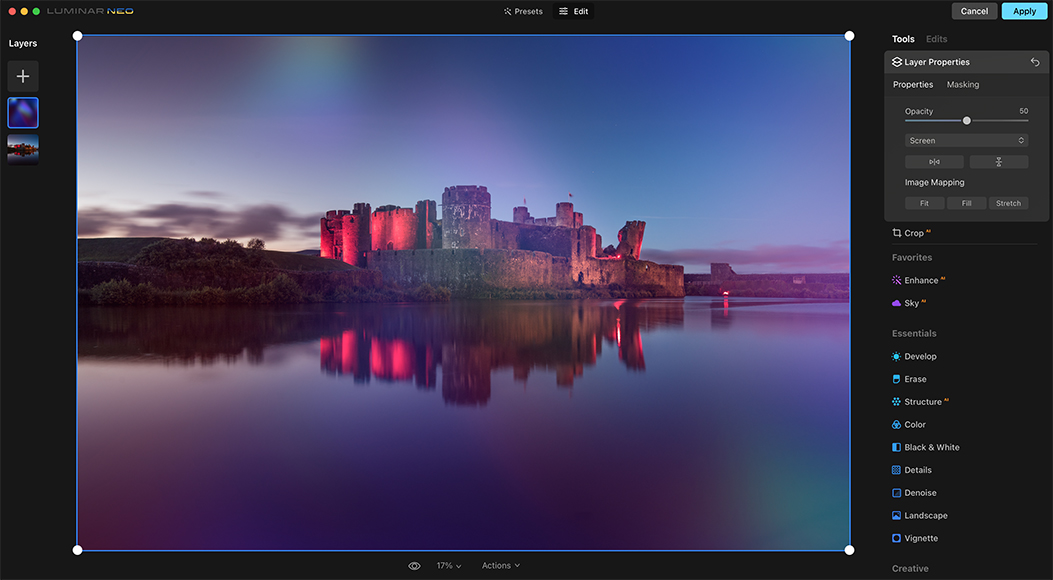
This Overlay nicely simulates lens flare; however, by adding it, we lose some definition on the structures in the center of the frame.
Therefore, let’s use masking to keep this area free from the effect.
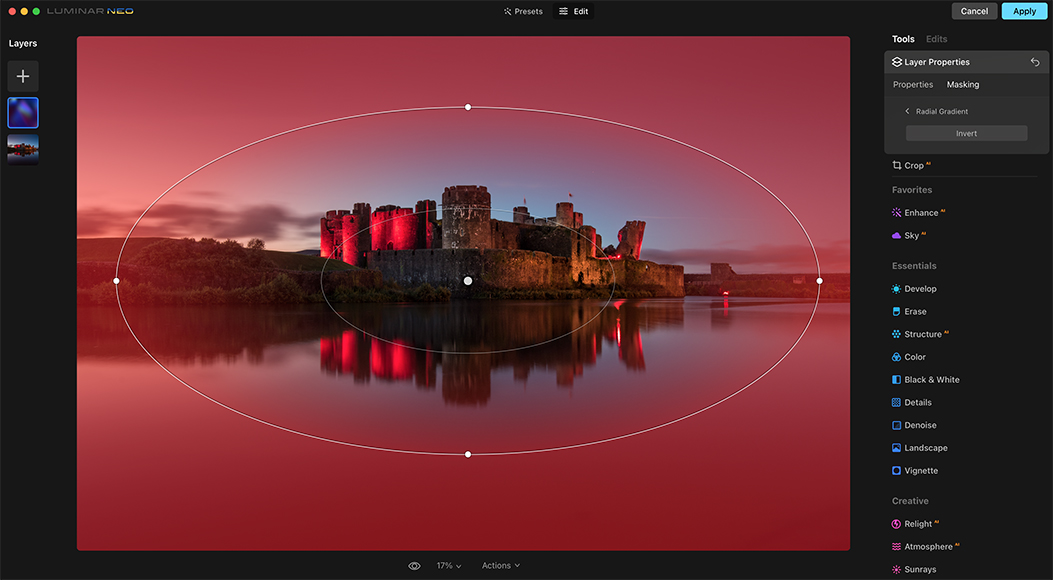
Under Layer Properties, click the Masking tab and apply a Radial Gradient mask over the area.
The completed mask now applies the lens flare Overlay selectively, excluding the center of the image.
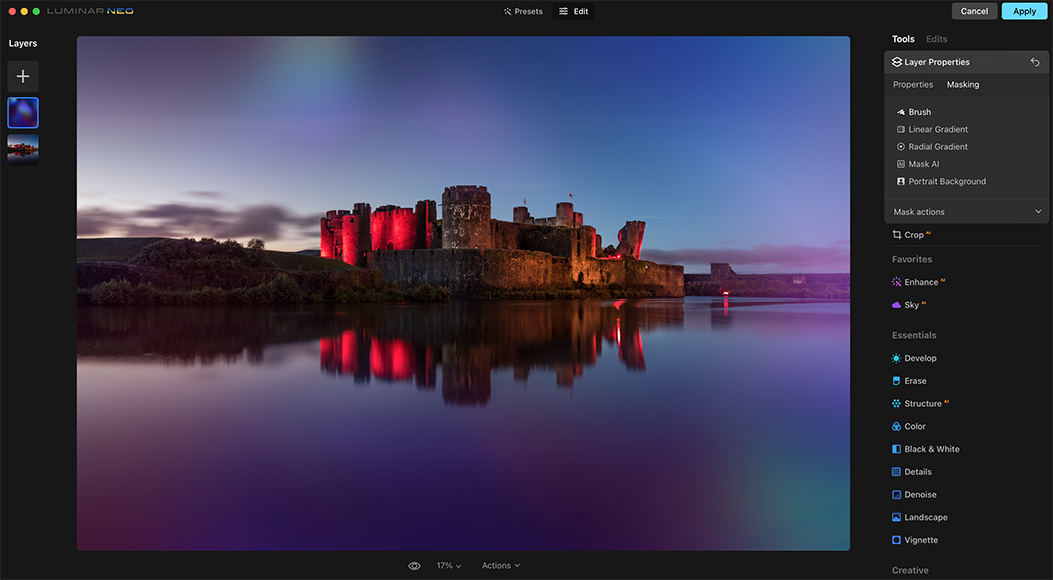
Understanding the Types of Masks in Luminar Neo
Luminar Neo gives you all the masking options you need to realize your creative vision, with three types of manually controlled masks, plus Mask AI, a powerful time-saving feature which can detect different types of objects within your image and mask them automatically.
Brush
The Brush mask allows you to paint a mask onto your image. If you make a mistake, just use the Erase tool to remove part of the mask. Three sliders are offered to adjust the brush effect.
- Size. Controls the diameter of the brush relative to your screen. Note that if you zoom in on the image, the brush resizes proportionally.
- Softness. Controls how much blending there is between the center of the brush and its edges.
- Strength. Adjusts the opacity of the brush effect.
Linear Gradient
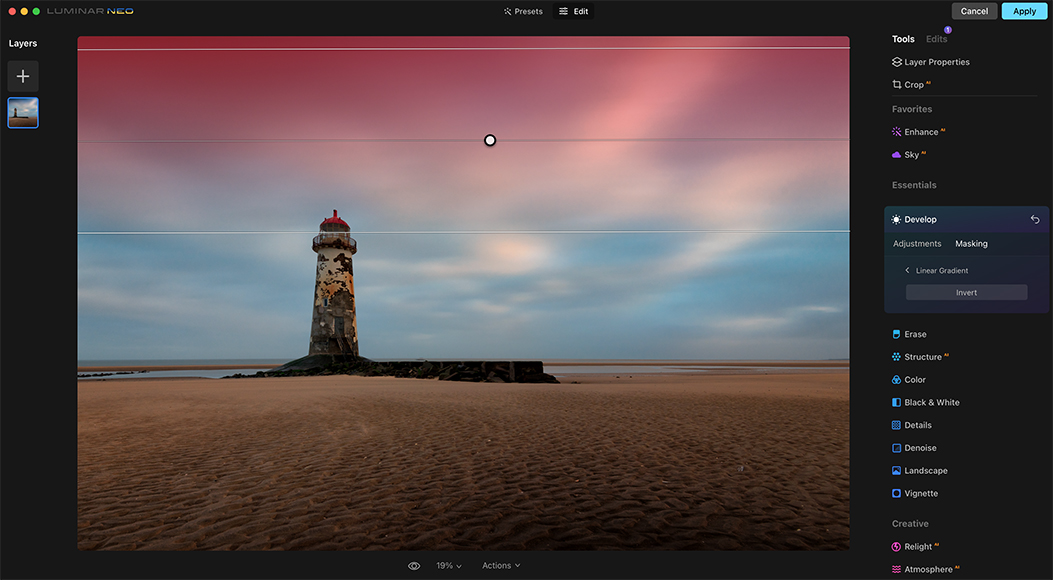
The Linear Gradient tool creates a mask which gradually blends from opaque to transparent in a straight line.
This kind of masking is popular with landscape photographers to create depth in a scene.
To create a Linear Gradient mask, define the start point of the effect, then drag and release at the endpoint.
Control points will allow you to expand and rotate the mask once it’s in place.
Radial Gradient
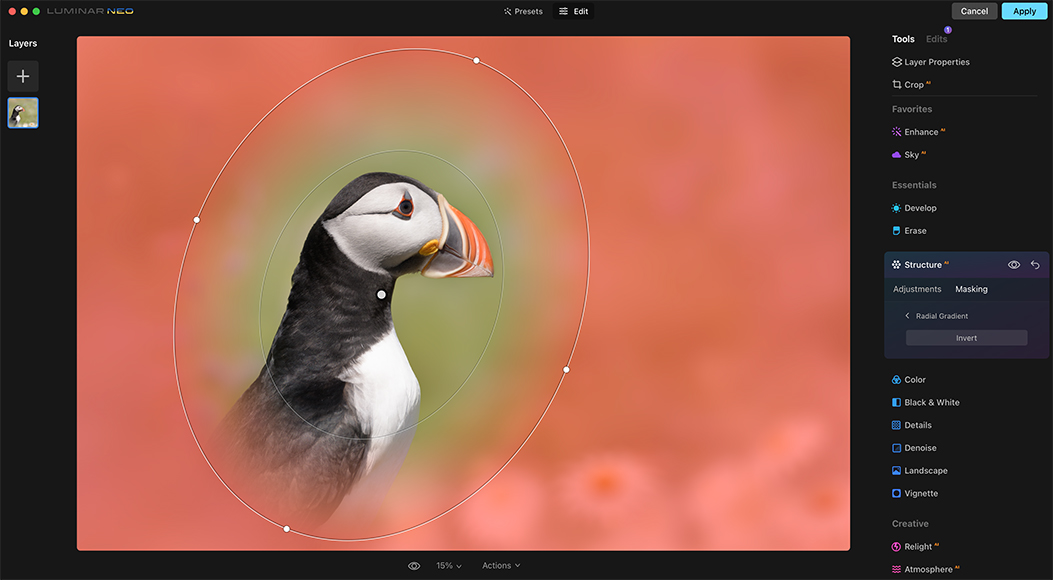
The Radial Gradient tool creates a circular or elliptical mask which gradually blends from opaque at a central point to transparent at its edge.
This kind of mask can be helpful to accentuate large points of light or to throw light upon an object or person.
To create a Radial Gradient mask, click to define the center of the effect, then drag and release at its edge.
Control points will allow you to resize and rotate the mask once it’s in place.
Mask AI
Luminar Neo can automatically mask objects with a single click. The AI engine distinguishes between nine types of objects with the click of a button:
- Human
- Sky
- Flora
- Architecture
- Mountains
- Artificial ground
- Natural ground
- Water
- Transport

Mask AI works on both tools and Layers.
Using Mask AI In Luminar Neo
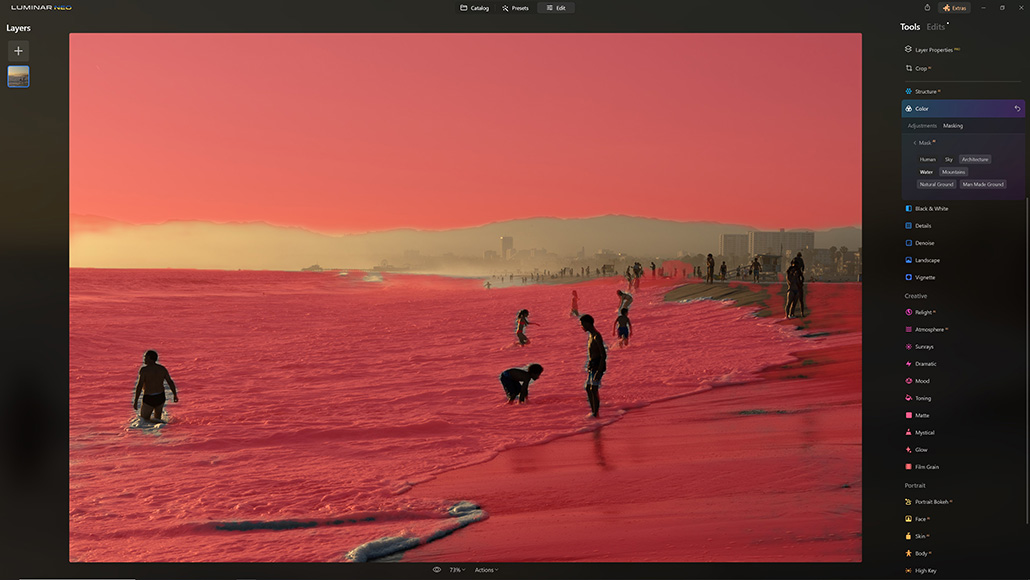
Luminar Neo masking tutorial – AI mask combinations
Luminar Neo’s unique mask AI feature allows users to quickly create a broad range of masks with minimal fuss, which can then be stacked and modified to truly enhance your images.
It makes removing skies and other unwanted features from images incredibly easy, as well as singling out specific areas for additional post-processing work.
With Luminar Neo, you can easily apply masks for use on their complete set of editing features, from essential tools like Structures and Colours to creative tools such as Dramatic and Mood.
In this tutorial, I’ll break down how you can use mask AI on your images, as well as take a look at the tools you can use to manually create masks and some additional features available in Luminar Neo.
Selecting elements using Mask AI
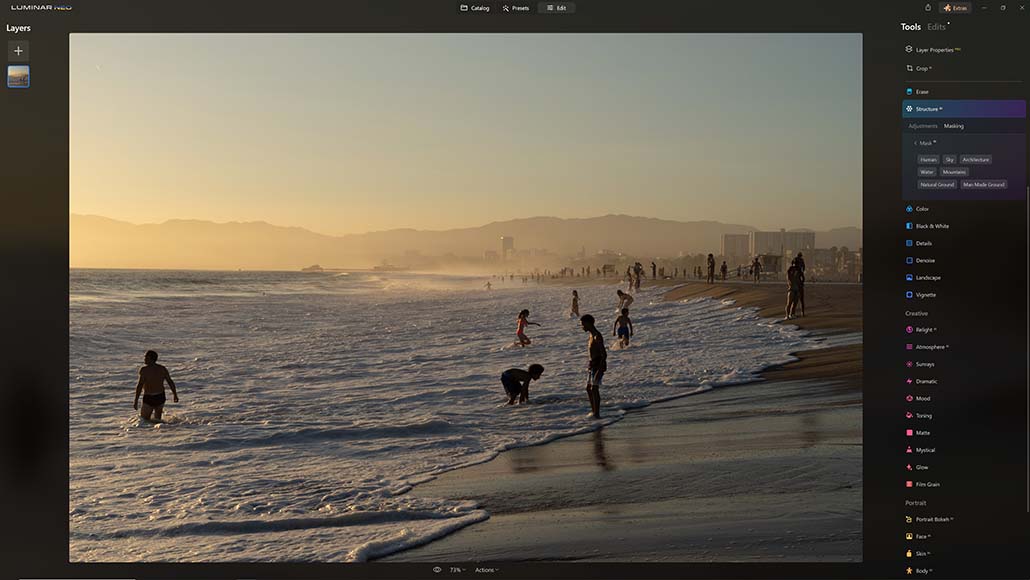
Luminar Neo masking tutorial – masking options
Using Luminar Neo’s mask AI tool to select specific elements is easy, and can be achieved by following these simple steps:
- Open the image you wish to use Mask AI with from your catalog.
- Head over to the Edit tab, then select the tool you wish to apply the mask to.
- Click the Masking option to the right of the Adjustments list to access the masking modes.
- Select the Mask AI option from the menu and wait for Luminar’s AI processing to complete.
- Choose the type of mask you wish to apply, for example, Sky or Architecture.
- Wait a few seconds as Luminar Neo processes and applies the mask.
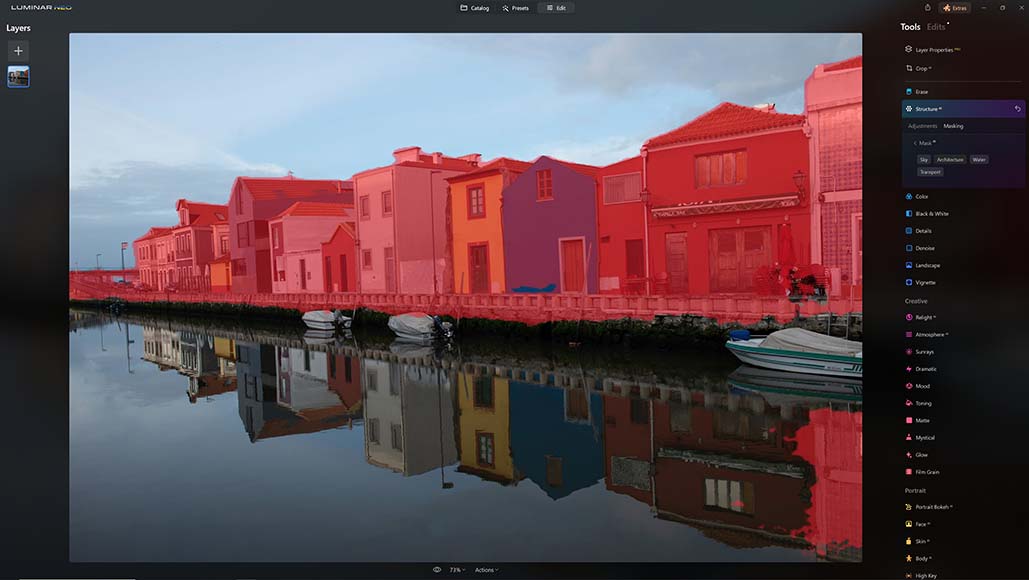
Luminar Neo masking tutorial – AI mask on buildings
There are various subject types that Luminar Neo’s Mask AI tool can identify, in addition to Sky and Human mentioned above.
These include Mountains, Foliage, Vehicles, Human, Water, Natural Ground, and Man Made Ground.
If your image doesn’t feature any of these, then only those which are in the image will be listed in the types of masks offered by the Mask AI tool.
If you want to apply more than one subject-based mask using this tool, simply click on the type and Luminar Neo will process and apply another map.
Understanding mask actions
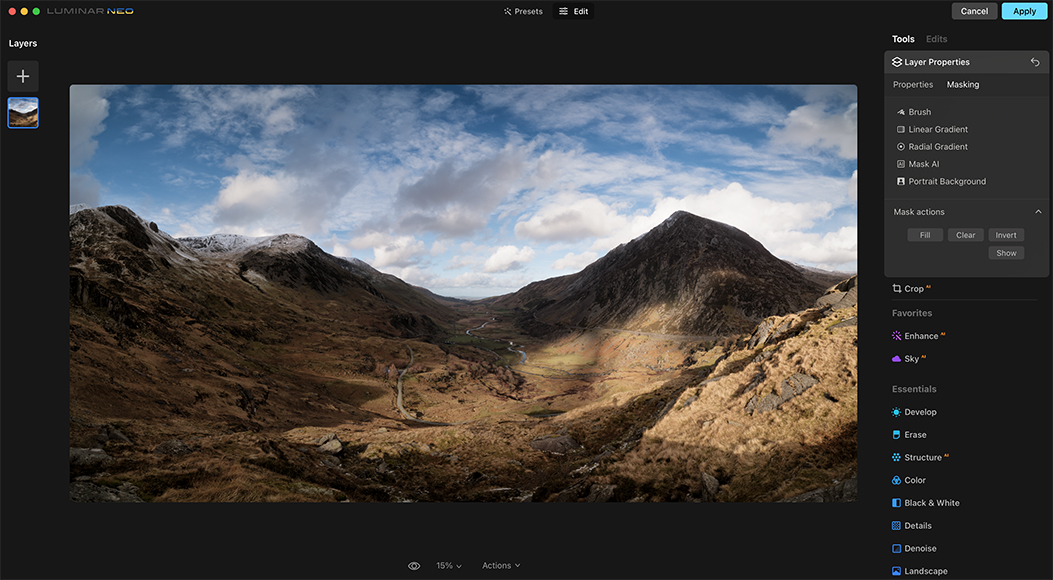
The Mask actions area in each Masking tab provides some shortcuts to create, invert, or remove a mask quickly.
Fill. Creates a mask that’s applied to every pixel of the image.
Clear. Removes the current mask.
Invert. Reverses the opacity values of the current mask.
Copy. Copies the current mask to the clipboard.
Paste. Pastes the mask currently stored in the clipboard.
Show. Reveals the current mask as a red overlay.
Portrait Background AI
One of Luminar Neo’s latest and most impressive features is Portrait Background AI.
This mask, which works on Layers, allows users to take the background out of a portrait and make it transparent.
This AI-powered feature can be applied with a single click.


Luminar Neo is Skylum’s flagship image editing software for Windows and macOS. Download it and try it today by tapping the button below.
Powerful AI editing tools improve photos in less time. Affordable one-time price and expandable features.
Use code shotkit10neo to save $10.


Jeff Collier is an experienced film photographer who enjoys experimenting with modern digital photography equipment, software and apps. He’s also an ex-world champion triathlete and avid cyclist, clocking hundreds of km each week in the beautiful Tweed Valley of northern NSW, Australia.

WELCOME TO SHOTKIT
Enter your email to be sent
today's Welcome Gift:
19 Photography Tools
🔥 Popular NOW:


Shotkit may earn a commission on affiliate links. Learn more.