


Luminar AI Review – Can Artificial Intelligence help you Edit your Photos?
An honest review of the world's first artificial intelligence-powered image editor: Luminar AI. Simple for beginners; powerful for pros... but is it for you?
Luminar | Software | Software Reviews | By Mark Condon | Last Updated: March 9, 2023
This is an in-depth, unbiased review of Skylum Luminar AI: the world’s first image editor fully powered by Artificial Intelligence.
By automating the most common manual image editing tasks and simplifying complexity in post-production, Luminar AI aims to save photographers hours of time, while making the photo editing process a lot more fun.
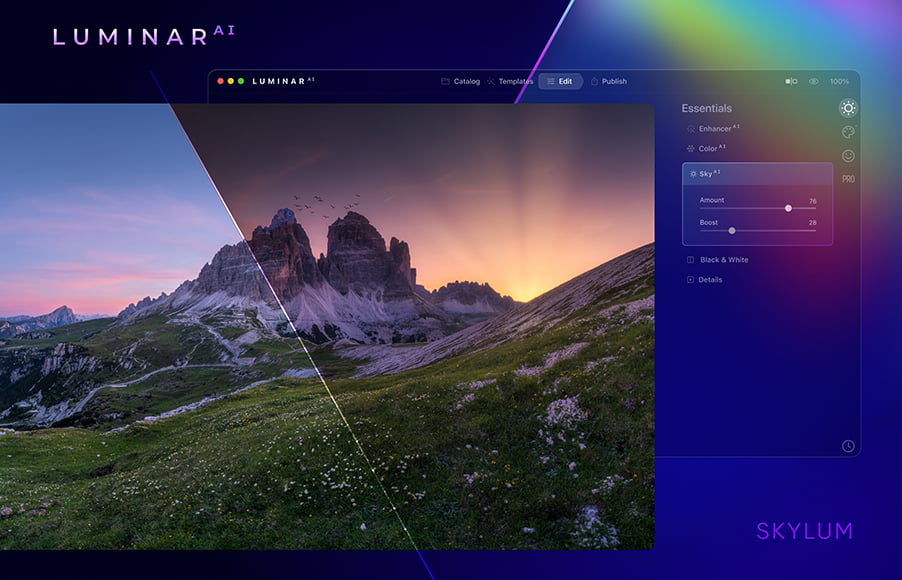
Simple, fast, fun and affordable way to make your photos look 10x better. Zero editing experience required.
Use code shotkit10neo to save $10
When used judiciously, artificial intelligence for photo editing can be an enormous time-saver, and can even help you achieve things that were previously impossible.
Is Luminar AI the fastest, simplest, and best-value image editor of the year? Is it a good alternative to Lightroom? Is it suited for every level of photographer?
Let’s have a closer look at this exciting new image editing software to find out.
Table of Contents
What is Luminar AI?
- Great value for money
- Complex edits made simple
- AI tools produce great results
- Template-based editing ideal for beginners
- Manual masking for advanced users
- Great plugin for Adobe/Mac Photos
- Fast (big improvement to Luminar 4)
- Fun to use
- Regular updates & new camera support
- Limited export options
- Limited metadata/DAM options
- Limited layer-based editing
- Can’t transfer Luminar 3 or 4 catalog
- Advanced features harder to locate
- Confusing pricing
Luminar AI is a revolutionary new image editing software that uses artificial intelligence to help with time-consuming and complex editing tasks.
It’s a stand-alone Windows and Mac application, as well as a Plugin for Lightroom, Photoshop and Photos for Mac OS, allowing users ingrained in an Adobe workflow to also take advantage.
Since April 2021, Lumina AI is optimised to run on Apple’s next-generation M1 computers, taking full advantage of the faster processing capabilities of the M1 chip.
Luminar AI is designed for every level of creative – from complete beginner photographers to seasoned pros, although the latter will likely use it more as a plugin, in conjunction with other image editing software.
Despite being incredibly powerful, it’s simple enough to pick up quickly, even for those with zero image editing experience.
According to Dima Sytnik, CPO of Skylum:
Luminar AI brings an entirely new, non-conventional approach to the world of photo editing, focusing on the results instead of the process.
As the world’s first photo editing tool that’s fully powered by artificial intelligence, Luminar AI offers a simplified approach to image manipulation, while still retaining full manual control for power users.
The goal of Luminar AI is to make the editing process fun and easy, letting users hone in their creative skills while being guided with Templates and other handy features.
Skylum has attempted to remove all the tedious and complex parts of photo editing, without sacrificing creativity – you as the artist will still be in complete control of the outcome.
Best Features of Luminar AI
In this Luminar AI review, I’ve tried to identify 7 key areas where this ground-breaking software by Skylum aims to make life simpler for anyone who needs to edit an image.
1. Simplified Workspaces for a More Efficient Workflow
Workspace tools are minimal with extra options appearing when required.
Luminar AI does away with a lot of the complex image management functionality to deliver much faster performance than Luminar 4, with virtually no learning curve.
It comprises 4 main workspaces: Catalog, Templates, Edit and Export:
- Catalog shows All Photos, Single Image Edits, Recently Added, Recently Edited (very handy), and Trash. It also shows Folders which have been manually added and Albums which you can create and manage.
- Templates are like ‘super’ presets which use AI to analyse the contents of each photo to suggest the best edits.
- Edit gives you access to a selection of regular and AI-powered image editing tools, separated in 4 separate tool panels: Essentials, Portrait, Creative and Professional.
- Export allows you to Save to Disk, Mail, Messages, SmugMug and 500px.
Getting images into Luminar AI is easy, using either the + button or by dragging and dropping into the editor or onto the app icon.
You can import a single image or a folder containing multiple images. During testing, I was able to import multiple high-resolution RAW files in seconds.
Photography beginners and newcomers to photo editing software won’t be intimidated by the design and workflow of Luminar AI – everything is self-explanatory and logically organised.
Similar to Luminar 4, photos can be sorted using folders or albums, which function independently to the file’s actual location on your computer.
This means that any image you add to a folder on your hard drive (i.e. outside of the Luminar AI app), will automatically appear within Luminar AI if that folder is already present in the Catalog – this is enormously helpful.
(Lightroom on the other hand, with its confusing DAM that operates independently of your computer’s hard drive, often results in disconnected files and the notorious “this image is missing” message.)
With Luminar AI, everything is simple to use and easy to pick up. It definitely gets a gold star for ease of use.
In under 20 minutes, even the most novice of beginners will have a good understanding of how it functions. Getting your photos into Luminar AI, edited using its one-click AI tools, then exported to social media really is simple, and actually quite fun too.
2. Templates for ‘Guided’ AI-Powered Editing
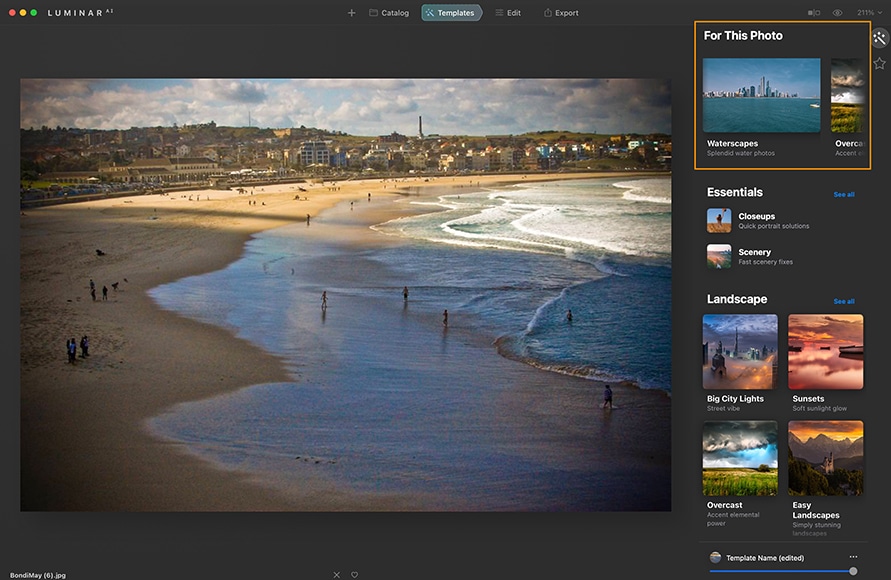
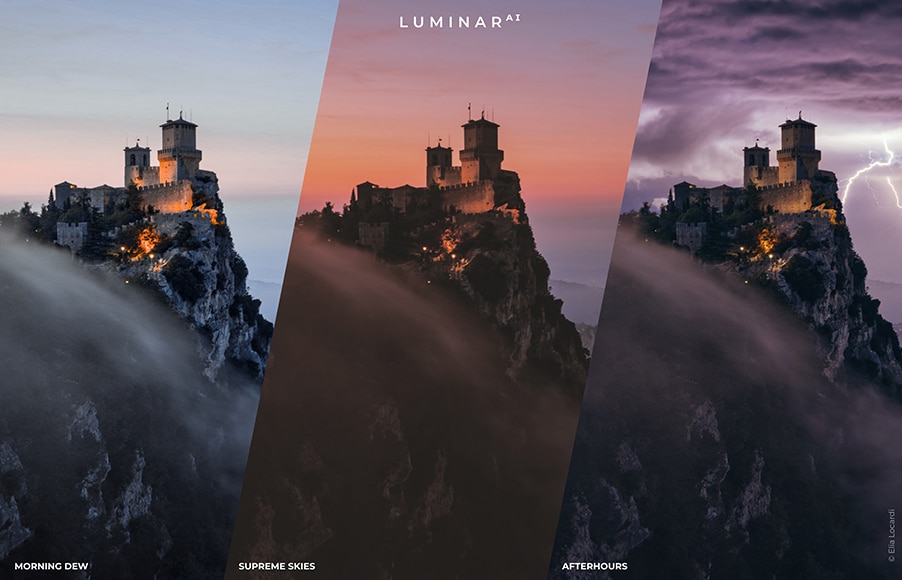
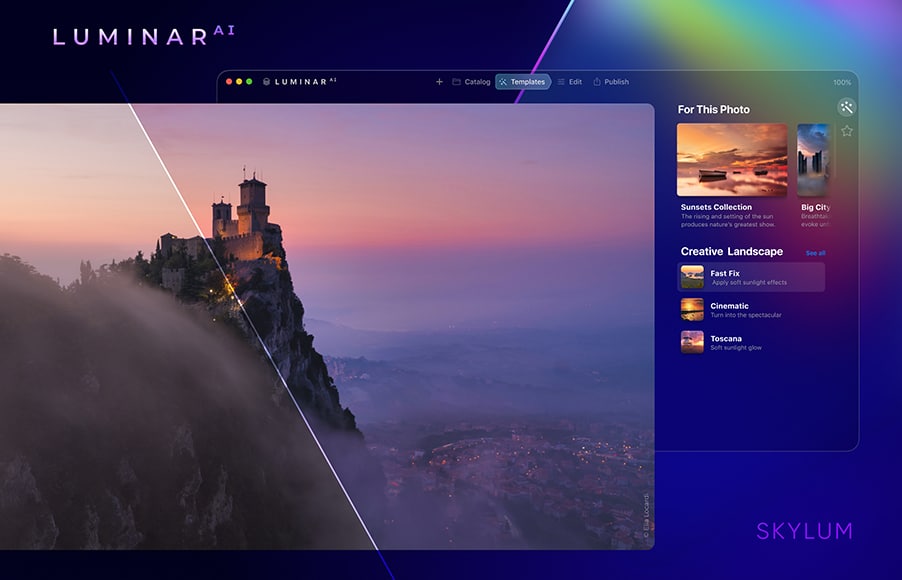
Templates offer a starting place for your editing – clicking reveals various ‘looks’ to apply.
Templates are the heart of Luminar AI, and function like a highly advanced version of presets or filters.
Once you’ve used Templates, you probably won’t go back to using regular presets again. Here’s what I mean:
Whereas a standard preset or filter ‘blindly’ applies fixed settings to an image, Luminar AI’s Templates use artificial intelligence to suggest the best edits for each photo, then apply thousands of individual micro-edits specific to the image.
Essentially, no two Template edits are the same – everything is entirely dependent on the photo you choose.
For every image, the right-hand Workspace panel displays a ‘For This Photo’ panel, with a series of Templates that Luminar AI has selected to be the best starting point to edit your image.
Importing an image of a beach at sunset, for example, might result in the Waterscapes, Sunsets and Landscapes Templates being suggested. A portrait image on the other hand may bring up Closeups, Experimental and Monochrome.
It’s not always perfect, of course, and I assume that’s why the software provides more than one suggested Template.
Clicking into each one opens up a selection of sub-Templates, with various looks to choose from – when you’ve found the one you want, you can alter the Template opacity with a slider, or add it to your favourites with the heart icon.

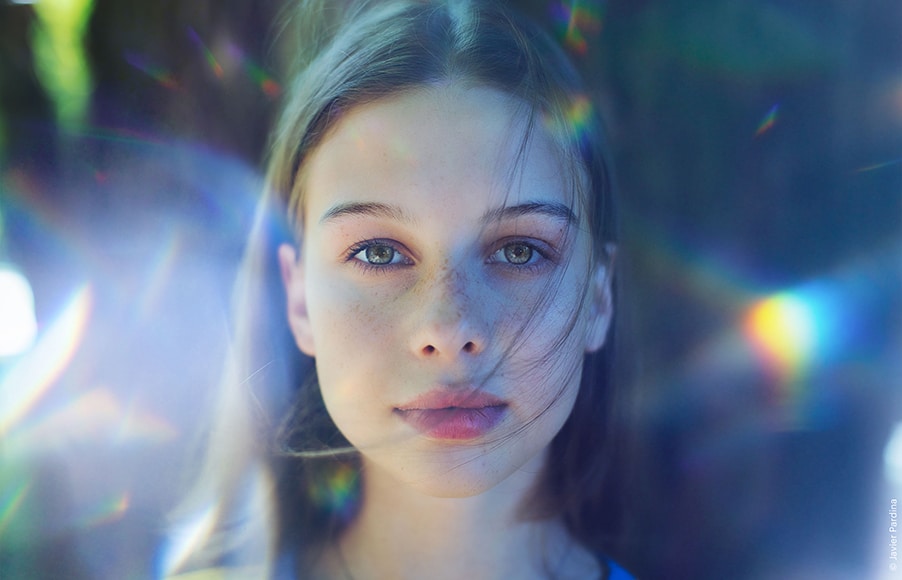
Credit: Javier Pardina
There’s no doubt that Templates are simple and fun to use – after all, it’s just a matter of clicking around to find the one that suits your tastes.
When I first wrote this Luminar AI review, I found the layout of Template options a little overwhelming and confusing. Thankfully, since Update 2, Skylum has improved the Template selection experience by reorganising them all under the ‘For This Photo’ section.
As for applying the Template, results are near-instantaneous – much faster than ‘Looks’ in Luminar 4, although there’s no preview of how the Template will look before you apply it like there is in L4.
Templates are a truly unique feature of Luminar AI and are especially useful to anyone who’s ever opened a RAW or JPEG photo and not known where to start the edit. They’re great for those unaccustomed to photo editing or people who simply want a fast and easy way to get their photo looking great.
Applying a Template will get you 90% of the way there – 100% if you’re not too picky – with the remaining 10% of the edit to be done in the Edit workspace, which we’ll discuss below in this Luminar AI review.
Interestingly, Templates are renamed ‘Presets’ in Luminar Neo – to see more of the changes, read Luminar AI vs Luminar Neo to see how it compares.
3. Luminar AI as a Powerful Plugin for Existing Lightroom, Photoshop and MacOS Photos users

Transferring images between apps with the Plugin allows you to ‘borrow’ missing tools or features.
Rather than trying to be an alternative to Adobe Lightroom (see options), Luminar AI is perhaps best used as a plugin in conjunction with Lr (version 6 and later), Photoshop (CS5 and later) or even Photos for macOS.
Each purchase of Luminar AI includes the plugin, which automatically installs to whichever of the 3 popular image editing software you may already have on your computer.
By using the Luminar AI plugin, there’s no need to disrupt your existing image editing workflow – you can pick and choose when to use its powerful toolset, then go back to your original editor.
Pro photographers who prefer using Lightroom’s superior image management features can select the ‘Edit In > Luminar AI’, take advantage of the AI-powered editing tools that don’t exist in any Adobe app, then return to Lr in one streamlined procedure – it’s the best of both worlds. Even the main Shortcut keys are the same!
Similarly, the plugin offers simple access to features not currently offered by Luminar AI, such as layer-based editing. If advanced users require this, they can simply hop over to Photoshop and back again.
Luminar AI isn’t trying to be a one-stop-shop for all your editing needs like some other products. Rather, it’s a software that offers some unique, incredibly powerful tools, all within easy reach of those with zero editing experience.
I can see most professionals using the plugin more often than the standalone app. The editing tools described below simply don’t exist elsewhere, and having them at our fingertips is invaluable.
4. Time-Saving Artificial Intelligence Powered Editing Tools
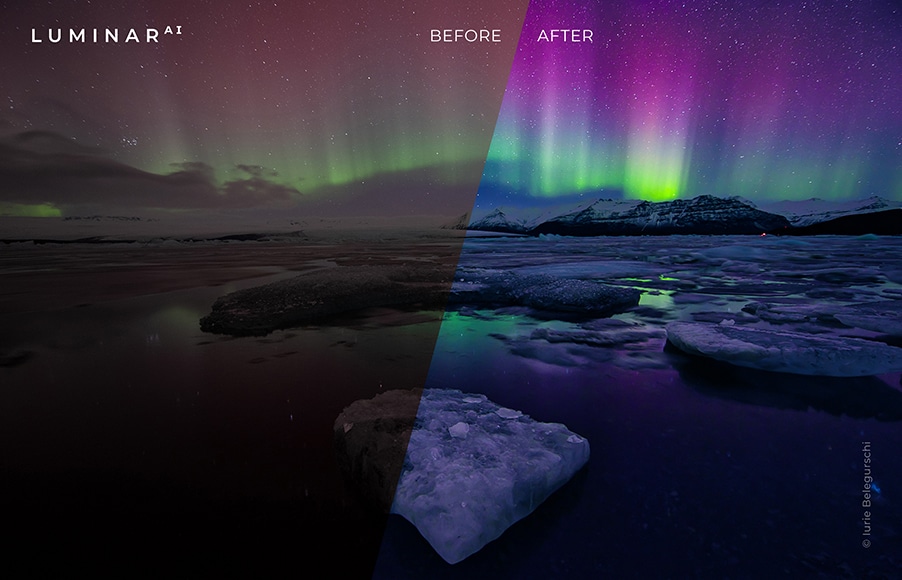
Credit: Iurie Belegurschi
It’s in Luminar AI’s Edit workspace where you can fine-tune any of the changes applied by your selected Template, or add any supplementary AI-based effects.
These AI tools are impressive, to say the least, and can save hours of time which would otherwise be spent ‘masking’ in Photoshop, or using the infamous ‘liquify’ tool.
(If you’re unfamiliar with either of these terms, don’t worry – by using Luminar AI, you’ll never have to know how tricky they are to use!)
A professional retoucher might spend hours slimming a model’s torsos or removing skin blemishes in Photoshop. Inserting a new sky into a landscape image would also be incredibly time-consuming. With Skylum Luminar AI, an absolute novice can perform these complicated edits in under a second. It really is jaw-droppingly good.
In addition to the AI tools, the Edit workspace also houses the basic editing tools – things like Exposure, Contrast, Temperature, etc. There’s even a handy (although somewhat hidden) History panel, allowing you go back in time to select a previous edit.
Despite having a robust basic image editing toolset, it’s the impressive artificial intelligence tools that set Luminar AI apart from every other photo editing software on the market in 2023
No matter what standard photographer you are, or what prior experience you may have with editing, Luminar AI is genuinely useful for everyone.
Let’s have a closer look at the headline AI tools – these are only brief summaries, so I recommend you click here to see each tool in action.
(Anything labelled ‘new’ or ‘coming soon; is exclusive to Luminar AI, with the other features carried over from Luminar 4.)
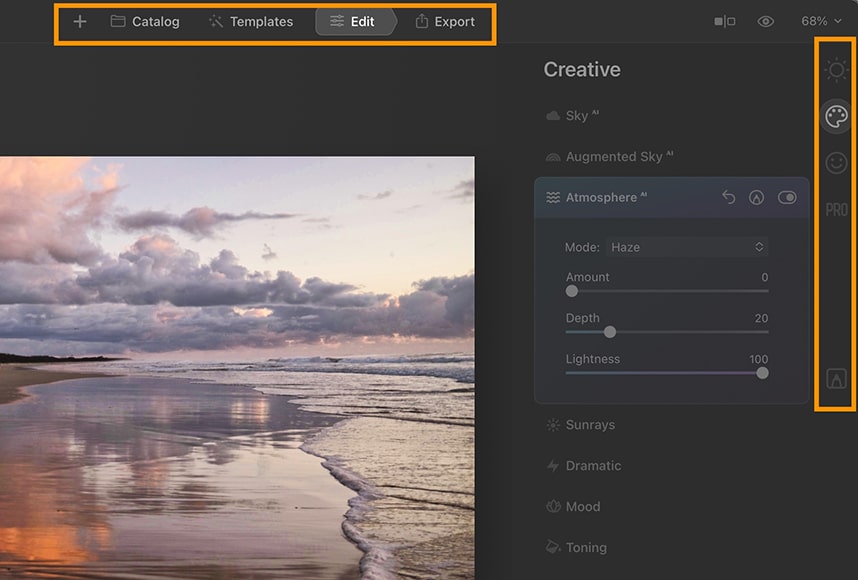
- Atmosphere AI (NEW)
Atmosphere AI adds realistic atmospheric effects to landscape images with 3D depth, such as fog, mist and haze, with steam and drizzle coming soon.
This would normally require complex Photoshop superimposing and blending – the AI identifies the various foreground and background elements, applying the edit to each various element independently.
- Body AI (NEW)
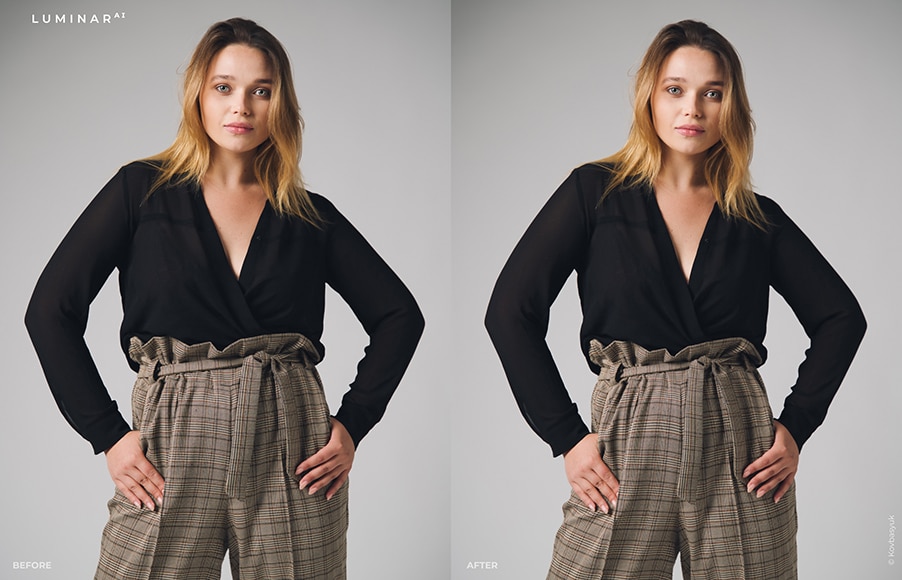
Add or subtract weight using Body AI.
Makes bodies thinner or fatter (removes or adds weight) – it’s eerily realistic! I can see this being very useful to Instagram influencers, or anyone working with models (tread carefully!)
The Body AI thinning feature is particularly useful (when used in conjunction with Face AI) to correct face/body distortion in portrait images shot with wide-angle lenses. It also works for multiple subjects in a group shot.
Coming in a future update to Body AI is the world’s first body shaping technology, which will transform a body to another position – sitting, lying down, lounging… I’ll believe that when I see it!
- Bokeh AI (COMING SOON)
Alter the out of focus areas of an image to replicate a photo shot at a large aperture with a shallow depth of field. This is available in other apps, but nothing currently achieves it well using AI.
- Composition AI (NEW)
Applies the golden rules of composition with some machine-learned magic to provide the ‘best’ composition for a photo.
I didn’t care much for Composition AI, probably because I (and any pro photographer) should always be able to compose and/or crop a photo better than AI! I guess it could be useful for a complete novice, though.
- Iris AI (NEW)
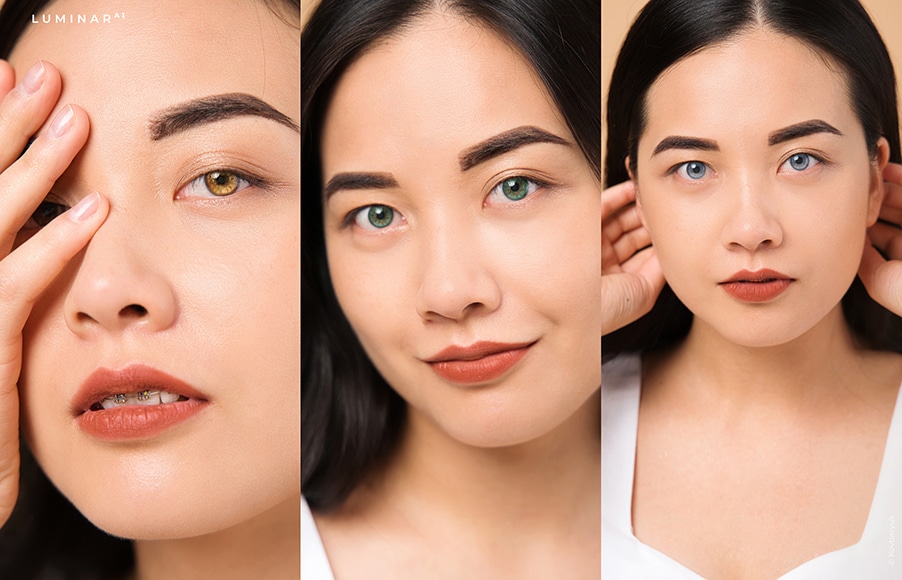
Change your subject’s eye colour realistically with one click
Iris AI changes the colour, shape, size and visibility of the subject’s iris, also working on multiple people in one shot. Amusingly, you can even apply a cat’s or owl’s eye to the subject, creating a surprisingly realistic ‘novelty contact lens’ look!
Iris AI is great for finishing portraits and adding some pop to dull eyes to help them stand out on social media. It can also be fun to see how you look with a different colour iris, all with just one click.
- Sky AI 2.0 (NEW)
Another feature exclusive to Luminar AI, Sky 2.0 brings along the remarkable ability to not only replace the sky in a photograph but also its reflection too.
If your landscape photos include water (or other reflective surfaces), this is an impressive feature – no other software is currently able to reflect any changes made to the sky.
The new sky automatically conforms to the angle and depth of the scene to produce realistic results even down to minute details. You still have manual control of the effect by adjusting a ‘Reflection Amount’ slider, in order to fine-tune the look to your tastes.
There’s also a handy ‘Scene Relighting’ feature, that helps eliminate strong colour casts from the sky on foreground objects, including human subjects.
Another handy update is the ability to preview the Skies in the Tools panel, giving you an idea of what your final result will look like before you apply it. 6 new skies have also been added for you to choose from.
- Accent AI
Accent AI adds natural lighting and boosts colours. It’s hard to say exactly what’s happening to the photo, but in most cases, it’s similar to applying an ‘Auto-enhance’ feature, except that the AI helps identify the subject and background in each photo to treat them differently.
- Augmented Sky AI
Detects the sky in a photo and adds various graphical elements such as birds, mountains, clouds, rockets and hot air balloons (!?) Augmented Sky is a bit of a gimmick in my opinion – I can’t see many people using it.
- Color Harmony
Balances saturation and vibrance to take complete control over colour depth.
- Face AI
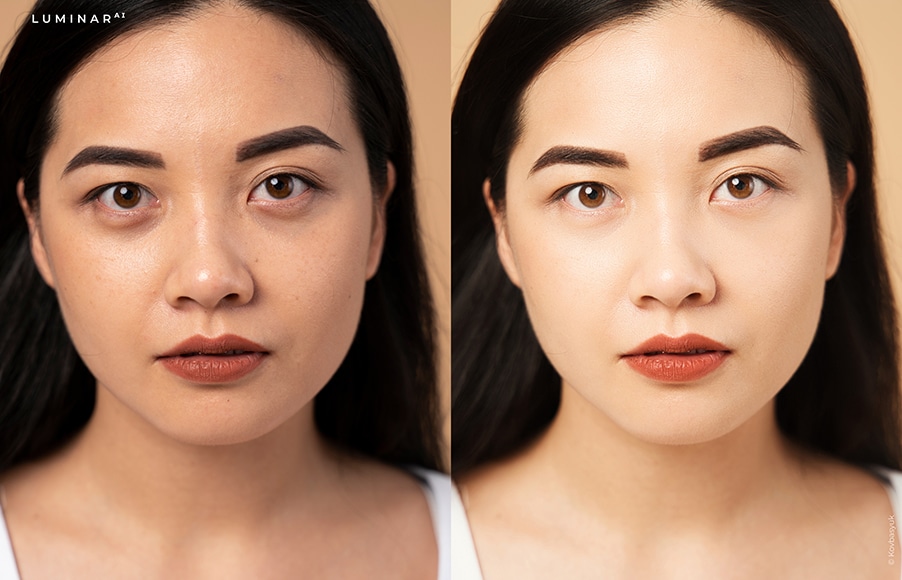
All AI portrait edits can be manually dialled back as required.
Enhances lips, removes dark circles, whitens teeth, slims the face and lightens it. Again, I can see this being useful (and addictive) for heavy social media users or fans of selfies!
The Face Light feature is especially useful for portraits, and even works on all subjects in group photos – this is great for wedding photographers who need to add brightness to each member of a family shot – normally this would require delicate ‘burning’ work with a Brush tool.
- Golden Hour
Relights the subject and scene to reflect a photo shot during the short time that precedes sunset, aka golden hour.
- Mood
Alters the mood of an image by experimenting with colour palettes and Lookup Tables (LUTs).
- Skin AI
Removes blemishes while preserving pores, texture and hair. Automatically detects and removes shine from the skin.
In practice, this works most of the time, but the AI obviously struggles to identify the difference between a mole and acne. In this instance, only a ‘real person’ can decide what to remove with editing, and what to keep!
- Sky AI
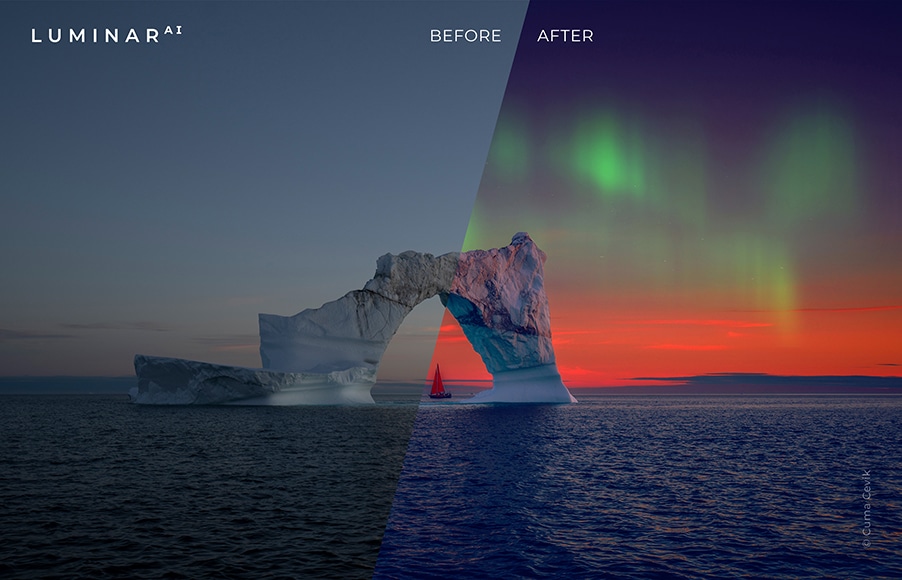
Realistically apply stunning skies or enhance what’s already there. Credit: Cuma Cevik
Replaces the sky in a photo. AI sky replacement was what made Luminar so popular and still works impressively well in this version, even when there are fine details intersecting the sky.
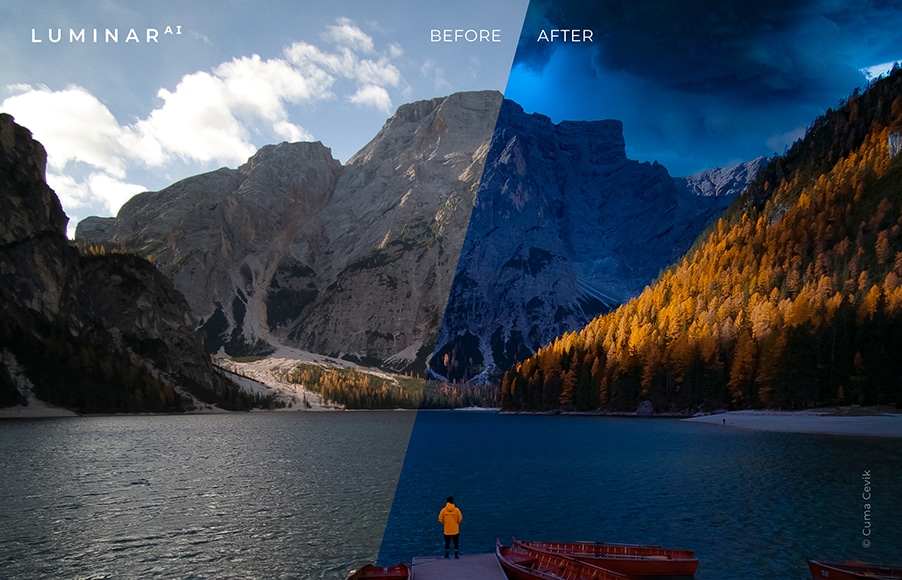
- Sky Enhancer AI
Makes seamless adjustments to skies to make them pop without looking unnatural. Save a lot of time since you don’t need to mask anything.
- Structure AI
Structure AI brings out details while adding depth and clarity. The AI recognises people, water, skies and objects, customising the edit depending on the contents of your photo. Particularly useful for architecture, cityscape and urban photos, since it helps refine textures and boost details.
- Sunrays
Adds a new sun to relight a scene, controlling its position, warmth and glow. This was my favourite feature of Luminar 4, so it’s good to see it still working so well in AI.
- Supercontrast
Adds contrast to highlights, midtones and shadows, individually – particularly useful for landscape images, when you haven’t used an ND filter to selectively control exposure.
- Texture Overlays (NEW)
This tool offers advanced tools to transform texture and PNG image overlays, allowing you to add special effects to photos, including watermarks, text, emoticons and other decorations. Once saved to a Template, you can sync them across multiple images.
5. Manual Masking Tools to Take Full Control and Selectively Add or Remove AI Edits
Any AI edits can be selectively removed using the Mask feature.
This feature is more relevant to users who are comfortable with more advanced image editing techniques, or who want to take full manual control over all the AI black magic going on here!
Each of the main tools in Luminar AI include an Edit Mask option, which allows you to selectively ‘erase’ any edits that were automatically applied by the software, leaving you in complete control of the final outcome.
When applying the Face Light tool to an image containing several people, for example, you could selectively erase the effect on any members of the group who have much paler skin.
Another example might be when applying Skin AI to a mother holding a baby to smooth out her wrinkles, then erasing the effect on the baby’s face.
In summary, it’s nice to know that we retain the ability to influence the final edit… even if we do want to cheat a little with AI!
6. AI Tools that Conform to Individual Images for Simplified Batch Editing
This is a huge benefit for pro photographers – namely, the ability to copy any AI edits from one photo to the next… and have the edits conform specifically to the photo.
Honestly, this is a gamechanger!
Now I can use Face AI to lighten every face in a group photo, apply eye whitening or even some iris flare (why not?!), then copy the edits using ctrl/command C, move to the next group photo containing different people, and ctrl/command V to paste the edits onto it!
Copy/pasting AI enhanced edits has never been possible before – this is a HUGE time-saver for anyone who needs to edit a series of similar images, notably groups of people.
Unfortunately, you’re not able to select several files at once to apply the batch edits, and there’s no single button to copy/paste edits. Hopefully, this will come in a future update.
7. Overall Performance – How Fast is Luminar AI?
As long as your computer meets the requirements, performance is fast and fluid. Credit: Cuma Cevik
A common complaint with Luminar 4 was about speed. In fact, most modern photo editors perform sluggishly, since handling lots of large files is inherently a processor-intensive task.
While Luminar 4 offered basic file-management and DAM capabilities, Luminar AI has been rebuilt from scratch to be simplified, more efficient and much more lightweight. With this comes a big improvement in speed.
Without the need to reference any archaic catalogue structure or chew through any complex metadata upon opening the app, Luminar AI functions refreshingly fast.
I tested on a 2020 quad-core 32GB Macbook Pro i7, and also gave it a whirl on my wife’s underpowered 2015 Macbook Air.
In both cases, Template edits were virtually instantaneous, and switching between modules suffered no delay. Occasionally things would pause when using one of the selective Edit tools, but no delays from the AI features, which I found surprising.
Switching from photo to photo incurs a slight pause while the software creates a shaper preview, presumably while analysing its content – the only clue that Luminar AI is actually processing a task is a cute animation over the logo in the top-left of the Workspace.
What’s Missing? Cons of Luminar AI
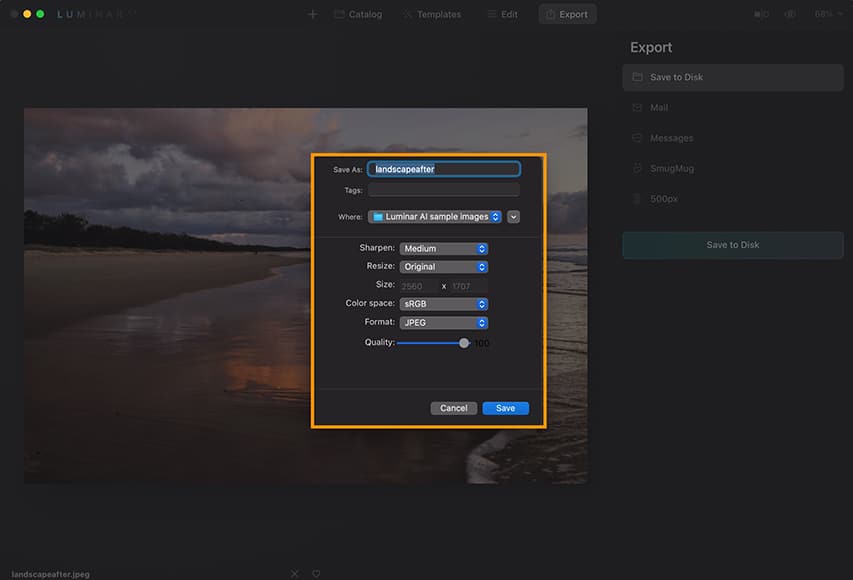
The lack of export options may deter standalone app users, but this is easily rectified when using the plug in.
This being an impartial Luminar AI review, here are the things that are missing, or that annoyed me while testing the final Beta version of the standalone photo editor and plug in:
- Inability to batch rename exports
- Inability to add watermarks to exports (you add them as a Texture layer)
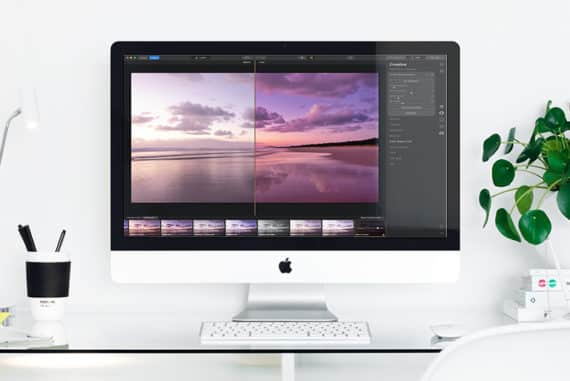
- Inability to compare two photos side by side
- No layer-based edits
- No keywording, tagging, starring or labelling of files
- No multi-photo batch editing (only one-by-one)
- Can’t transfer any existing Luminar 3 or 4 catalogues
- Can’t continue to edit while images are exporting
- Some advanced features are harder to locate
- Confusing pricing
Skylum is keen to emphasize that Luminar AI is NOT an upgrade or sequel to Luminar 4 – it’s a completely new photo editor, totally independent or previous editions. In this way, you can’t move your L4 catalogue directly to AI.
Most of the other missing features noted above can be solved by using the Plugin.
For example, you could start your edit in Lightroom Classic, then transfer the image to Luminar AI via the Lr plugin, do whatever artificial-intelligence-powered wizardry you want, then transfer it back to Lr, to be keyworded, tagged and exported with a watermark!
Similarly, you could start an edit in Luminar AI, then transfer it over to Photoshop for some layer-based additions, then back again for exporting.
Even the exporting can be handled in another software, allowing you to continue to use Luminar AI while this is taking place.
Who is Luminar AI for?
These are the usage cases that I’ve identified while writing this Luminar AI review. It’s a great piece of software for:
- Beginners and non-photographers who don’t have the time nor desire to learn how to edit
- Hobbyist and advanced/professional photographers who want to save time from complex portrait retouching
- Portrait, wedding, family and event photographers who need to apply complex people edits to multiple photos
- Photographers of all standards who want to experiment editing landscape photography with minimal effort
- Existing Lightroom users who want to save time from complex edits (using the plugin)
- Social media influencers who need an easy and quick way to upload polished photos
- Small business owners who need great images but are short on time
Who is Luminar AI NOT for?
- Advanced photo retouchers who are too skilled (proud?!) to use artificial intelligence
- Anyone who is happy with Luminar 4 and doesn’t need the supplementary new tools
- Anyone who needs to manage/edit thousands of images in the same software
- Anyone looking for an all-in-one Lightroom replacement
- If you need a layer-based editing solution, check out Luminar Neo
Luminar AI Price + Promo Code
Now for the big question: How much is Luminar AI?
This is where it gets a bit confusing – here are the purchasing options correct as of November 2023:
- Buy Luminar AI on its own for use on one device (or pay a bit extra for use on two devices)
- Buy Luminar AI Plus Bundle (includes two licenses and two Sky replacement packs),
- Buy Luminar AI Max Bundle Bundle (includes two licenses, Luminar 4 with two licesnses + Aurora HDR + Photographic Storytelling video course.)
Since the prices and bonuses may change, I recommend you click below to find out the latest offers.
Although not heavily publicised, Skylum offers a 30-day money-back guarantee.
This means that you can experiment with Luminar AI on your own photos for a month before deciding whether you want to keep it forever.
Remember to use code shotkit10neo to save $10.
FAQs
Does Luminar AI replace Luminar 4?
Well, yes and no. Luminar AI is NOT the successor to Luminar 4 – it’s an entirely new product, enhancing some of the features of L4, and simplifying others.
While Luminar 4 offers various advanced editing tools in conjunction with basic AI features, Luminar AI everything to the next level, foregoing some of the complexities of L4 in favour of a faster, simpler and more powerful editing solution.
Luminar 4 impressed us all with a small handful of AI tools, but Luminar AI has been redesigned from the ground up to be completely powered by AI – photographers of all standards can take advantage of the AI tools for landscape photography, portrait retouching, general image enhancement and more.
If you’re an existing Luminar 4 user trying to compare Luminar AI vs Luminar 4, we’ll discuss the features exclusive to this newer version later in this Luminar AI review to help you decide whether it’s worth upgrading.
What are the System Requirements?
For Mac:
- MacBook, MacBook Air, MacBook Pro, iMac, iMac Pro, Mac Pro, Mac mini, early 2010 or newer
- CPU Intel® Core™ i5 or better
- Memory 8 GB RAM or more (16+ GB RAM is recommended)
- macOS 10.13.6 or higher. macOS 10.12 is not supported.
- Hard disk 10 GB free space; SSD for best performance
- Display 1280×768 size or better
For Windows:
- Windows-based hardware PC with mouse or similar input device
- CPU Intel® Core™ i5 or better, AMD Ryzen™ 5 or better
- Open GL 3.3 or later compatible Graphics Cards
- Memory 8 GB RAM or more (16+ GB RAM is recommended)
- Operating System Windows 10 (only 64-bit OS). Windows 7 and Windows 8.1 are not supported.
- Hard disk 10 GB free space; SSD for best performance
- Display 1280×768 size or better
What are the Supported Languages:
- English
- German
- Spanish
- French
- Portuguese
- Italian
- Chinese Simplified
- Chinese Traditional
- Korean
- Russian
- Japanese
- Dutch
How much does Luminar cost?
According to Skylum’s website, Lumina NEO has three plans available:
- Explore: Costs $9.95 monthly fees or $8.25 per month for an annual subscription, including a one-computer license with a 5% marketplace discount. This package doesn’t contain all the program’s features.
- Pro: Costs $14.95 monthly fees or $9.92 per month for an annual subscription, including a two-computer license with a 10% marketplace discount. This package contains all the program’s features.
- Lifetime: Costs $149 as a one-time purchase, including a one-computer license and no marketplace discount. This package also doesn’t include access to any future extensions or upgrades.
Luminar AI Updates
Throughout the year, Skylum attempts to fix bugs and make improvements to the original Luminar AI software.
Updates are free – just click on the Luminar AI logo in the top menu bar, then choose ‘Check for Updates’ on Mac, ‘Help > Check for Updates’ on Windows.
If you’re running LuminarAI as a plugin for Photoshop or Lightroom Classic, you should rerun the plugin installer.
Below is a summary of the latest updates. Visit the website for more details.
Update 5 (October 2021)
- For This Photo in Sky AI
- New camera support
- Luminar AI launches in Microsoft Store
Update 4 (July 2021)
- Portrait Bokeh AI
- Improved Textures
- Horizon Control in Sky AI
Update 3 (May 2021)
- Better Sky Detection
- Better Reflections
- Better Relighting
- Apple M1 Support
- HEIC Support
- Updated Augmented Sky
- Updated Dodge & Burn Tool
Update 2 (March 2021)
- Sky Reflections
- Scene Relighting
- Sky Orientation
- Sky Previews
- Texture Overlays
- Updated Templates
- Improved camera support
- General bug fixes
v1.0.1 (Jan 2021)
- More convenient edit panel
- New import interface
- Enhance AI by default
- Simpler Template selection
- Redesigned Toning tool
- Tool tips
- Additional language localization
Luminar AI Review | Final Words
With Luminar AI, Skylum has created is a truly revolutionary piece of software at an affordable price.
It offers Tesla-Autopilot-like self-driving capabilities – it’ll get you to the same destination, but with a lot less effort… and if you want to take the steering wheel for full control, you still can!
Tenuous car analogies aside, all you need to know is this – Luminar AI can help unskilled people produce images that previously only highly-skilled people could produce… and all in a matter of seconds.
Using Luminar AI is so easy that it can feel like cheating… but as your audience will only ever see the final result…. who cares!
Simple, fast, fun and affordable way to make your photos look 10x better. Zero editing experience required.
Use code shotkit10neo to save $10


Mark Condon is a British wedding photographer and editor of Shotkit. When he’s not taking photos or reviewing the latest camera gear and software, Mark can be found cycling around the northern rivers.


WELCOME TO SHOTKIT
Enter your email to be sent
today's Welcome Gift:
19 Photography Tools
🔥 Popular NOW:


Shotkit may earn a commission on affiliate links. Learn more.