


How to Use Luminar Neo in 2023: Beginner’s Guide
If you're looking for a fun, affordable and powerful picture editor that's also easy to use, Luminar Neo is a great choice. Here's how to use it properly.
Luminar | Software | By Andrew Dilks
Luminar Neo is a photo editing software powered by artificial intelligence.
I learned how to use Luminar Neo for my photography business, and it saved me so much time and energy I used to spend editing photos.
I find it super easy to edit and enhance photos on this software, and I’d love to show you how to use Luminar Neo, too.
Check out this guide as I take you through the ins and outs of this exciting photo editing platform.
Download the latest version of Luminar Neo to follow along with this simple tutorial.
Use code shotkit10neo to save $10
Table of Contents
How to Use Luminar Neo: Beginner’s Guide
Luminar Neo by Skylum is a powerful AI photo editor that simplifies a variety of editing tasks for beautiful finished images.
This software works on Windows and Mac, with smart technology used to enhance lighting, change the background, or remove blemishes in just a few clicks.
Here are my top tips on how to use Luminar Neo and get the most out of this editing software.
(You might also like to watch these Luminar tutorials for some extra tips.)
Setting up Luminar Neo

Pricing options for Neo – correct at March 2023.
To download and install Luminar Neo, you must purchase Luminar on Skylum’s website.
There are currently 3 ways to buy Luminar Neo – I recommend the ‘Lifetime’ option (available here), since it means you own the software outright with no ongoing subscription fees.
Register for a Skylum account or log into your existing account. Under My Software, find Luminar Neo and click download.
You will need to activate the software with a license key and follow the on-screen instructions to install the software on your computer.
Keep in mind Luminar Neo requires Windows 10 or macOS 10.13.6 or higher. You can read the full system requirements on Skylum’s website.
- Related: How to install Luminar Neo
Basic Interface and Navigation

Library view is well organised.
Now, let’s dive into the Luminar Neo interface. There are two main areas with access controls: Catalog for browsing and navigating images and Edit for enhancing photos.
To navigate the layout, simply click between Catalog, Edit, and Info in the top right-hand corner.
In the Catalog view, you’ll see a toolbar with frequently used commands and navigation buttons to switch between folders.
You can adjust the magnification level and view the library side panel for shortcuts.
Edit view is how you enhance images, with popular functions available in the toolbar.
Photo histograms, layers, and adjustment tools are in the side panel. You can save one-click presets from the Action menu in the Luminar Looks Panel at the bottom of your screen.
Info view is where you’ll find photo details, including the current resolution, size, and camera model used to take the picture.
Importing and Organizing Images
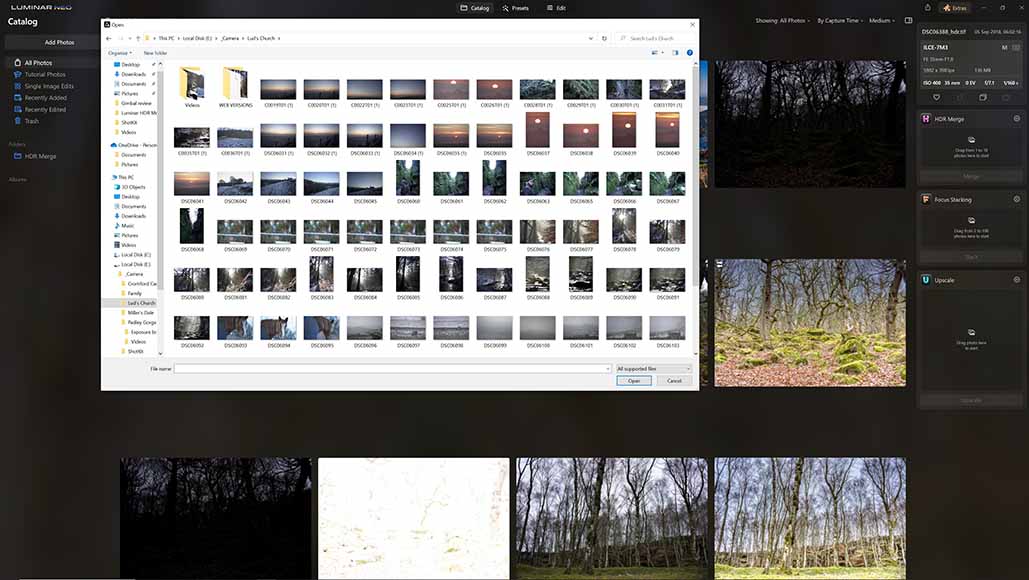
Import your images from your file browser or just drag and drop.
Next, it’s important you know how to import images into Luminar Neo. You can import photos from an internal or external hard drive or a memory card.
Click the Open Button Menu and hover the cursor over Import Images, which will bring up all available library folders.
Select File>Import Images and select the images and/or folder you wish to import.
Choose the Organize dropdown menu to confirm how the images should be sorted into subfolders.
You can tick the Include Subfolders box if you want images from all subfolders to be imported.
Luminar Neo offers several ways to organize and sort images within the software:
- One folder – place all images into a single level with no subfolders
- Existing folders – maintain current folder setup with subfolders created
- Year/month – Luminar will automatically create subfolders by the year and month the photo was taken
- Year/month/day – for more detailed organization, let Luminar sort photos by the exact date
You have the option of importing images to an existing folder or making a new one.
To create a new master folder, use the Add Folder button in the Library Panel. Use the New Folder button and then import your photos accordingly.
Luminar Neo makes it easy to organize images in folders and sub-folders within the platform.
You can move photos to different folders or move images from the Quick Edit collection to a storage folder.
Editing Tools
The AI-powered tools are simple to use, and the advanced editing tools provide granular control.
Luminar Neo has a variety of quick editing tools to enhance images in just a few clicks.
Make sure you are in Edit view, and then you can access all of these tools and more.
The Adjustable Gradient filter is one of the key tools for fast enhancements, as it lets you selectively adjust exposure, contrast, warmth, and vibrance in two different parts of the photo.
For exposure, move the slider to the left for a darker image or the right for a brighter image.
Further refine the image by adjusting the relative exposure at both the top and the bottom.
Also, use the Adjustable Gradient to control the contrast, adjusting the difference between the color and brightness within the image.
The warmth slider is an easy way to change how cool or warm a photo appears. Choose a positive value for greater warmth or a negative value for a cooler look.
The Smart Saturation control enhances vibrance by making less vibrant colors more noticeable. It has a minimal effect on already vibrant colors, so it’s ideal for enhancing secondary shades.
Other options for color correction include professional filters.
The Advanced Contrast feature is a prime example, with sliders for elective adjustments to highlights, midtones, shadows, and balance.
Channel Mixer lets you fine-tune red, green, and blue (RGB) color channels for custom images.
The Clone tool replaces unwanted pixels with better pixels to hide blemishes. The feathering feature is great for seamless stroke blending.
You can quickly make layer masks, too. Luminar Neo has four mask types: brush, linear gradient, radial gradient, and Mask (AI).
Saving and Exporting Images
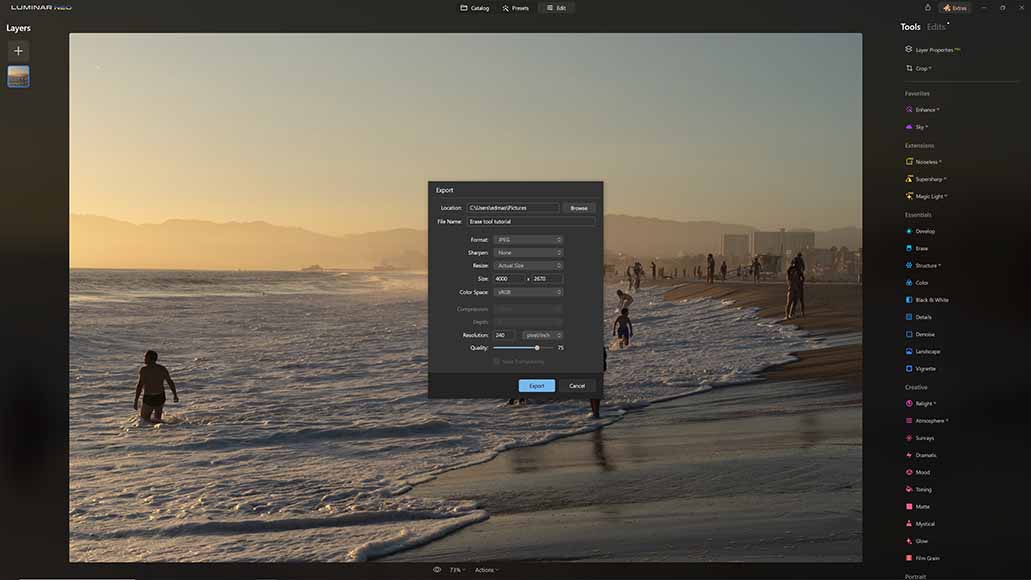
You can export images at various sizes.
You don’t have to do anything fancy to save your edited images within Luminar Neo, as the software automatically saves changes in your Catalog.
Once you’re ready to export your images in various file formats for sharing or printing, find the Export button at the top right corner of your screen. You can also right-click on the image to bring up Export options.
Either way, you’ll see a dialog box with options to save the image in a variety of formats, such as JPEG, PNG, PNG, PDF, and PSD.
A quick tip for you: for sharing photos via email or the web, choose JPEG and move the Quality slider to 85. Export the image to generate the file.
I also suggest saving photos as TIFF files if you want to archive the image and preserve the colors and details. I like to use TIFF files for printing.
Other options for exporting images include the sharpen setting, which increases details and offsets compression in JPEG formats.
You can export in three color spaces:
- sRGB – narrowest but most compatible with web applications
- Adobe RGB – commonly used in software and computer graphics
- ProPhoto RGB – widest color space for the broadest color range, the only one that can contain all raw colors in an image
JPEG is one of the available formats that let you assign a quality setting to adjust the file size and compression.
When exporting just one file, you can update the file name in the Export Image display. For multiple image exports, the exported files will hold the original file names.
How the Luminar Neo Catalog Saves Edits
One of the key benefits of editing in Luminar Neo is automatic saving.
Any adjustments you make are stored as you work in the Catalog database.
The software saves every edit, so you have unlimited undos and can review changes in the Edits tab.
If you quit the program and reopen the catalog, all individual image edits will be preserved.
Image edits are saved as a .state file so if there are any issues, it won’t corrupt the whole folder.
What Are Luminar Neo’s Best Features?
Skylum’s Luminar Neo stands out from other photo editors with a variety of innovative features that support automatic editing to achieve polished photos in just seconds.
Let’s take a closer look at some of the most popular features on this AI-powered photo editing software.
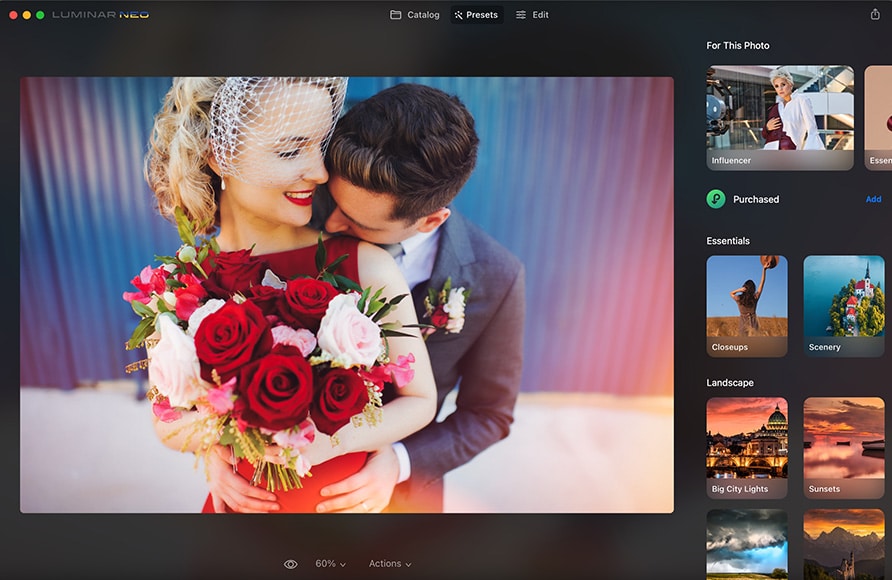
Luminar Neo Presets

The ‘For this photo’ presets can save tons of time.
According to Skylum, Luminar Neo was created to make photo editing fast and fun, and Presets make that possible.
Presets use AI to scan each image for strong and weak points. Presets automatically fix common problems and enhance images for a high-quality finish.
This feature combines the latest trends with classic photo design elements to refine images for the best results.
You can refine and customize Presets, and then save these settings to sync across numerous photos, even those captured in different locations.
I find Presets a great place to start if I need a bit of inspiration to fix up a batch of photos.
When I’m not satisfied with the initial image color or lighting, Presets point me in the right direction.
Presets are easy to use, as you just need to click at the top of the screen to move into Presets Browser.
Once the Presets panel is open, check out suggested templates for a particular photo, or look through collections sorted into categories.
Just click on the Preset name and it will automatically apply to the image. Click on a different Present name to experiment with several options.
Switch to the Edit tab to make any further adjustments. You’ll notice the tools used for the Preset with a dot next to the name if you want to fine-tune the image with tool controls.
Remember to press Save as Preset so your tailored adjustments are ready to apply to more photos in the future.
Luminar Neo Sky Replacement Tool
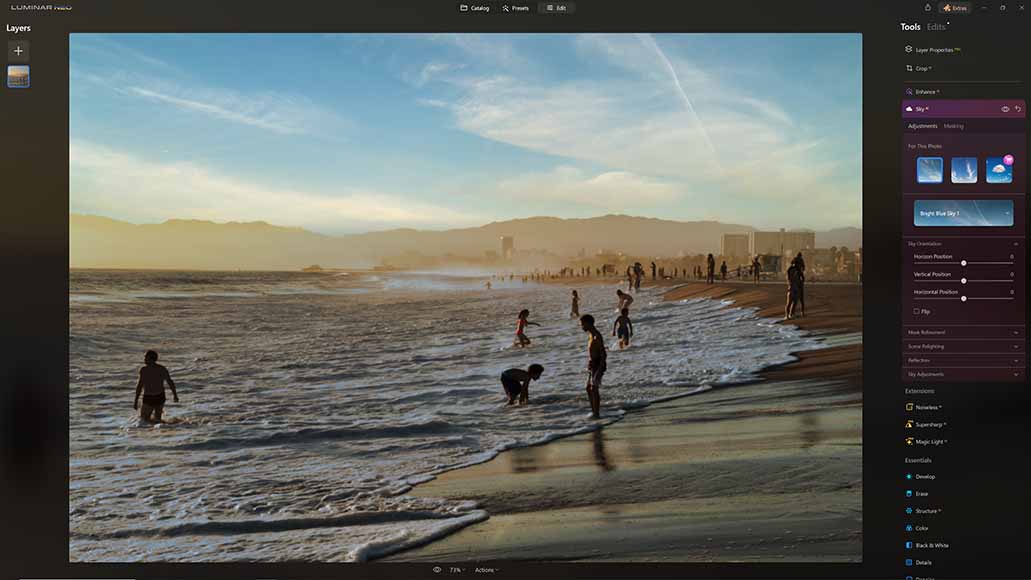
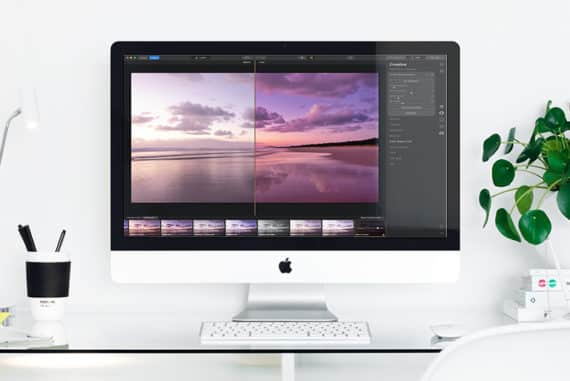
Neo’s sky replacement tool is what made the software famous.
The Sky AI tool is one of the most popular creative tools on Luminar Neo.
If the sky in your original image looks average, this tool automatically creates a more compelling, eye-catching image by replacing the existing sky with a wide range of styles and colors.
Choose from different shades of blue and cloud covers to transform nature shots and cityscapes into beautiful finished photos.
Sky AI automatically identifies where the sky starts and ends and recognizes any water reflected in the image.
The tool smoothly replaces the original sky and adds water reflections as required for a realistic finish.
All you need to do is select which sky you want to use in the tool panel, and add your favorites to your custom skies folder.
While Luminar Neo AI automatically adjusts the sky to suit your image, you can still make edits using the control options.
Use Shifting Horizon Control to refine the sky’s position by rotating and/or blending the horizon.
Slide Vertical Position controls to place the new sky precisely how you want it, as AI matches the sky and reflection so the clouds and water look natural.
You can flip the sky, shift and rotate the horizontal position, and use mask refinement to fix details.
Several sliders help with relighting the scene, too. Relight Strength adjusts exposure while Relight Saturation adds the color of the new sky to the rest of the scene. Relight Human helps match people and the sky for a more realistic appearance, too.
Reflection Amount, Water Blur, Atmospheric Haze, and Defocus are other adjustment options to try with your new sky.
If you have your own skies that you’d like to save, you can upload the JPEG files into the tool’s custom folder.
Luminar Neo Portrait AI
Luminar Neo also offers Portrait AI tools, which are designed to recognize facial features and enhance them in a subtle, natural way.
To achieve the best results with these tools, make sure the face fills 25% or more of the frame. If multiple people are in the photo, Portrait AI will pick up on them, as long as they are large enough.
To work with Portrait AI, open an image and find Portrait Tools in the Edit sidebar.
Start with the Portrait Bokeh AI Tool, which is named after the Japanese term bokeh, which describes the aesthetic blur behind the portrait subject.
If you want the area behind your subject to appear out of focus, the Portrait Bokeh tool simulates this effect on any portrait.
Even if the lens and lighting weren’t that great, Portrait AI can transform the background so the subject stands out.
You can adjust the amount of background blur as AI generates an initial mask to separate people from the horizon.
The Amount slider creates a ready-to-use mask, but you can always refine it with the Focus, Defocus, and Restore brushes. You have the option to adjust the radius, softness, and opacity of the brush, too.
Background controls may be used to adjust the brightness, warmth, highlights, depth, and edges. Adjust the slider as needed to reach the ideal settings, otherwise, you can use the initial Portrait AI result for a quick finish.
The Face, Skin, and Body AI tools also come in handy for portraits, simplifying the enhancement process for certain features.
For example, these portrait tools remove dark circles from under the eyes and whiten teeth automatically to ensure subjects look their best.
I also like the High Key tool, which creates high-contrast images often used for fashion and beauty shoots.
Use the slider to adjust the effect’s intensity and add glow, contrast, and saturation as desired.
Luminar Neo Extensions

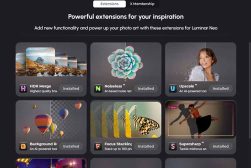
How to use Luminar Neo – extensions
Luminar Neo’s 2022 Extensions Pack further expands the software’s capability and assists with specific photo editing tasks.
Magic Light AI enhances street and background lights for sparkling city scenes.
Use control sliders to update light intensity, size, clearness, and glow. You may customize the number of light beams and widths, or use masking for greater precision.
Supersharp AI is another popular Luminar Neo extension. It fixes misfocus and motion blur by analyzing the photo depth and perspective.
AI generates a compression algorithm for a crisp, sharp photo with greater stability and minimal blur – it’s a great way to fix blurry photos.
Focus Stacking can stack as many as 100 photos with various depths, automatically aligning, cropping, and balancing them.
This AI tool selects the areas with the best focus and corrects chromatic and lens anomalies for high-quality finished images with noticeable detail.
Background Removal AI detects the primary subject and up to nine other elements to remove the background from. The refinement brush is great for touching up imperfections.
There’s also the Upscale extension, which uses AI to enhance image resolution up to 6X.
Noiseless AI eliminates noise without smoothing the image, ensuring a natural finish to raw and JPEG images.
HDR Merge uses tone mapping technology to combine up to 10 images for greater dynamic range.
Luminar Neo extensions also include Structure AI for background image contrast and Relight AI to enhance 2D images in 3D space.
Lastly, Supercontrast has six AI controls for detailed definition, highlights and shadows. The Accent AI sliders are great for enhancing image tone, saturation, and exposure, too.
Luminar Neo Plugin
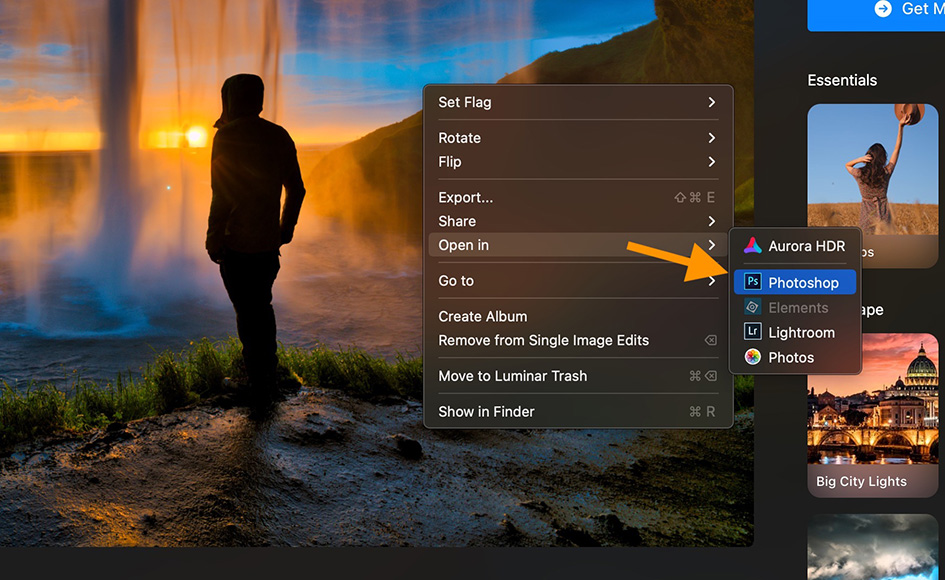
When you install Luminar Neo, you’re given the option to also install the Luminar plugin for Lightroom, Photoshop and Apple Photos.
If you already own any of these apps, I recommend you install the plugin, so you can use them in conjunction with Luminar.
For example, you can be editing a photo as normal in Neo, then choose to open it up in Photoshop without actually leaving Neo.
Then, when your Photoshop edits are complete, you can come back to editing it in Luminar Neo.
You can also do the reverse by opening photos in Lightroom, Photoshop or Apple Photos, then ‘sending’ them for edits in Neo, then either bringing them back to the original app, or leaving them there.
Is Luminar Neo Good For Beginners?
Luminar Neo is a newer photo editing software compared to Photoshop, but it’s quickly become popular with beginners thanks to the easy interface, navigation, and editing capabilities.
I definitely agree that Luminar Neo is beginner-friendly, given how it has a number of AI editing features to enhance photos in just a few clicks.
Here are a few more features to consider when using Luminar Neo to edit images.
CropAI Tool
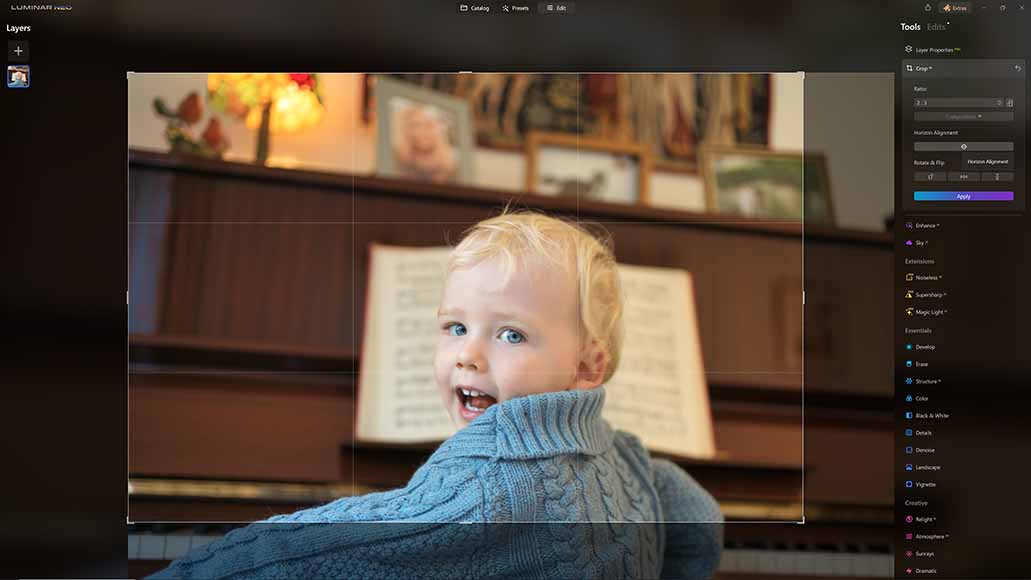
Crop AI is great for users who don’t know about the rule of thirds.
Luminar Neo speeds up the cropping process with the CropAI tool, which automatically adjusts the photo’s crop, composition, and perspective.
Choose from Auto Horizon Alignment or Auto Verticals Straighten, and use the manual crop to make any minor adjustments if needed.
What I love about the CropAI tool is that it’s non-destructive, so you can edit or reset the crop at any time without losing the original image.
One-click tools make rotating and flipping the image very simple, too. Try rotating counterclockwise or flipping on the horizontal or vertical axis.
There’s also a number of aspect ratios in the dropdown menu, including free (custom shape) and original for preserving the photo’s shape with a tight crop to remove details on the edge.
Square and Facebook cover/feed are some of the most popular aspect ratios, and you can edit and export photos in just a few minutes to keep your projects on track.
Develop/Develop RAW Tool
Luminar Neo also has the Develop/Develop RAW Tool, which includes the top controls for adjusting image color and tone.
When you open an unedited raw file, the RAW indicator will pop up next to the Develop tab.
Any adjustments made with Develop RAW will update the settings for future edits.
All RAW images will apply this tool first, although settings may be adjusted whenever you need to.
With the Develop tool, you can adjust the exposure, smart contrast, highlight, shadows, curves, sharpness, and noise reduction.
Simply move the sliders to achieve the desired settings for raw photos.
I also recommend DNG camera profiles to help with raw file color and tone, speeding up the editing process even more.
Enhance AI Tool
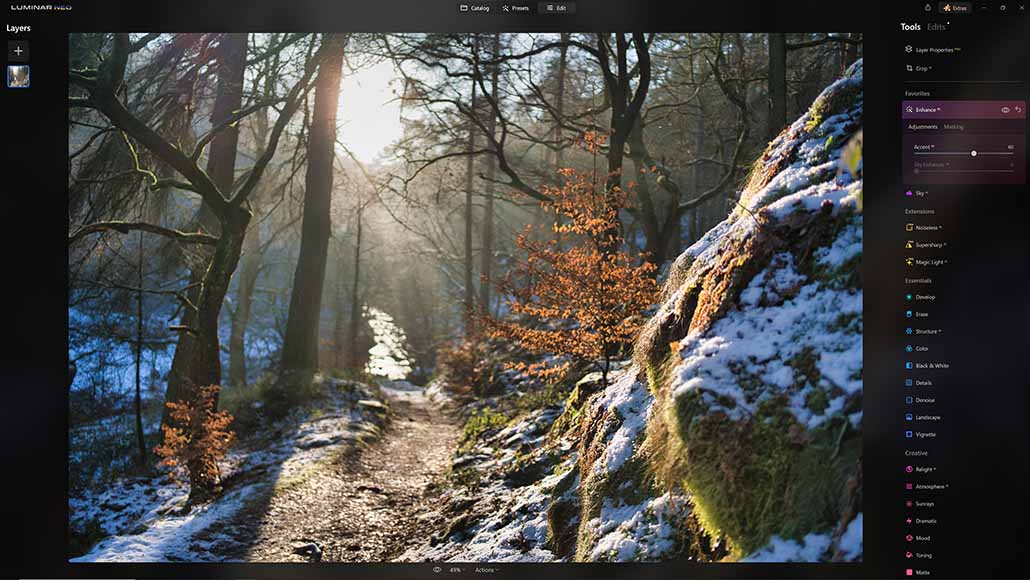
Enhance AI is the easiest way to give a photo some punch.
Luminar Neo uses artificial intelligence to quickly enhance photos for a polished, professional look.
The Enhance tool analyzes the image and makes instant corrections while giving you manual control over the level of correction.
Accent AI contains more than 12 settings, all controlled with one slider. This includes highlights, shadows, contrast, saturation, exposure, and tone.
The Sky Enhancer AI tool identifies the sky in a photo and automatically enhances the color, texture, and tone.
Sky Enhancer distinguishes between the sky, water, and other background elements to make masking easy.
If you want a more vivid sky to make outdoor photos pop, I highly suggest using the Enhance AI tool.
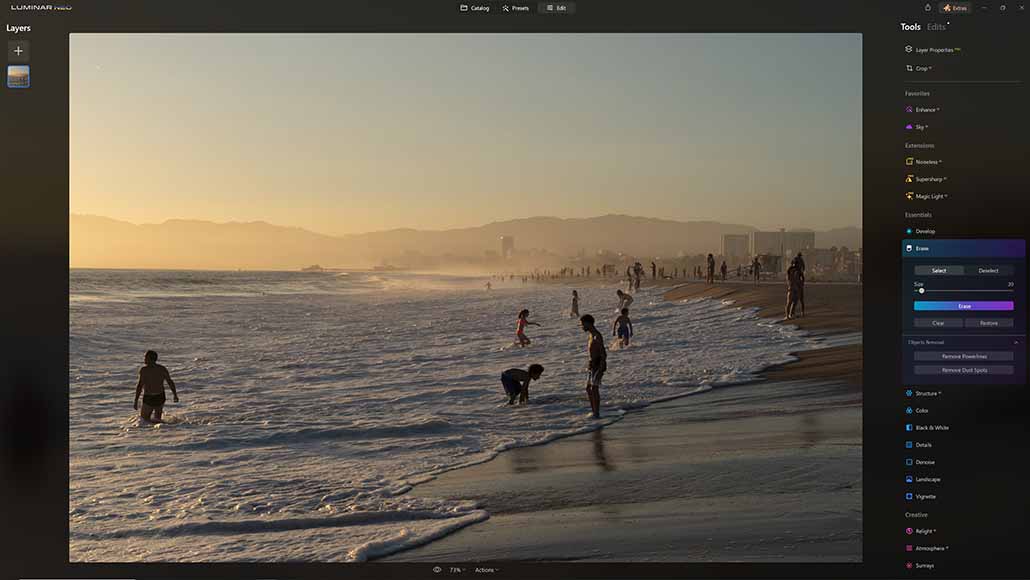
Erase Tool
One of the biggest demands for photo editing software is eraser capabilities.
Luminar Neo’s Erase tool is non-destructive and matches the image’s original lighting, shading, and texture without a new layer.
Once you select the Erase tool, the cursor turns into a brush, creating a red overlay for eraser selections.
Simply click the Deselect button to remove brush eraser selections. When you’re ready to go, click Erase and watch the affected pixels disappear.
You can always restore the original photo if you’re not satisfied with the eraser.
What’s great about Luminar Neo Erase is that it examines the nearby pixels to create new pixels with similar texture and shading.
You may also want to check out the Remove Powerlines tool, which quickly removes unwanted objects from the sky in a landscape photo.
I’ve used Remove Powerlines for telephone poles, planes, and background buildings. I was really impressed that it took just a few seconds to clean up the sky.
One other Eraser option is the Remove Dust Spots tool, which cleans up the effect of dust and dirt on the camera sensor or lens.
AI makes it possible to remove dust blemishes from the photo without compromising quality.
Final Thoughts on Using Luminar Neo
If you’re new to photo editing or you want to spend less time on the computer and more time behind the camera, Luminar Neo is worth looking into.
This AI-powered photo editor works for Mac and Windows computers, with an accompanying app to share photos to your mobile device.
Many of its smart features can enhance images in just seconds, with auto adjustments to the color and composition.
You can definitely look forward to faster photo editing and sharp finished images with Luminar Neo.
Download the latest version of Luminar Neo to take advantage of simple, fast and fun editing.
Use code shotkit10neo to save $10
 Luminar Neo Review (My Latest Test Results)
 Luminar 4 Review
 Luminar Neo vs Luminar AI: 6 Key Differences to Know in 2023
 Luminar AI Review – Can Artificial Intelligence help you Edit your Photos?
 What are Luminar Extensions (+ Do You Need them?)
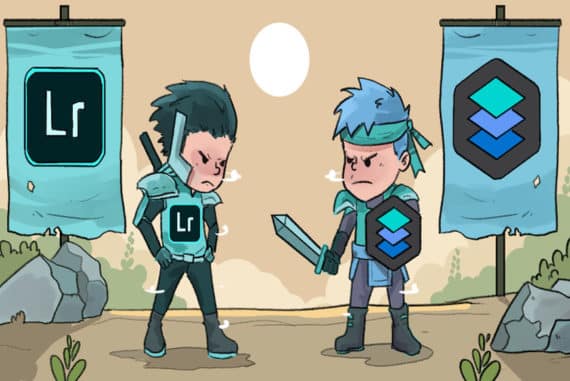 Luminar vs Lightroom for Photo Editing (7 Key Differences)

Andy Dilks is an experienced landscape photographer and former games industry veteran. When he isn’t taking photos or reviewing the latest tech gadgets, you can find him hiking and wild camping in the Peak District.


WELCOME TO SHOTKIT
Enter your email to be sent
today's Welcome Gift:
19 Photography Tools
🔥 Popular NOW:


Shotkit may earn a commission on affiliate links. Learn more.