


How Lightroom Smart Previews can help photographers
Find out everything there is to know about Lightroom Smart Previews and how they can benefit your editing and image management. (Most simple explanations.)
Lightroom | Software | By Usnea Lebendig
If you’re an Adobe Lightroom user and haven’t yet gotten into using Smart Previews for your photography, you should definitely look into them.
Lightroom Smart Previews, originally introduced in Lightroom 5, can really revolutionize your photo editing and organising workflow.
 | Need Lightroom? I use this: Lightroom Photography Plan✓ Great features ✓ Regular Updates ✓ Affordable | View Price |
Table of Contents
What are Smart Previews in Lightroom?
A Lightroom Smart Preview is a compressed, lossy DNG copy of a photo file. It’s a fraction of the size of the original image file and is stored in an .lrdata file alongside your Lightroom catalog.
With its longest edge measuring 2540 pixels, a Smart Preview is basically just a shrunken down, lightweight version of the original image.
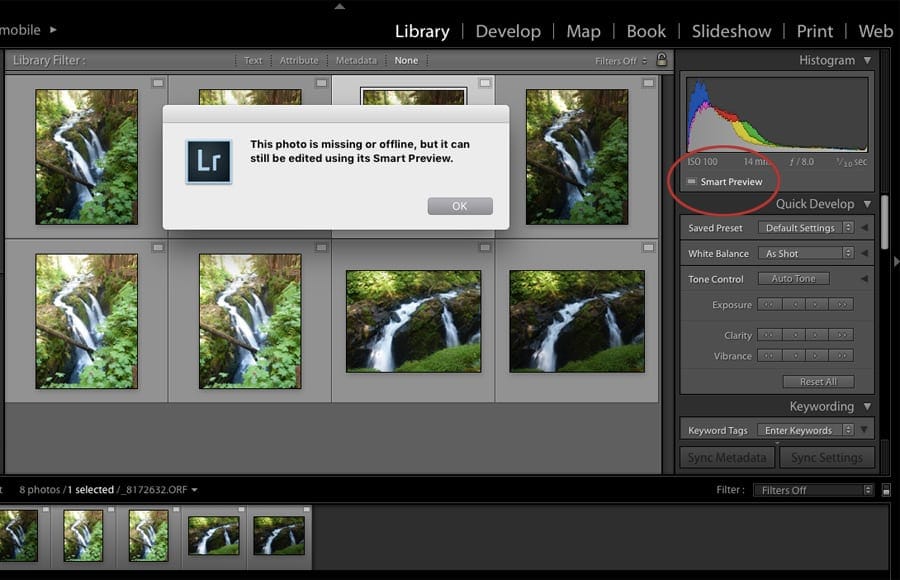
Unlike normal previews however, Smart Previews are fully editable in the Develop module with or without the original file present.
You can even switch between Lightroom before and afters with a Smart Preview (i.e. Lr will preserve all your edit history so you can see the original image!)
This is one huge advantage of Smart Previews – you can disconnect the drive containing your original files and edit the Smart Previews the way you would the full-size images.
When you reconnect your external hard drive, Lightroom automatically applies the adjustments to the originals, keeping all the edits intact across your photography.

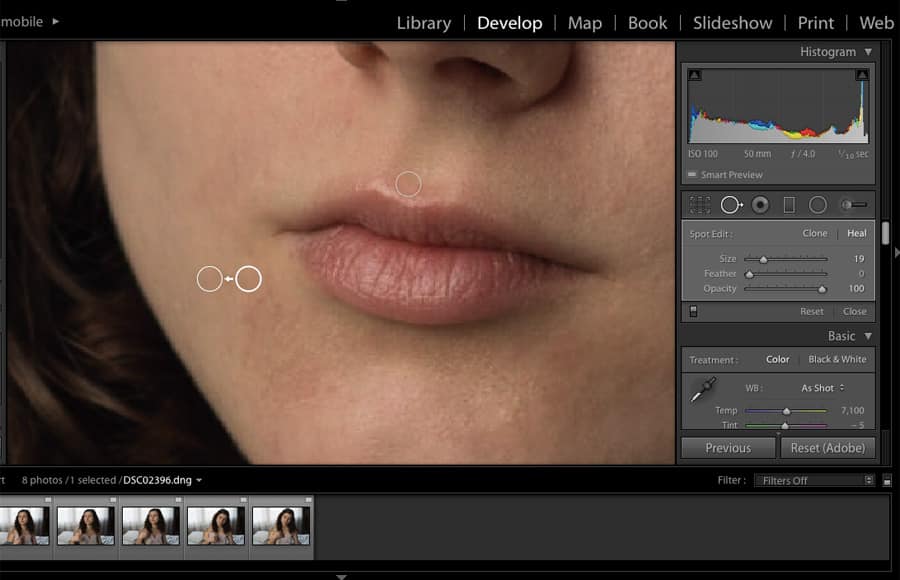
While Smart Previews are low resolution – at least in comparison with the original file – most of the time you won’t really be able to tell the difference.
Even at 1:1 the previews look as good as the original file. In fact, it’s easy to forget you’re working with a compressed file at all.
Why you should use Smart Previews
Using Lightroom Smart Previews has a few key advantages:
1. You can edit your images without the original files present
The first and most obvious advantage is that you don’t need to have your actual photos with you to work on them in Lightroom.
Say you’re a traveller or tend to work away from home on a laptop. Smart Previews allow you to travel with your entire photo library while leaving the originals safely at home – this is definitely one of my favourite features of using Smart Previews!
You can take your laptop anywhere – into another room, to a coffee shop, the office, to a friend’s house or even to another country – and still develop and manage your photos.
If you’re meeting with clients, you can bring just your laptop and still have access to all your photos. No need for clunky external drives or any other peripherals.
For those who fly and want to get started on culling their photos without the added burden of attaching an external drive, this can be particularly helpful.
Standard airline seating can be pretty cramped and having one less thing attached to your laptop makes flying and working just that much easier.
2. Smart Previews greatly improve Lightroom’s performance
Is your copy of Lightroom slow? It definitely isn’t the fastest program out there and any improvement in speed can make a huge difference in workflow.
Editing the smaller, lighter Smart Previews instead of full-sized RAW files can significantly speed up Lightroom’s performance considerably.
When Smart Previews first came out, photographers noticed the difference immediately. They’d intentionally unplug their connected external hard drives (or temporarily change the main image folder name to ‘disassociate it’), edit using only Smart Previews, and then reconnect their external drives at the end of the day to synchronize all the changes.
When Adobe noticed this they added an option to edit using Smart Previews only – even with the originals still available (whether on a local or an externally connected hard drive).
Now you can simply tell Lightroom to use Smart Previews instead of the originals just for a performance increase, at least in Lightroom Classic and the most recent version of Lightroom 6. – i.e. you don’t need to disconnect your hard drive or disassociate the original folder at all.
Switching back and forth is easy, but generally only needs to be done if you need to zoom in beyond a 2550-pixel size. Lightroom automatically applies the changes to the Raw file.
For more tips on how to boost Lightroom’s performance, check out our blog post on How to Make Lightroom Faster.
3. You can carry your ENTIRE catalog with you
Most photographers have a lot of photos. So many, in fact, that in the olden days (you know, 5 years ago) we often had to have multiple external drives to hold them.
Smart Previews are so small that most photographers can get our entire catalog + previews onto a single device like a laptop. This makes image editing and management while on the go a lot more efficient.
For example, 500 RAW images worth of photography from a high-end DSLR camera can easily occupy 14 GB of disk space.
The Smart Preview files for the same images are only 400 MB.
A library of 50,000 images can be compressed down to just 28GB. This is definitely one of the most impressive features of Smart Previews!
Having access to my entire library away from home has made a huge difference for me at times – especially since I don’t like using cloud storage – I have too many photos for that.
Since Smart Previews are 2540 pixels on their longest edge, they’re more than large enough for most online applications.
Those dimensions are certainly more than enough for uploading to Instagram, Facebook, Flickr, 500px, Instagram or your own website.
In fact, if you export an image that’s no larger than your Smart Preview, the image will be the same quality as the one created from the original RAW image.
That really frees up my workflow when I’m travelling.
4. Provides a low-resolution backup for your images
Obviously, Smart Previews shouldn’t be used as your primary backup – you’ll want to have all your RAW files from your camera nicely tucked away somewhere – but if something did happen to your Raw files you’d still have smaller, usable copies available.
Sure, it’s not ideal and I certainly don’t recommend creating Smart Previews for this purpose, but it’s nice to know you won’t lose your images completely if your other devices fail.
5. Mobile Editing with Smart Previews
If you use Lightroom CC on a mobile device, Smart Previews can be really useful. This is especially the case when your internet connection isn’t the greatest, like when travelling overseas, for example.
Instead of transferring the large RAW files to your device from the cloud, Lightroom Mobile will download the Smart Previews and then synchronize the editing changes automatically.
Just make sure you have Lightroom set up to work with the Smart Previews instead of the originals. (See below.)
Also, Lightroom Mobile has no problem synchronizing the images across different devices over the Creative Cloud.
So if you’re in areas where internet isn’t available or is slow, using Smart Previews will allow you to keep working fairly effortlessly.
To be able to take advantage of Lightroom CC, you need to subscribe to a Creative Cloud plan – here’s the best value plan that we recommend.
How to Make Smart Previews in Lightroom
Creating Smart Previews is the same process in Lightroom versions 6 and later. As with most things in Lightroom, there are several ways to do it:
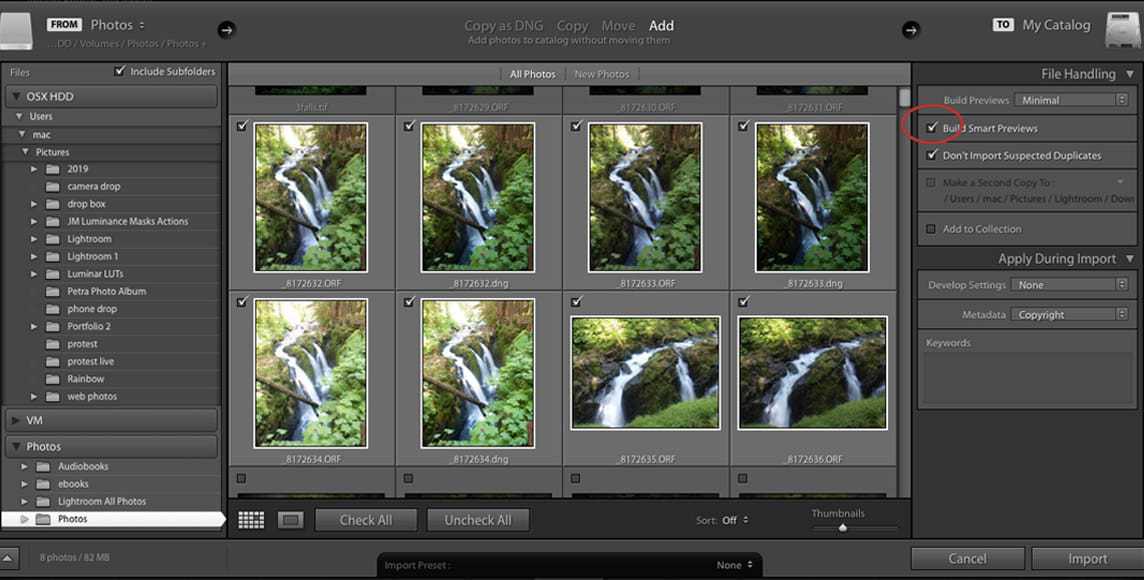
On Import
If you’re adding new images to the Lightroom catalog, the easiest way to create Smart Previews is on import. Simply check the “Build Smart Previews” button on the right. (See the image above.)
Images Already in the Catalog
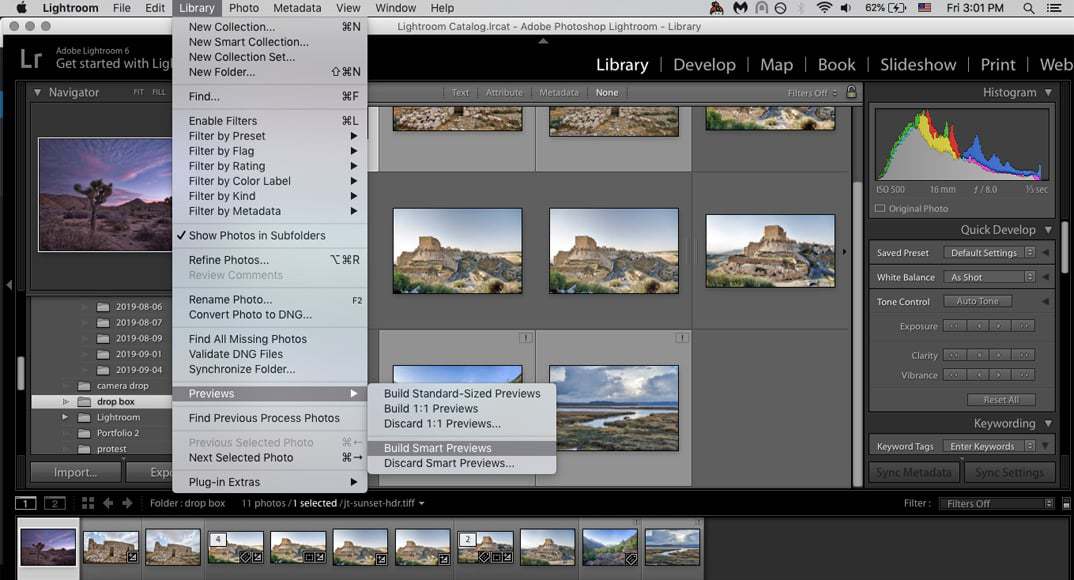
For multiple images that are already in your catalog, select the images you’d like to create Smart Previews for and then go to the Library drop-down menu.
From there select “Previews” and then “Build Smart Previews.”
For individual images, you’ll need to click on the “Original Photo” box just underneath the histogram. Once you do that a dialog box will appear asking if you’d like to build a Smart Preview:
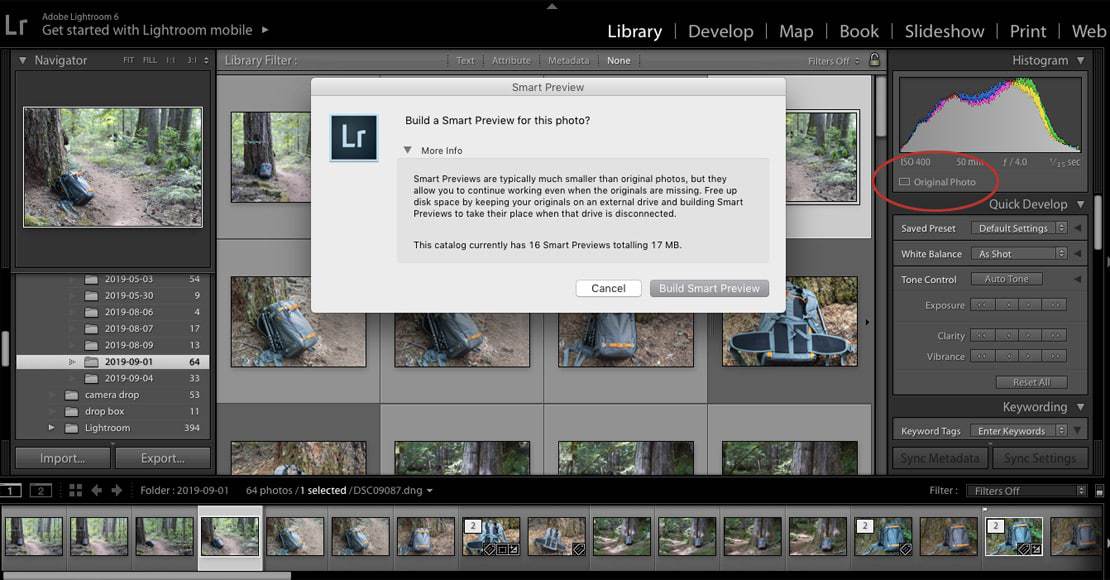
If you’re doing several images at once, it might take a little while to build all of the previews.
Once they’re built, however, you’re good to edit, change the metadata, and export or print, all without having the originals handy.
Managing Smart Previews
Once you have your Smart Previews in place there’s generally not much more you need to do.
Still, if you find that your laptop is short on memory, you can both review how much space they’re taking and/or delete them if you like.
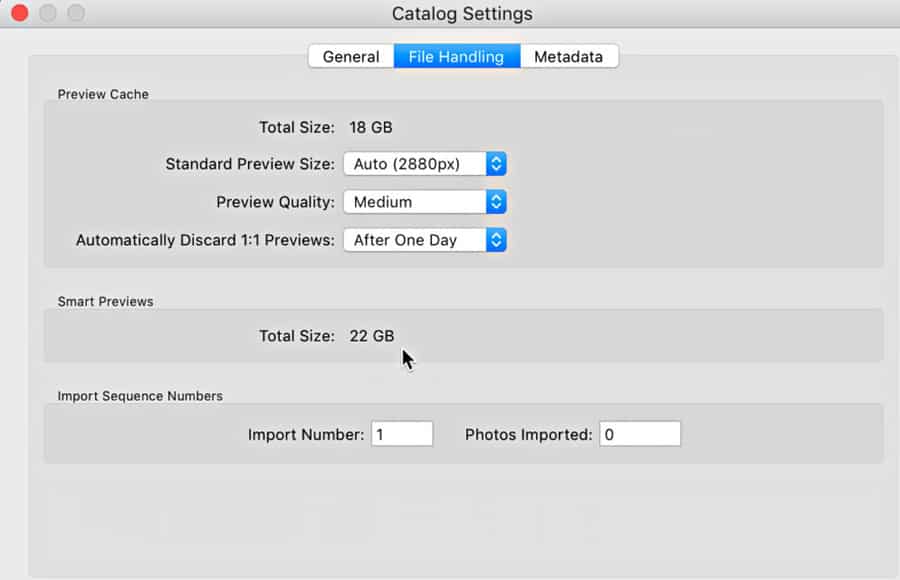
To see how much space your Smart Previews are taking up, go to Catalog Settings > File Handling.
From there, you’ll see a running tally of how much space is being used by your Smart Preview cache.
If you find that you’re wanting to reduce the space Smart Previews take up, your best bet is to delete them from the images you’re not working with any more.
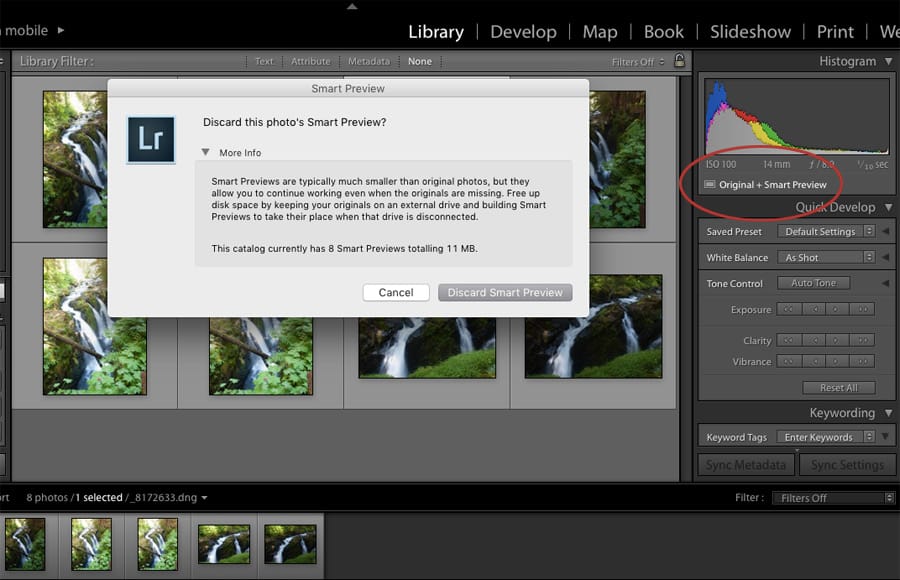
To do this with an individual photo, it’s pretty much the same as building one.
Click on the line under the histogram that reads “Original + Smart Preview.” From there a dialog box will appear asking if you’d like to discard the Smart Preview.
For a group of photos, select them in Grid view and then go to the Library drop-down menu. From there select “Previews” and then “Discard Smart Previews”.
How to tell Lightroom to only use Smart Previews
As mentioned above, you can set Lightroom to only work with Smart Previews, even when the originals are still available (i.e. your external hard drive wit the images is still attached).
To do this go to “Preferences” under the Lightroom drop-down menu. From there select the “Performance” tab. In the image editing box, check “Use Smart Previews” instead of “Originals.”
Lightroom > Preferences > Performance > Use Smart Previews
Then you’ll need to restart Lightroom, and you’re good to go.
Limitations of using Smart Previews
There are a few limitations to Lightroom Smart Previews that you should be aware of – primarily in editing mode using Photoshop.
- First, you can’t export Smart Previews to Photoshop or plug-ins. For that, you’ll need the original file, then choose the ‘Edit In > Photoshop’ menu command.
- Second, you can’t Merge to HDR or Merge to Panorama without the original files. You can, however, Merge photos with Smart Previews in Lightroom Classic or Lightroom 6.7 or later.
If you only edit in Lightroom, these two considerations shouldn’t be an issue. If you frequently use Photoshop plugins or HDR, Smart Previews may not be for you.
- Third, for accurate sharpening and other detail work like Noise Reduction, the 1:1 on a Smart Preview is not the same as the 1:1 on the original, uncompressed RAW file. You’ll need to double-check any of these types of adjustments once you have the original file available again.
You should also read on guide: how to use Lightroom on more than one computer.
Final Thoughts
Smart Previews in Lightroom are an exceptionally useful tool for anyone who travels, wants to speed up Lightroom’s performance, or uses Lightroom CC and frequently edits their photos on the go.
They also make it easier to manage and edit photos across multiple devices.
If your workflow often includes plugins and/or exporting to Lightroom through Photoshop, Smart Previews may not be a workable solution, but for everyone else – especially those who travel – Smart Previews can make a huge difference.
Not sure? Try them out and see. And let us know what you think.
 12 Best Adobe Lightroom Alternatives in 2023 [User Tested]
 Adobe Lightroom Review – Still the Best Image Editor in 2023?
 What Is RAW File Format Used For? (+ How to Open & Edit a .Raw)
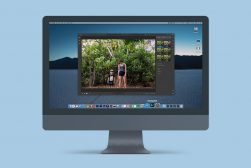
 Lightroom CC Mobile Guide
 How to Use Photoshop Smart Objects in 2023: Create, Edit & Fix
 What’s the BEST Way to Buy Lightroom in 2023? (For All Budgets)

Usnea Lebendig is an experienced photographer and reviewer who loves to photograph professionally and in moments where the world’s beauty and/or strangeness leaps in front of the lens.


WELCOME TO SHOTKIT
Enter your email to be sent
today's Welcome Gift:
19 Photography Tools
🔥 Popular NOW:


Shotkit may earn a commission on affiliate links. Learn more.