


Guide to Time Lapse Photography
This guide takes you through how to create a time-lapse video, from shooting to post-processing. Plus, our 7 best tips for stunning results!
Learn | Photography Guides | By Greg Cromie
In this guide to time-lapse photography, we’ll take a deep-dive into the creative world of time-lapse videos.
Time-lapses are a unique blend of photography and videography – two worlds that collide to create mesmerising content.
We’ll cover all there is to know about this genre, including how to prepare for a shoot and how to effectively capture a sequence.
What’s more, we’ll take you through a simple editing process guaranteed to streamline your workflow.
Last but not least, I’ll be making a time-lapse with step by step instructions for you to follow along.
Table of Contents
What is Time-Lapse Photography?
Time-lapse photography is a process that involves taking multiple images and combining them into a video. When played in sequence, the images form fast-paced footage of dramatic changes in the subject or scene that happen over time.
When it comes to capturing the changes in a subject, your camera would focus solely on that subject and take hundreds, if not thousands, of images as it moves or evolves.
A brilliant example is a sequence that captures a seedling sprouting from the ground and unfurling to form a bud.
Another example could be the development of a toddler over the course of a year – this requires a single photo taken every day for that year.
When it comes to using timelapse photography to capture scenery, the same process applies. But in this case, you’re taking hundreds of images of the sun rising and setting over a city or landscape. The photos capture the way the light shifts and changes throughout the day.
Another excellent example is when there’s a lot of motion in the frame.
Imagine capturing a storm blowing in off the coast towards a beach town. Compressed into a few moments of footage are hours worth of images that show the storm forming, swirling and inching forward.
By now you may be asking how they make these videos look so good? Creating a time-lapse compilation is a lot like shooting a video, and we’ll go into a lot more detail in this guide.
What Is Time-Lapse Photography Used For?
Chances are you’ve seen dozens of examples of time-lapse photography in all forms of media.
That’s because this style of photography is a creative way to showcase dramatic change and movement in a scene. Especially scenes that benefit from being captured over a long period.
Tourism, marketing and government projects frequently use time-lapse to showcase a topic.
As an example, the tourism industry might use it to showcase the changing light and colour of Uluru (Ayers Rock) in the Northern Territory, Australia.
A government agency might use timelapse photography to capture and showcase a large scale construction project like the digging of a new underground rail tunnel.
Creatively, you might capture a gorgeous image sequence of stars rotating in the night sky, or a fast-moving progression of people bustling through Times Square in New York.
How to Shoot a Time-Lapse Video
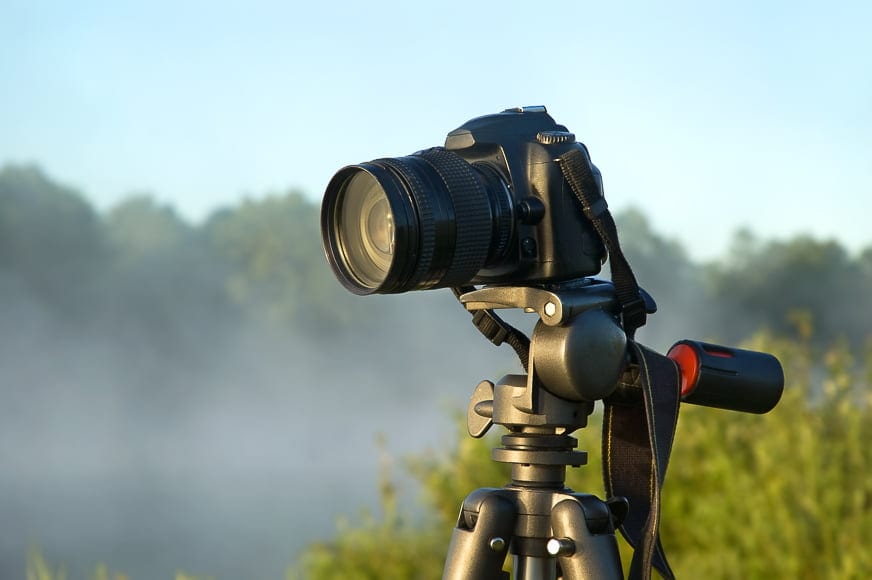
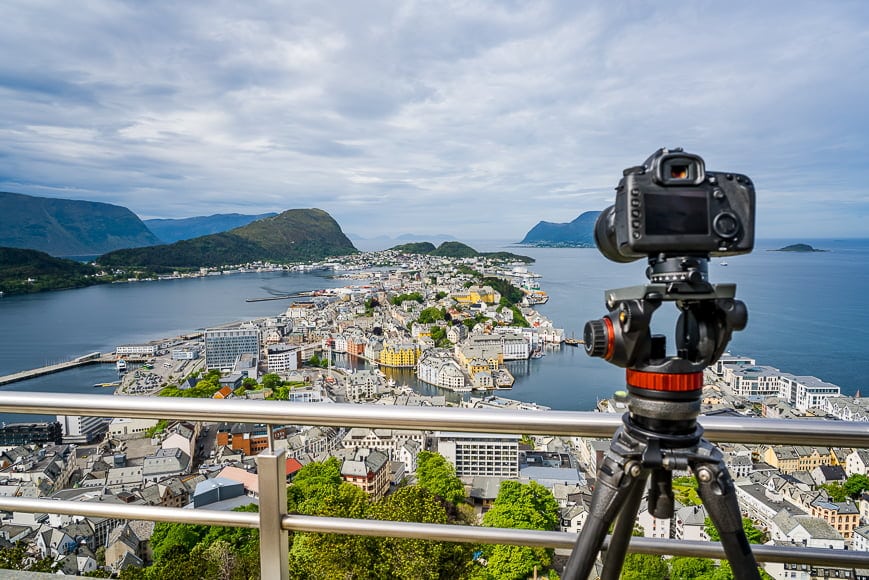
Using a tripod to avoid motion blur is one of the keys to shooting a timelapse.
Now that you know what time-lapse photography is, let’s take a look at how to create it.
If you’ve seen examples of impressive time-lapse videos but think its a pro-level and daunting task, you couldn’t be more wrong.
With the right equipment and know-how, you can easily capture time-lapse images and turn them into a video using post-processing software.
It’s not that different to taking a single photo – and in most cases, you only have to push the shutter button once and then let the camera do the rest.
The biggest challenge is to get the correct interval between each photo captured (this is also known as the frame rate).
You need to pace the images in a way that suits the scene you’re trying to capture. If you have slow-moving subjects and a long interval time, the time-lapse will appear sluggish. If you have fast-moving subjects and too short an interval, the video will appear too fast.
Similarly, if your interval is too long, your footage may seem jumpy and not flow properly.
Also, the duration of the interval must be longer than the exposure time of the sensor (i.e. the shutter speed). If you’re running with a speed of 1 second due to the lighting conditions, then your interval must be longer than 1 second.
Here are the straightforward steps to create your time-lapse.
Step 1 – Get everything stable
Camera stability is the key to a clean video. Attach your camera to a sturdy tripod or clamp in a location where it won’t be bumped or disturbed.
If you’re using a motorised slider that slowly moves the camera along, ensures it’s tightly secured and that the slider is not going to move out of position.
Step 2 – Dial in your settings
Set up your camera with the desired settings, including shutter speed, ISO and aperture to suit the scene and lighting (we’ll go into greater detail on this later).
Step 3 – Set up your intervalometer
Set up the intervalometer in your camera’s menu system. The intervalometer is the system that determines the frame rate (i.e. the period of time between each shot) and how many shots you’ll take in total.
You can usually set this in minutes, seconds and hours – plus select how many images you want to be captured for this sequence.
When starting, try a 10-second interval and a total of 10 photos and then review the outcome.
Step 4 – Choose manual mode
If shooting with a DSLR, select Manual mode from the control dial to reduce any flickering that will appear in your video. This way, you can manually control the exposure quality. Manual mode is also the best option for mirrorless systems.
Step 5 – Check your exposure
Using the LCD, viewfinder or histogram display, check the overall exposure. Look out for strong highlights and shadows and adjust your settings accordingly.
Step 6 – Check your focus
Use either manual or autofocus to make sure that you have a sharp focus on your core subject or across the entire scene. Just be careful with autofocus as you don’t want the camera to hunt for focus while in the middle of a shot.
Step 7 – Shoot a test shot
Conduct a test shot with 10 images set to a 10-second interval and preview the photos to make sure that the timing works and that the exposure looks correct.
Step 8 – Trigger remotely
Use a self-timer, remote shutter release or suitable app to trigger the shutter button while you’re standing away from the camera.
Then, hit the trigger and let the camera do its job!
7 Tips for Better Time-Lapse Photography
Now that you know the basics, let’s take a look at some tips to make your time-lapse photography stand out from the crowd.
It’s also critical to remember that getting your images correct in the camera is going to make your post-processing workflow much easier later on.
Given that you’ll be capturing hundreds of images, you don’t want to spend hours editing each one.
1. Best Gear For Time-Lapse
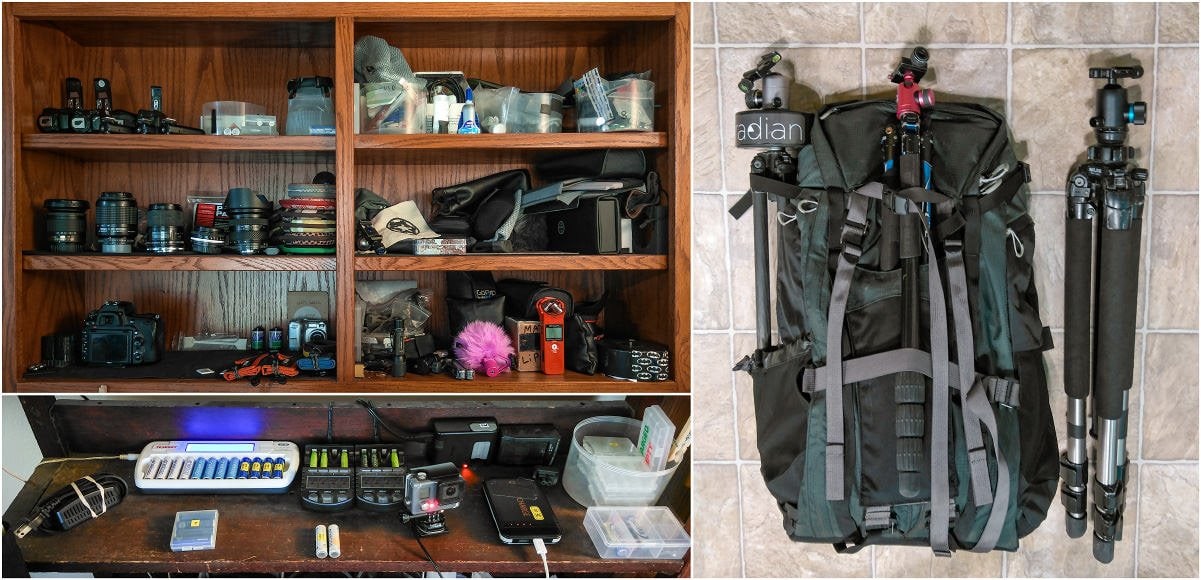
Camera equipment of time lapse photographer Matthew Saville on Shotkit
- Camera
The fact that you need a camera sounds pretty obvious, but there are some essential features and functions it will need in order to shoot time-lapse.
Older cameras can still shoot time-lapse, but they often need an additional intervalometer unit or a third-party software update to do so.
Let’s assume that your camera is relatively new. Most digital DSLR and mirrorless cameras feature a built-in intervalometer. This allows you to take a certain number of images at a specific frame interval.
The other benefit of a camera like this is that you can set it to Manual mode to control your settings.
Compact cameras may also feature an intervalometer for this kind of work. If you’re planning on buying a compact system for timelapse photography, make sure to do your homework thoroughly.
If you want to make the most of your GoPro, you can also use it for time-lapsing. While the GoPro is considered an action camera, you can convert the images into a high-resolution 4K time-lapse video – even underwater!
Finally, if all you have access to is a new smartphone but you want to test out time-lapse, you’re in luck. There’s a range of basic free time lapse photography apps as well as powerful paid apps designed specifically for this.
- Lenses
The type of lens you’ll use all depends on the style of shot you’re capturing.
If you’re shooting a landscape, then you’ll need a wide-angle lens that can capture a wider frame. If you’re shooting in darker conditions, you want a lens with a fast aperture such as f/1.8 or f/2.
Having image stabilisation is unnecessary as you’ll be mounting your gear to a tripod.
- Intervalometer
As mentioned, current-generation cameras feature a built-in intervalometer that does all the hard work for you. But not all cameras are current-generation, and many don’t feature such a function.
To accommodate this, you can get a separate intervalometer. This is a standalone device that also acts as a remote shutter release.
The intervalometer plugs directly into your camera and controls how many shots are fired as well as the period of time in between them. It’ll also be helpful to help you calculate time lapse time.
- Tripod
As mentioned in our step-by-step guide to shooting time-lapse, you’re going to need a sturdy tripod or clamp. If you don’t keep your kit stable, your video will look all kinds of wrong.
Tripods come in all shapes and sizes, and depending on the situation, you’ll need something that’s both portable and stable. Aluminium or carbon fibre frames are best for portability.
You also need to make sure that there’s a suitable ball head or attachment mechanism to connect your camera to the tripod.
- Batteries and Memory
Timelapse photography chews through both batteries and memory card storage quickly. If you’re going to be shooting a long sequence of shots, it’s best to make sure that your memory cards are of a decent size.
Otherwise, your memory card will fill up half-way through the sequence, and the process will stop.
The same applies to batteries. If you’re not confident in the performance of your old battery, consider getting a fresh one.
Alternatively, use a camera that has a matching battery grip to extend the battery life – some camera/grip combos can support up to three batteries.
- Filters
If you’re shooting in bright conditions, then you should invest in a decent ND or Neutral Density filter. ND filters can help to control the harshest of light in your composition.
Just be careful if your time-lapse is covering a period that moves from a bright day into night. While ND filters are great during the day, they may jeopardise the success of the second half of your video.
You can’t be touching the camera at all during a time-lapse recording. Even triggering the shutter for the first time can cause unwanted shake or motion blur.
The simplest way to overcome this is to use a remote shutter release – a small IR or Bluetooth device with a button like a remote control.
Alternatively, many camera brands now have a mobile app that you can pair with the camera. With this, you can fire the shutter but also control many of the camera settings.
2. Camera Setting For Time-Lapse

To shoot timelapse, the period of time between each image should be greater than your exposure time.
If your camera has various file formats available, always choose RAW. While these may be much bigger than JPEG files, they capture a greater level of data from the sensor.
Just be prepared to handle a lot of data as you’ll capture hundreds of images in a single sitting.
Shutter speed can be tricky to calculate as you want to make sure that the exposure time is less than the interval between each shot.
There’s no point setting an exposure time of 5 seconds if your interval is only 3 seconds – the overlap won’t work.
An excellent place to start is with a shutter speed of 1/60 second – this way you’ll get sharp images for each shot.
The aperture depends on the type of subject you’re photographing. If you’re shooting a landscape scene, then you need a narrow aperture to ensure everything is in focus – f/5.6 or f/8 is ideal for this kind of work.
If you’re shooting a scene where the main subject is close to you and the background is not crucial for the composition, go with a wider aperture. f/2 or f/18 is ideal as you’ll get the foreground subject in sharp contrast against the blurry background.
The third element of the ‘exposure triangle‘, ISO controls the sensitivity of the light hitting the image sensor. Choosing an ISO is going to depend heavily on the lighting conditions of your composition.
Remember that too high than ISO can cause noise distortion to appear on your image. As such, you’ll need to balance this setting with the exposure time and aperture to find the sweet spot.
3. Selecting Intervals For Time-Lapse

Choosing the intervals of your timelapse is one of the critical factors in the success of the finished product.
Depending on the composition and situation you’re photographing, the gap or interval between each shot will significantly aid the story you create in your video.
If the intervals are too short or too long, the final result may be dull or jumpy. And while there’s no hard and fast rule for the interval settings, here are a couple of examples to consider:
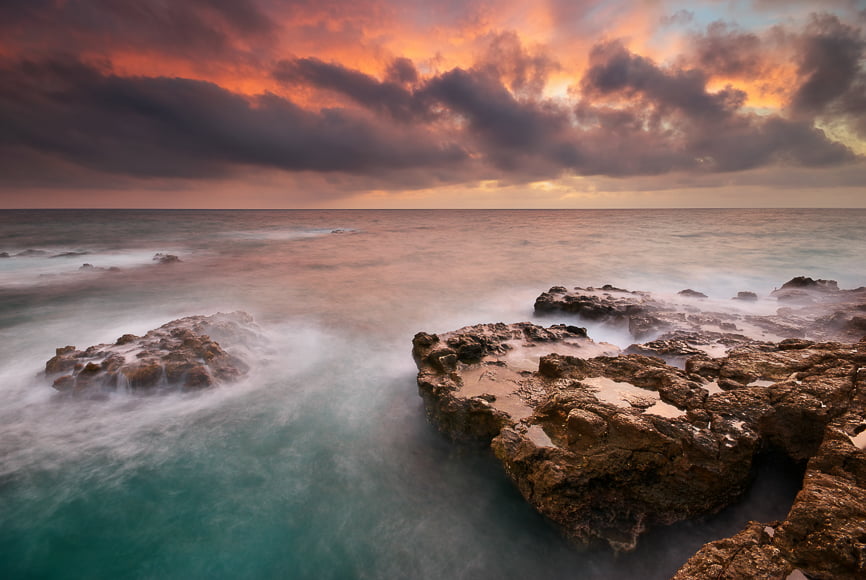
- If you’re capturing a landscape and want to feature the clouds scudding across the sky, I would recommend 3 to 5 seconds for typical cloud movement, 5 to 10 seconds for slow-moving clouds and 1 to 3 seconds for faster clouds – see our guide to long exposure photography for more.
- For capturing the sun and moon as they rise and set, aim for somewhere between 1 and 3 seconds.
- For videos where you want to catch the sun arcing across the sky, an interval of between 15 and 30 seconds is best.
4. How Long Will You Need to Shoot?
A lot of the hard work with time-lapse photography comes down to doing a little math. But for those you that hated math in school, don’t stress, it’s pretty simple to work out.
Creating timelapse is a lot like shooting a video – so let’s break that concept down a bit more.
With the development of modern video, we understand that the camera captures a certain amount of frames per second. That could range from 15 frames up to 120 frames depending on the style and intent of the video.
For this explanation, let’s use 30 frames per second as that’s a reasonably standard frame rate.
In a single second of footage, you’ll see 30 individual images that have been strung together and played back. Ten seconds of footage is 300 images, ten minutes equates to 18,000 photos, and a typical two-hour movie is a whopping 216,000 images.
But for the sake of creating a short video of around 30 seconds duration, here’s how to work it out. At 30 frames per second, you would need to capture 900 individual images (30 frames x 30 seconds = 900 images).
I would also recommend that you capture more than what you’re likely to use.
When you have your composition set up and ready to shoot, don’t be afraid to add extra frames to the time-lapse. So instead of capturing 900 images, you’d capture 1,100 and trim the ends of the collection later.
5. Reduce Flicker In Time-Lapse Photography
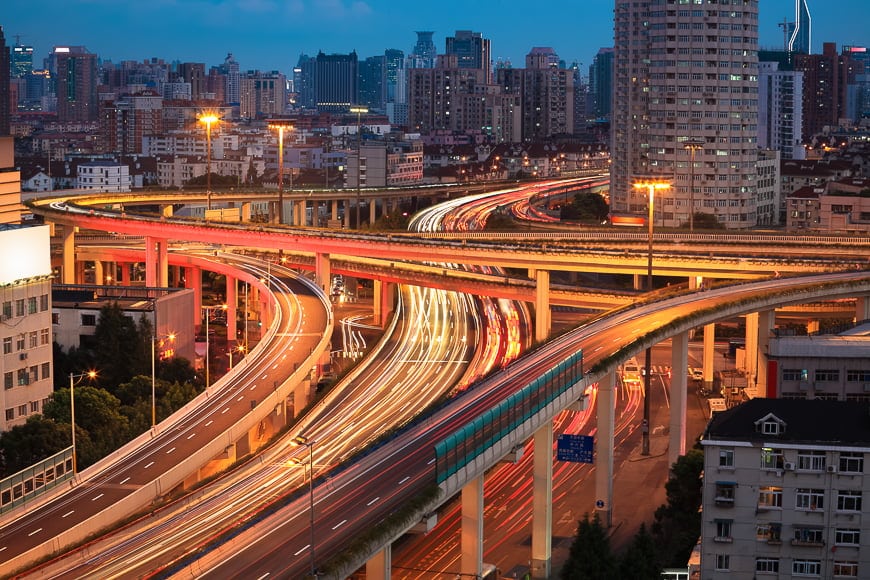
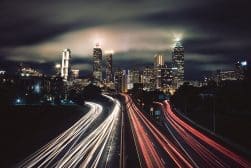
Night photography of traffic is a popular subject for timelapse.
A common issue with time-lapse photography is flicker caused by changing exposure values.
You won’t notice flicker while you’re taking the images, but you will later when you pull them together to form your timelapse video. It will appear as though the lighting changes quickly during the video.
It’s usually caused by the camera automatically selecting the exposure for each photo, and often occurs during a session where you’re filming at sunrise or sunset. The changing light values of the sky causes the camera to compensate by adjusting the overall exposure.
To manage this, I recommend ensuring that you have your exposure control on manual mode. This way, your camera has no choice but to deal with the exposure values that you dialed in before starting the time-lapse.
Plus, if you shoot in RAW, you can finely adjust the exposure values of all images as a collection to achieve an even look.
Another form of flicker can be caused by shooting at a narrow aperture. The aperture blades have to move more to achieve a narrower opening, and this actuation can result in image flickering throughout your video.
To better manage this, use an aperture setting that’s as wide as your composition will allow.
The camera shutter causes the next form of flicker. Too fast a speed can cause a flickering effect when you bring together the images to form your video. You wouldn’t notice this with everyday stills photography, so it’s not a defect of your camera.
Don’t push the shutter speed up too high if you can help it – experimentation is the key to success.
The final form of flicker is due to how your camera automatically selects white balance. For the most part, we tend not to touch the white balance settings on a camera – they’re pretty good at choosing the right balance themselves.
But if the automatic white balance setting is too aggressive at adjusting white balance from frame to frame, you can get colour flicker in your video. In this case, the colour of the sequence changes continuously.
To combat this, set your white balance to a constant setting so that the camera cannot adjust it on its own.
6. Correct Exposure For Time-Lapse Photography
For timelapse, you’ll need large memory cards due to the volume of images.
As mentioned previously, you may choose to shoot a timelapse to capture the arcing sun or perhaps a video that transitions from day to night.
Without the ability to manually change the exposure controls part way through your time-lapse, you need to find another solution.
The best one is to apply a Circular Polarizing (CPL) Filter, or a Neutral Density (ND) filter to the front of your lens. ND filters provide a level of shade – much like wearing sunglasses.
Filters cut down the amount of harsh light hitting the camera sensor, thus avoiding over-exposed images. That way, you can also drop your shutter speed and use a wider aperture to reduce flicker.
If you’re concerned about the varying levels of exposure during a day-to-night shot, you can effectively manage this later in your editing software. But the goal is to get a good balance of exposure during the actual shoot so that your editing touches are minimal.
7. Composition Considerations In Time-Lapse Photography

Finding a good vantage point to capture motion is one way to elevate your timelapse.
Next, I want to touch on a couple of handy compositional considerations for creating a fascinating time-lapse video.
One of them is to look for scenes where you know there’ll be some form of motion. It has to draw the eye into and across the video.
A simple example involves ships pulling into and out of a port town, such as in the image above. The constant to-and-fro motion of the vessels draws the attention of the viewer, especially when set against a static waterfront.
Another example is the steady growth of a subject – it could be something as simple as a child building a toy tower or a local construction site. The motion is what makes time-lapse videos so appealing.
You can also compose your shot to have a static subject and a changing background. For example, imagine a solitary tree positioned in your frame using the rule of thirds, with the sky changing colours behind it as the sun rises and sets.
Another way to elevate your output is to use a device dedicated to motion control. You simply fix your camera to a device that can slide the camera in a single direction or allow it to pan horizontally.
These are used on table-tops and work surfaces or mounted to a tripod.
Electronically controlled slider rails and pan heads come in a range of styles and sizes that can be controlled with an app. They add a secondary level of motion to the composition and can add a lot of drama or excitement when done well.
How to Edit your Time-Lapse Photography
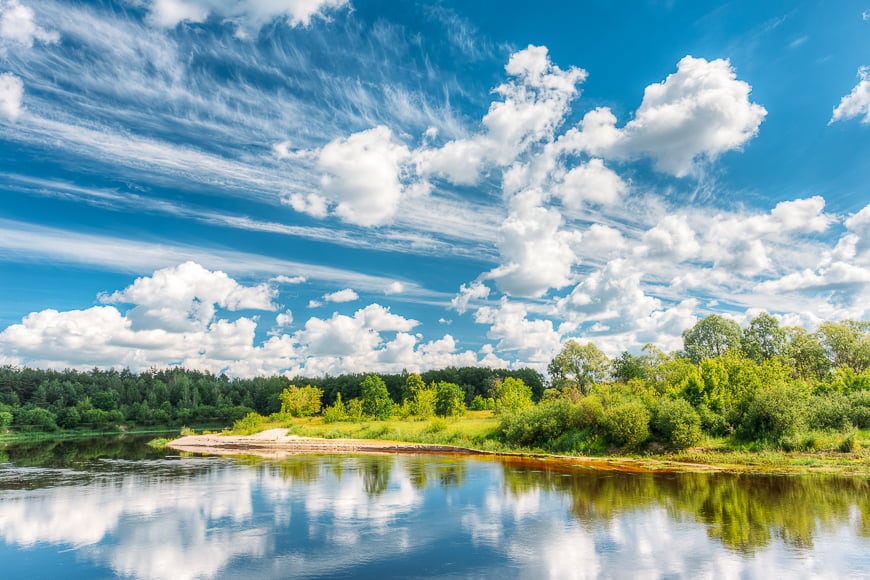
Clouds are a perfect subject to practice your timelapse techniques.
Now that you’ve captured hundreds of pictures with your time-lapse photography, how on earth do you turn them into a video?
The chances are that you’ve shot your images in RAW file format and now have lots of large picture files ready to go. To manage that level of data, you’re going to need a powerful RAW image editor.
There’s a range of excellent editing applications available for both desktop and mobile – though desktop is better for this kind of work.
Adobe Lightroom is one of the most comprehensive and useful RAW image editing and file management applications available.
With Lightroom, you can easily handle large files and large volumes and manage the process of creating a timelapse.
The second application to use is Adobe Photoshop – a pro-grade image editing and graphic control tool.
If you’ve used the right camera settings before capturing your images, your editing workflow will be far more smooth and straightforward – far better than if you’d not invested the time earlier to get it right before you hit the shutter button.
Editing With Adobe Lightroom & Photoshop
While some photographers who are comfortable with specialist movie editing software may choose to use Adobe After Effects (or its alternatives) to edit their timelapse, it’s much more common to stick to good old Lightroom and Photoshop for the task.
Let’s have a closer look at how to achieve this.
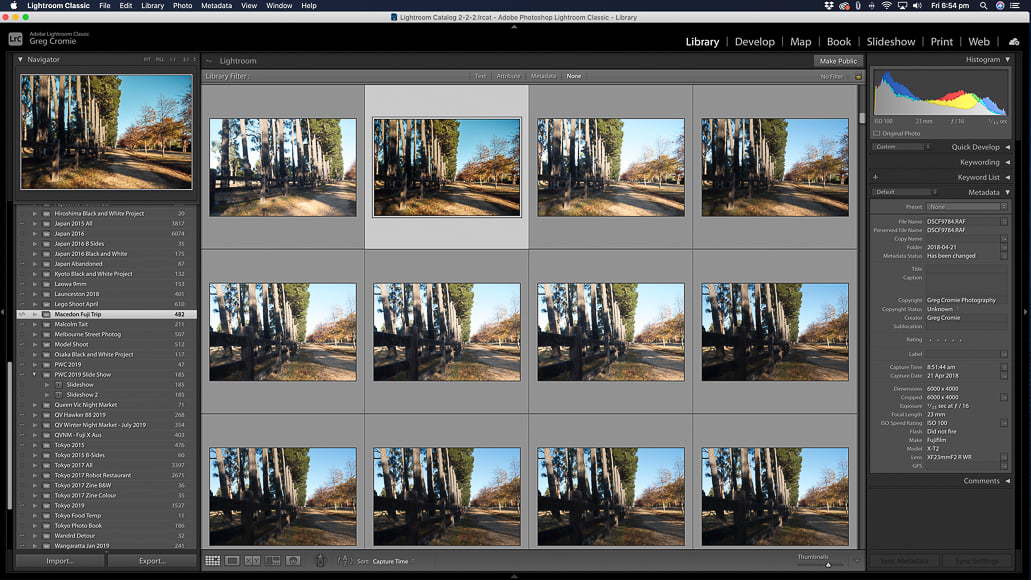
- Step 1
Step one is to plug your SD card into your computer or card reader and import the full collection of images into Lightroom. It’s best to move these into a Collection, so you don’t get them mixed up with any other import photos.
- Step 2
Scroll through your images and look for any that stand out due to an issue you may not have detected when shooting.
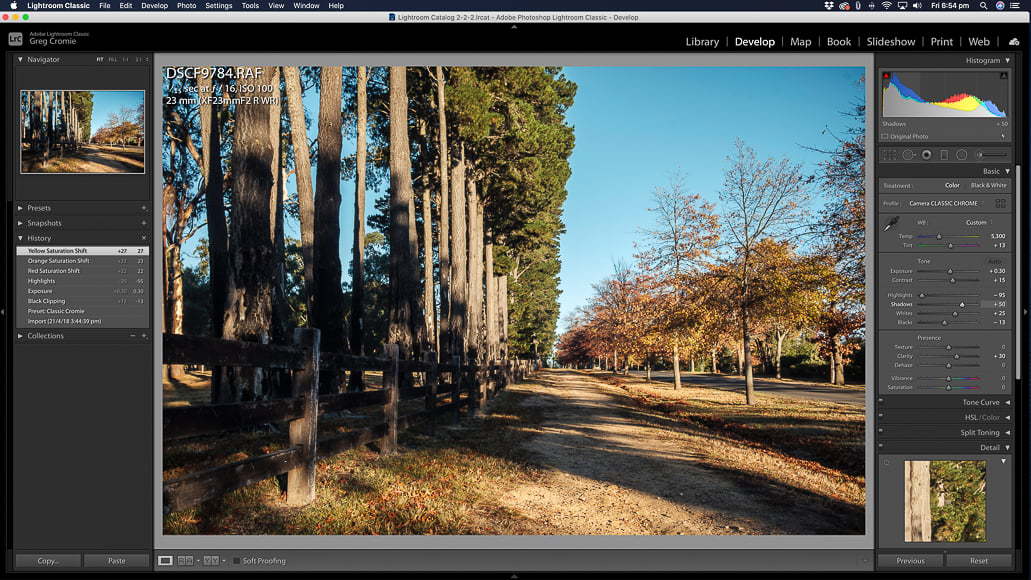
- Step 3
Select a picture somewhere in the middle of the pack and edit this just as you would a regular single photo.
It’s also a good idea to change the crop ratio from the default ‘As Shot’ to 16×9 – it’s the standard aspect ration for viewing video content.
- Step 4
Copy the edited settings from that one image and apply them to every shot in the collection. This will ensure that you have the same colour, contrast, exposure and crop settings throughout.
- Step 5
Export the entire collection of images to a folder, as JPEGs with a resolution of 1920×1080 pixels.
- Step 6
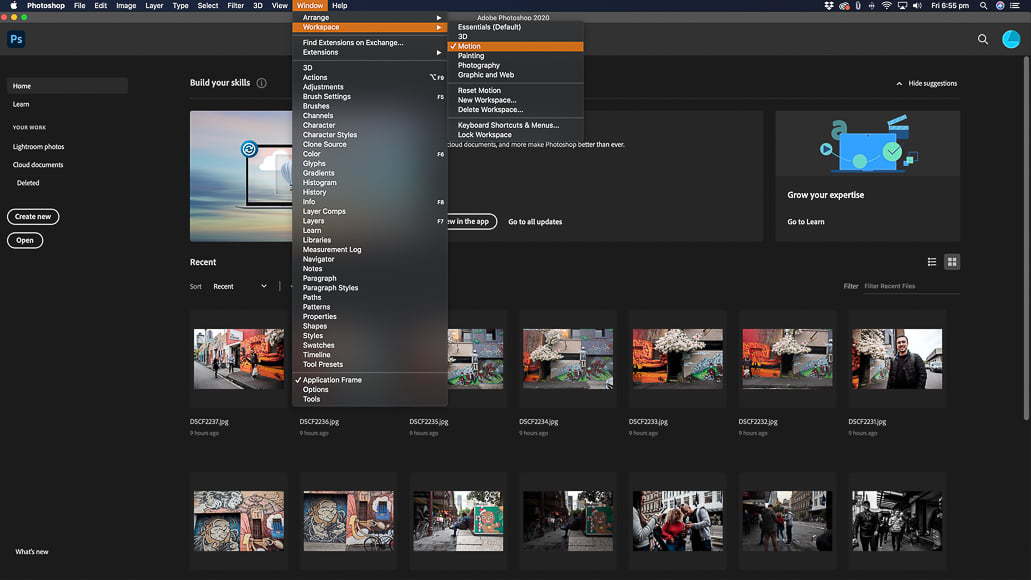
Now it’s time to jump to Adobe Photoshop. Open up the software, then click on the Window dropdown menu, select Workspace and choose Motion.
- Step 7
From the File dropdown menu, select Open and choose the folder where you exported your JPEGs. Then select Options and check the Image Sequence option.
- Step 8
Set the frame rate that you want to use and then hit OK – your images will take a few moments to load depending on the specs of your computer.
- Step 9
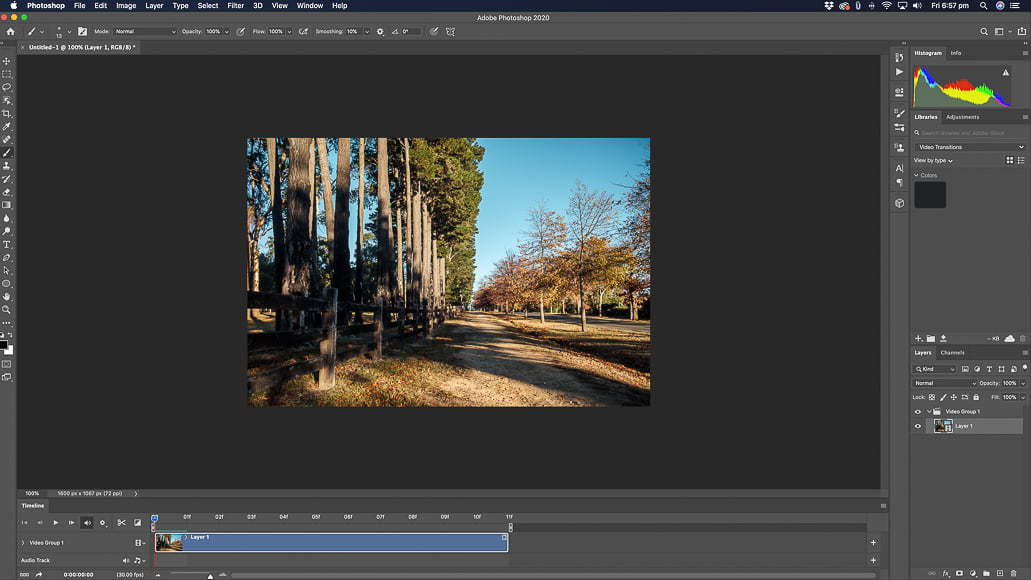
Photoshop will create your time-lapse video based on the settings you entered.
At the bottom of the screen, you’ll see the video timeline. Here, you can play and review the video to make sure you’re happy with it before you export it.
- Step 10
The final step is to export the video to your desktop by selecting the File dropdown menu then Export and Render Video. Select the location and quality and hit Export – you’re done!
You should also check out our guide to the best time lapse video editing software for more helpful tips.
Time-Lapse Photography FAQ
How many frames per second is good for time-lapse?
While you can vary the number of images captured per second up to staggering amounts, you don’t want to deal with that many files later in editing. Standard video output is around 30 frames per second.
How long does it take to make a 30 second timelapse?
At 30 frames per second, you would need to capture 900 individual images (30 frames x 30 seconds = 900 images).
What is the best camera for time-lapse photography?
A good camera for time-lapse photography is the Canon 80D – a crop sensor DSLR. It’s an ideal entry-level camera with great low-light performance.
Time-Lapse Photography | Final Words
Time-lapse photography is an exciting genre that blurs the boundaries between photography and videography.
With the right gear and a good understanding of the before and after process, you’ll create a compelling video to amaze your friends, followers or clients.


I am a Melbourne based street photographer and blogger. I love to travel and make a regular trip to Japan to photograph and document its dynamic culture.

WELCOME TO SHOTKIT
Enter your email to be sent
today's Welcome Gift:
19 Photography Tools
🔥 Popular NOW:


Shotkit may earn a commission on affiliate links. Learn more.