


Multiple Exposure Photography: Ideas, Examples & Techniques
Learn how to shoot multiple exposures on vintage film cameras and modern digital cameras, and even how to fake the multiple exposure look in Photoshop.
Learn | By Judyth Satyn
Multiple exposure photography is an intriguing technique and one of the earliest forms of special effects.
Combining multiple light exposures onto one image creates endless avenues for creative photographic expression.
Read on to learn how to shot multiple exposures on old-school cameras and digital cameras, and even how to fake it in Photoshop.
Table of Contents
What is Multiple Exposure Photography?
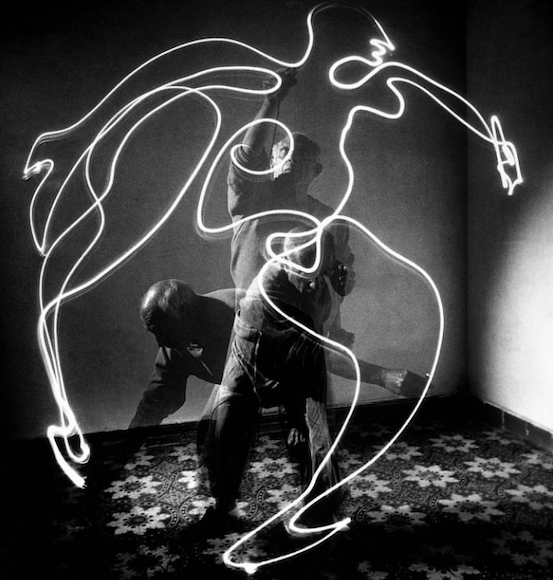
Image: Pablo Picasso’s Life drawing
Multiple exposure photography is a technique that captures two or more exposures of light on the same frame of film or digital media.
Combining multiple exposures in this way results in a photo with many translucent images overlaid onto each other.
This technique of photography falls into two genres of photography experimental and impressionism.
Before digital cameras were invented it was not uncommon for photographers to accidentally shoot double or multiple exposures.
This would happen when the film was not wound onto the next frame. The result was the next shot taken would be cast over the last.
These accidentally caught exposures usually resulted in undistinguishable blurs, but sometimes a delightful impressionist masterpiece was created.
Digital cameras have an inbuilt mechanism to overlay multiple exposures. This makes it easy for photographers to experiment with this fantastic technique.
Double exposure photography is when only two exposures are captured. Multiple exposure is the term used when two or more exposures are captured.
Why do photographers do multiple exposure photography?
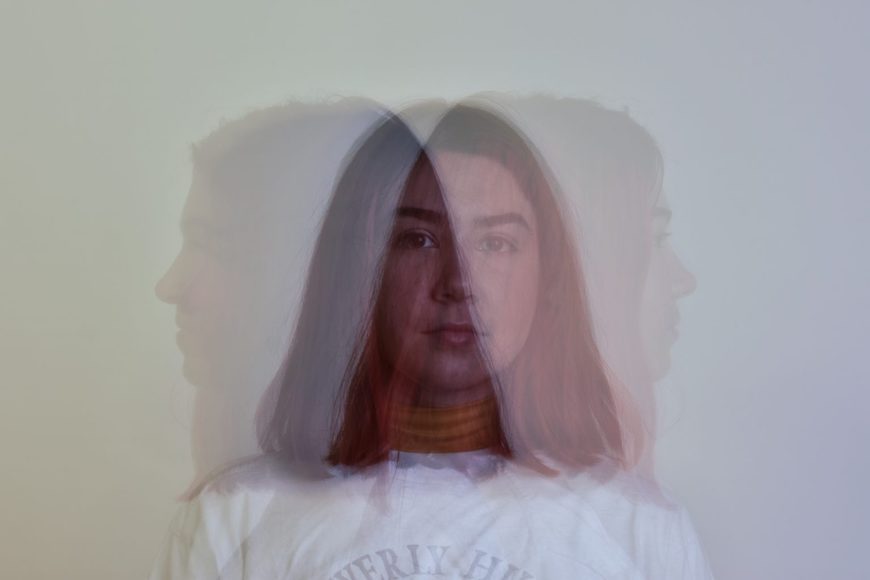
Image: May Ju
Multiple exposure photography is an inspiring technique when used for creative exploration. The results are often wistfully unique and intriguingly ethereal.
The overlaying of translucent forms simulates haunting, mystical, or whimsical properties.
Photographers use the multiple exposure technique to tell a story in a single picture.
The background remains stationary while the character’s movements are traced across the scene, cooking, painting, or waving goodbye.
Using this technique photographers can capture movements to trace the flow of expressive dance moves or freeze multiple shots of running in one frame.
Capturing movements into one exposure allows them to be studied in further investigation to help solve movement puzzles.
Let’s not forget to mention fun. Capturing multiple exposures produces unexpected results and experimenting with it is fun.
Five Creative Examples of Multiple Exposures
There are different creative styles within multiple exposure photography. Let’s take a look at some photographers who are using it.

@jpatrickphoto
Using this technique Jpatrickphoto has generated images with a beating life force.
The movement caught within the photograph is vibrant with an energy that is ready to burst free from the frame.
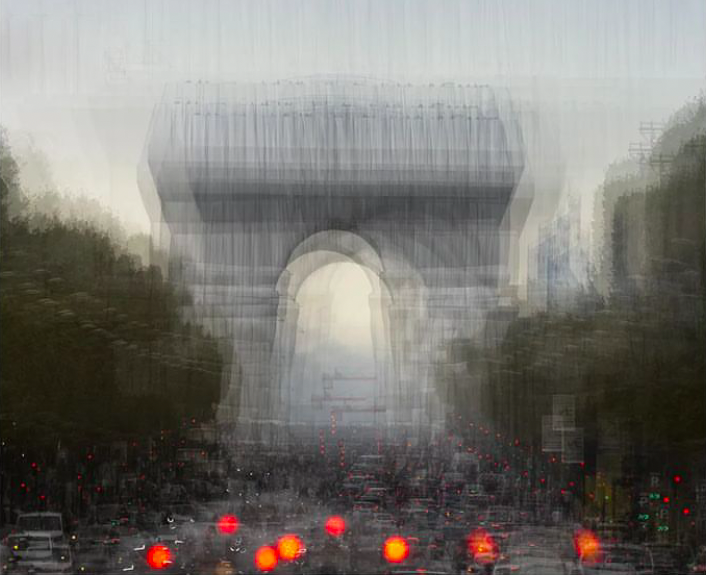
Image: @danieldencescu
Danildencescu overlaps multiple images of the Arc de Triomphe in Paris to simulate an impressionist work of art.
By using the technique Daniel has successfully added a creative edge to an everyday scene.
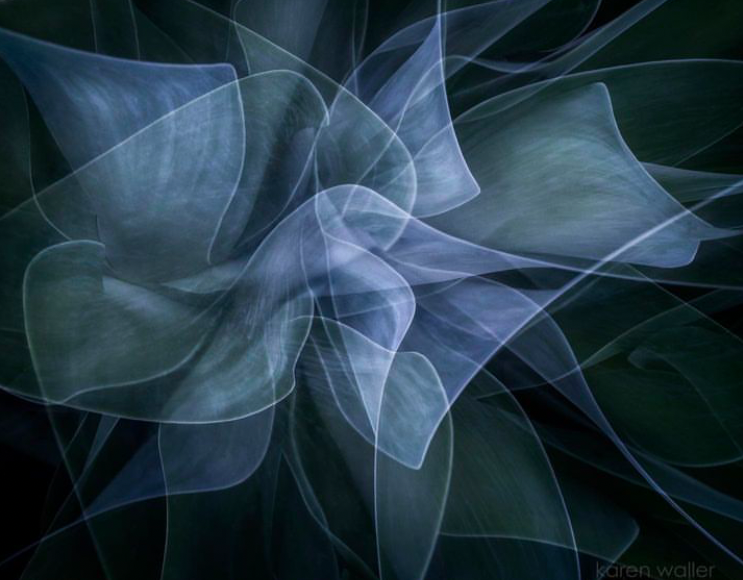
Image: @karenwallerphotography
Karen Waller uses this photography technique to shoot a ghostly ethereal art piece.
Multiple light exposures of agave are caught on one exposure resulting in a graceful flowing image.
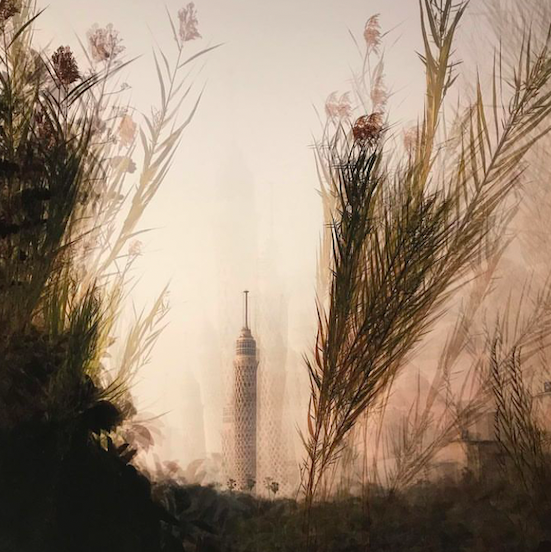
Image: @tintera_art
Tintera has shot multiple frames of exposure to create a subtle blur effect adding a gentle quality to the exquisite photo.
Entirely different scenes are imposed over each other to beautifully simulate the movement of an elegant tower framed by giant wildflowers.
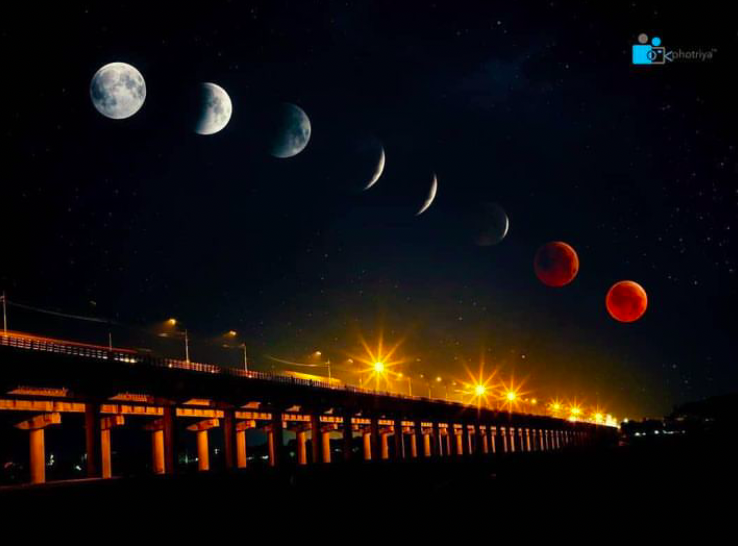
Image: @sonyalphain
Sony has taken the photography technique to a high level. The shot taken of the moon’s eclipse would require immense planning.
The result is a photograph that by using careful timing has achieved a sublime image of the storyline of the eclipse.
How to Shoot Multiple Exposures with a Digital Camera
Digital cameras have a built-in multiple exposure feature for shooting photographs using the multiple exposure technique so the process is straightforward.
One of the advantages of shooting multiple exposures digitally is you won’t have to factor in a lighting average. The camera calculates this for you using Averaging Mode.
Select Average Mode and the camera will average out the exposure. Select Light or Bright Mode and the lighter exposure will be kept. Select Darken or Dark Mode and the darker image will be kept.
So do you want to give it a shot? Here’s how:
Step 1: Set exposure mode to multiple exposure mode.
You will find this in the camera’s menu under Shooting Mode or Exposure Mode.
Step 2: Take the first shot.
Step 3: Take the second shot, and view how they are overlaid.
Step 4: Continue shooting until you have achieved the result you desire.
Step 5: Save your image.
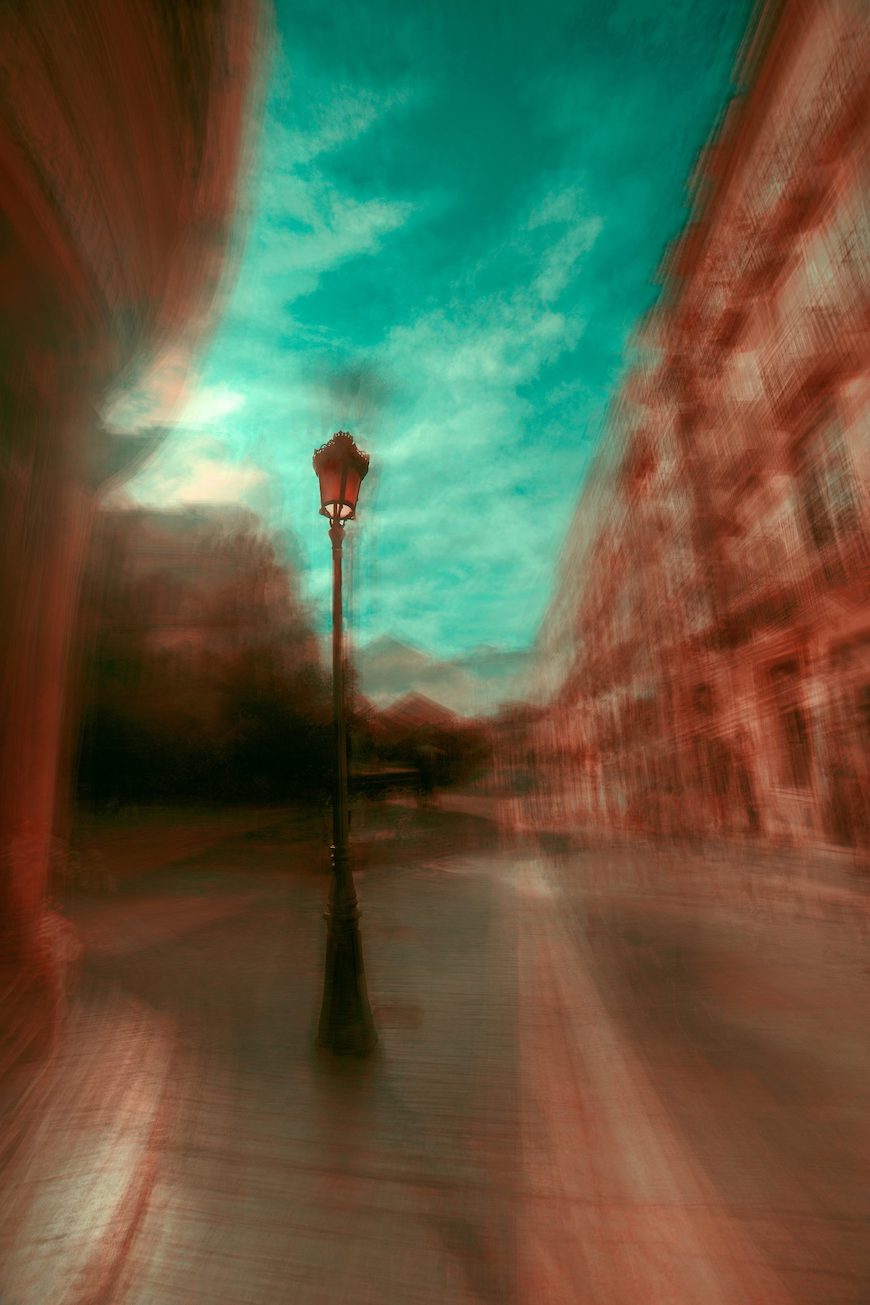
Image: JR Korpa
To truly nail the technique try these Pro tips.
1. Set the darker shot as the base shot whether this is the subject or the background exposure.
2. Try simple uncomplicated subjects when you first start experimenting. Such as silhouettes, or plain backgrounds. When the shots are too busy the image will become messy and difficult to comprehend.
3. Use a tripod. This is especially true when taking shots of a figure moving across a room. Using a tripod the background will remain stationary and decrease the possibility of motion blur. Only the subject will move creating a cleaner look.
4. Set the ISO on low to reduce image noise.
5. If you are shooting a few multiple exposures use a large memory card. The camera will save each exposure as an individual photo and as one condensed photo. Shooting using this technique will quickly start to clog up your memory.
6. When shooting the first image it will be stored in the camera’s memory. This means can freely change the lens, exposure, and add filters.
What digital cameras have a built-in multiple exposure mode?
Now that you have a taste for the multiple exposure photography you will be keen to give it a shot.
So what cameras sport the option to shoot with multiple exposures?
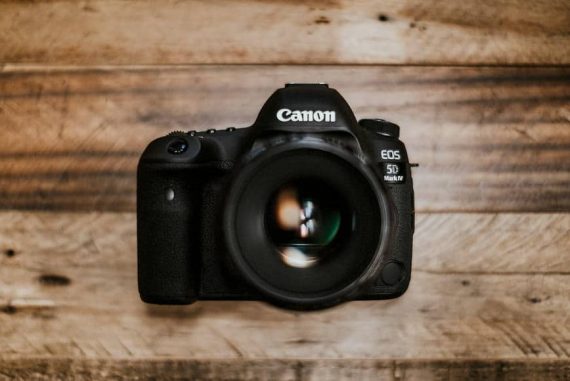
Many Canon camera models have a built-in exposure mode.
These include EOS 90D, EOS 7D Mark II, EOS 6D Mark II, EOS 5D Mark IV, EOS RP and EOS RF.
When using Cannon cameras with this built-in mode there are two shooting settings – Function Control or Continous Shooting.
Other cameras with in-built multiple exposure modes include those shown below:
- Canon:
- EOS 5D Mark IV
- EOS 6D Mark II
- EOS R series (EOS R, EOS RP, EOS R5, EOS R6, etc.)
- Some EOS Rebel series models
- Nikon:
- D810 and D850
- Z series (Z6, Z7, etc.)
- Some other D-series models
- Fujifilm:
- X-T series (X-T3, X-T4, etc.)
- X-Pro series
- Olympus (OM-D series):
- OM-D E-M1 Mark II
- OM-D E-M1X
- OM-D E-M5 Mark III
- Sony:
- Some Alpha series models have apps or functions for multiple exposures, but it’s less common as a native feature.
- Pentax:
- K-1 and K-1 Mark II
- Some other K-series models
- Leica:
- M10 and its variants
- Panasonic:
- Some Lumix models have this feature.
How to Shoot Multiple Exposures with a Film Camera
Image: Callum Skelton
In a disposable world old-school film adds novelty to the photography practice. You have to be committed because you won’t be able to trash film stills so easily.
Load the camera with film and get ready to start.
Step 1. Take the first shot. This will usually be the subject.
Step 2 A: Take consecutive shots without winding the film on.
Step 2 B: If the film winds automatically to the next shot rewind it manually.
Once the film is rewound take the next shot.
Step 3: When finished taking exposures wind the film to the next shot.
Step 4: Develop and process the film.
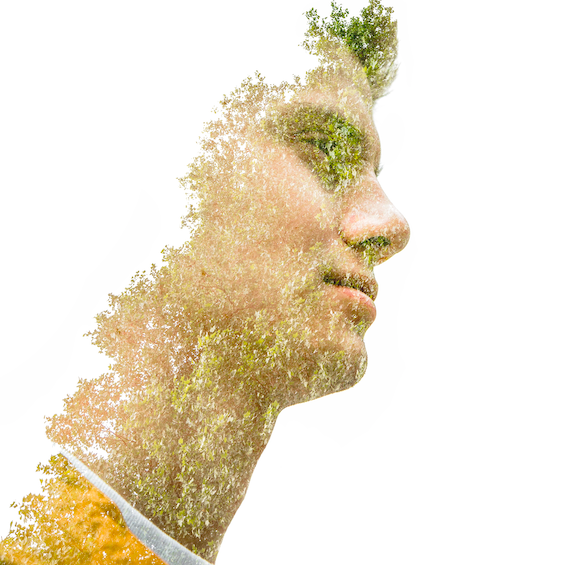
Image: Matt Antonioli
Don’t forget to read the Pro Tips:
Before you start gearing up to shoot using this exciting technique check your vintage camera has the option to shoot multiple exposures.
Film cameras will have a multiple exposure lever. Without a lever, it will still be possible to take double exposures but you have to rewind the film manually.
Rewinding the film can be a little tricky especially if you are not familiar with film cameras.
It is easy to rewind too far or too little. This will mean only half of the negative will be rewound.
When using film diligently plan your photography shoot.
You can overexpose a photo easily because every shot will expose the film to more light. This is more important to consider when shooting with film than digitally.
Take time to calculate the necessary exposure of the shoot and plan to under-expose it.
Use low ISO film when shooting with this technique to reduce noise.
Use a tripod if you want the background to remain stationary.
And most importantly do not overthink the process. Try it and have fun.
You will be happily surprised by the unusual and unexpected results. So get out your camera and give it a go.
How to ‘Fake’ Multiple Exposure Photography Using Photoshop
If you have Photoshop there is nothing to stop you from creating a multiple exposure post-shoot. As the experts say fake it until you make it.
This is also a great way to achieve the exact visual result you are looking for.
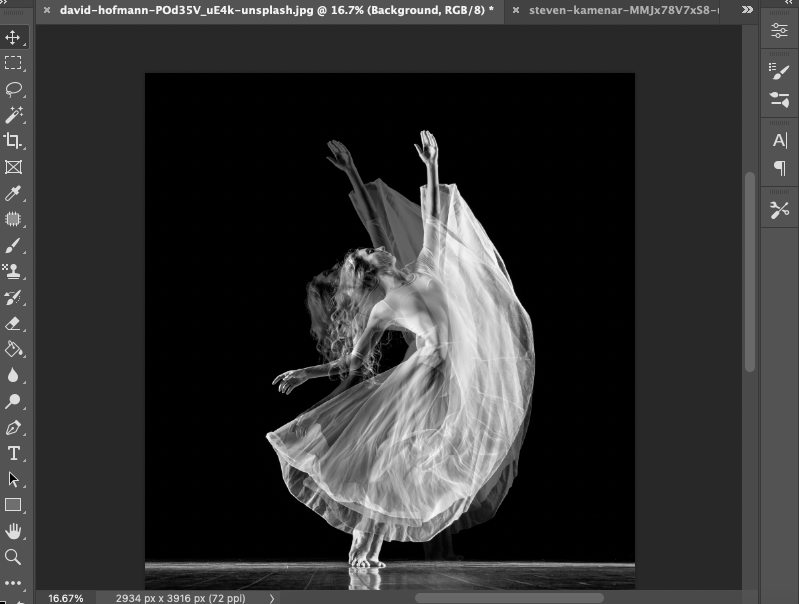
Step 1. Open the background image in Photoshop.
This should be the darkest image.
Below I have used a black-and-white image of a dancer as the background image.
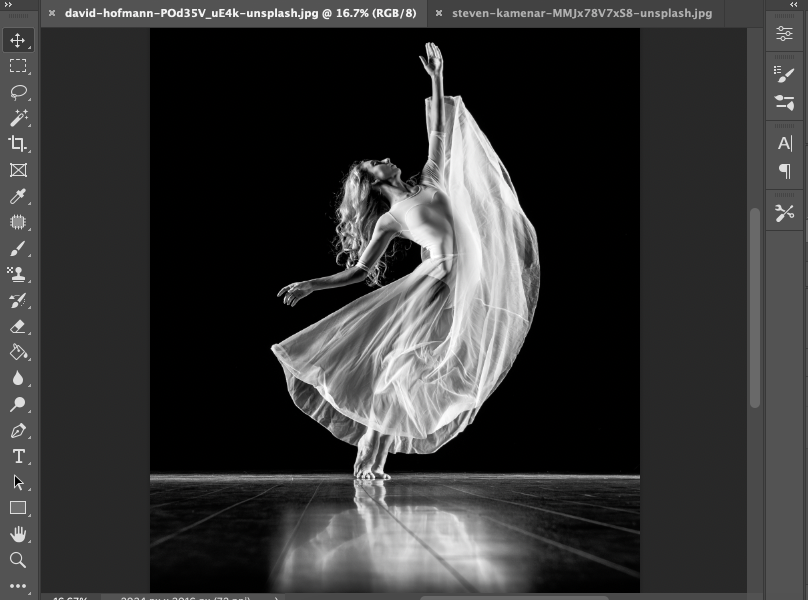
Step 3: Upload and overlay the next image onto the background.
I have copied the dancer and overlain her onto the background.
To do this I used the Subject Selection tool by navigating to the top menu bar and selecting Select > Subject.
Photoshop automatically selects the subject and surrounds it with marching ants.
Next copy and paste the selection by using the keyboard shortcut Ctrl plus C to copy and Ctrl plus V to paste (for Windows) or Command plus C to copy and Command plus V to paste (for Macs).
Alternatively, select Edit > Copy and then Edit >Paste.
Step 4: Reposition the overlaying image.
To reposition the image select Edit > Free Transform.
Drag the bounding box to reposition the cutout.

Step 5: Alter the overlaying images’ opacity.
To alter the opacity of the overlayed image head to the top right corner of the Layer Panel and use the layer’s opacity slider.
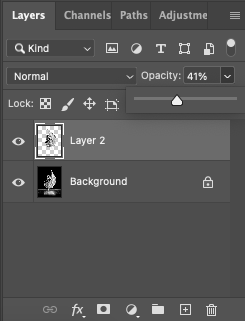
Reduce the value of the opacity to about 40%.
The image now has the appearance of a double-exposure shot.
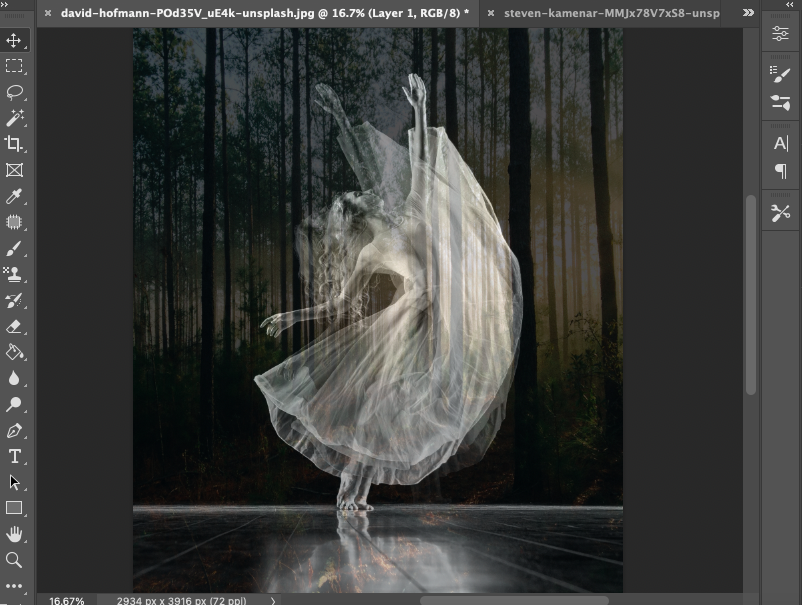
Step 6: Upload the next image to overlay.
For the final overlay I will add a photograph of a pine forest.
Open the image in Photoshop then navigate to the top menu bar and choose Select > All.
Your image will now be surrounded by marching ants. Copy the image and paste it onto the background image.

The forest image obscures the view of the dancer.
Step 7: Alter the overlaying images’ opacity.
Head the layer’s opacity slider in the top right corner of the Layer Panel and set the value to 35%.

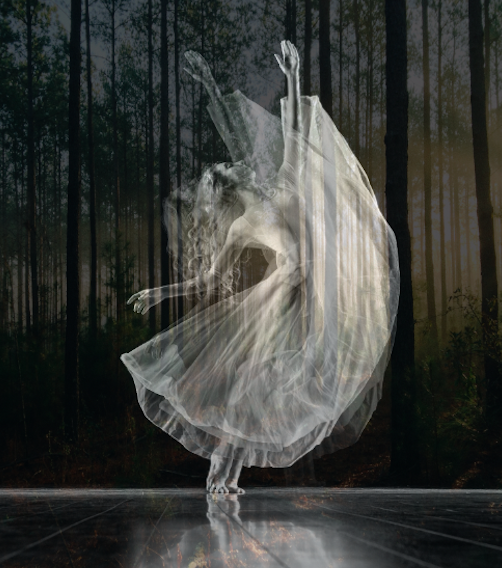
You will now have an image that replicates the multiple exposure technique.
You can add more layers to the background image. Make sure to adjust the opacity of each new layer.
In decades past this technique was also created by photographers using darkroom techniques.
The creative possibilities of multiple exposure photography are only limited by your experimentation and imagination.
FAQs about multiple exposure photography
Can all cameras do multiple exposures?
Not all cameras have a built-in multiple exposure function. Some DSLRs and mirrorless cameras have this feature, while others do not. You can always create multiple exposures in post-processing, regardless of your camera.
What are some tips for successful multiple exposure photography?
Some tips for success include carefully choosing your subjects, considering the contrast and lighting, and experimenting with different blending modes in post-processing. The process often involves a lot of trial and error.
Can I do multiple exposure photography with film?
Yes, this technique can be done with film by not advancing the film roll to the next frame after a shot is taken. However, this method often involves guesswork and can’t be precisely controlled.
What type of subjects work best for multiple-exposure photography?
There’s no hard rule on this as it depends on the creative vision. However, typically one of the exposures is a silhouette or a subject with a lot of negative space, and the other exposure fills in that space with texture, pattern or detail.
How can I use multiple exposures for creative effect?
Multiple exposures can be used to convey movement, show different perspectives of the same subject, or create surreal, dreamlike images. Experimentation is key in discovering unique ways to use this technique.
 Guide to Camera Film Stock: Types, Developing, Examples
 33 Most Famous Film Photographers in 2023
 What is the Best Canon Camera in 2023? (All Budgets)
 Canon EOS 5D Mark IV Review for Professional Photographers
 Best Canon Flip-Screen Camera for Vlogging in 2023

Judyth is an experienced studio photographer and glass artist. When she isn’t Photoshopping comedians into the bellies of sharks, you can find her cooking delicious treats for her guests.

WELCOME TO SHOTKIT
Enter your email to be sent
today's Welcome Gift:
19 Photography Tools
🔥 Popular NOW:


Shotkit may earn a commission on affiliate links. Learn more.