


Guide to Levitation Photography
Discover the secrets to creating realistic levitation photos using a camera or phone. Learn how to make your subject float. (Includes 7 ideas for inspiration!)
Learn | Photography Guides | By Ana Mireles
Have you seen pictures where people and objects are flying around? I’m sure you have. They’re popular and eye-catching – because we’re looking at something that our brain says isn’t possible!
It doesn’t matter if you’re a portrait, commercial or a fine art photographer – you can do levitation photography with all sorts of subjects.
It’s a fun and original way to spice up your portfolio or your social media feed – and it’s not nearly as difficult as you might think.
Here, you’ll find a step-by-step levitation photography tutorial and some levitation photos for your inspiration.
Let’s get floating!
Table of Contents
How to Shoot Levitation Photography

There are different ways to do this. The easiest one – technically speaking – is by jumping or throwing the object in the air as you take the photo with a fast shutter speed.
Even if this is easier to do, it might not give you the best results as you can’t perfectly control the outcome.
It’s also not the safest approach either because the person can injure themselves, or the object can fall and break.
This ‘freeze-the-subject’ technique puts a limit on your creativity. Certain poses aren’t possible to reach by jumping. Also, you can’t compose an image with multiple levitating objects, etc.
For all the previous reasons, I’ll show you another levitation photography technique – it may seem complicated, but as with all the best magic tricks, you’ll see it’s not really that difficult!
It’s known as the support method. With it, you’ll get more realistic levitation photography results and open up a world of image creating possibilities.
For your first levitation photograph, you’ll need:
- A tripod.
- A camera (any camera will do, even a smartphone).
- Something to support your subject.
The idea is to photograph the elements and the background separately and then make a composite.
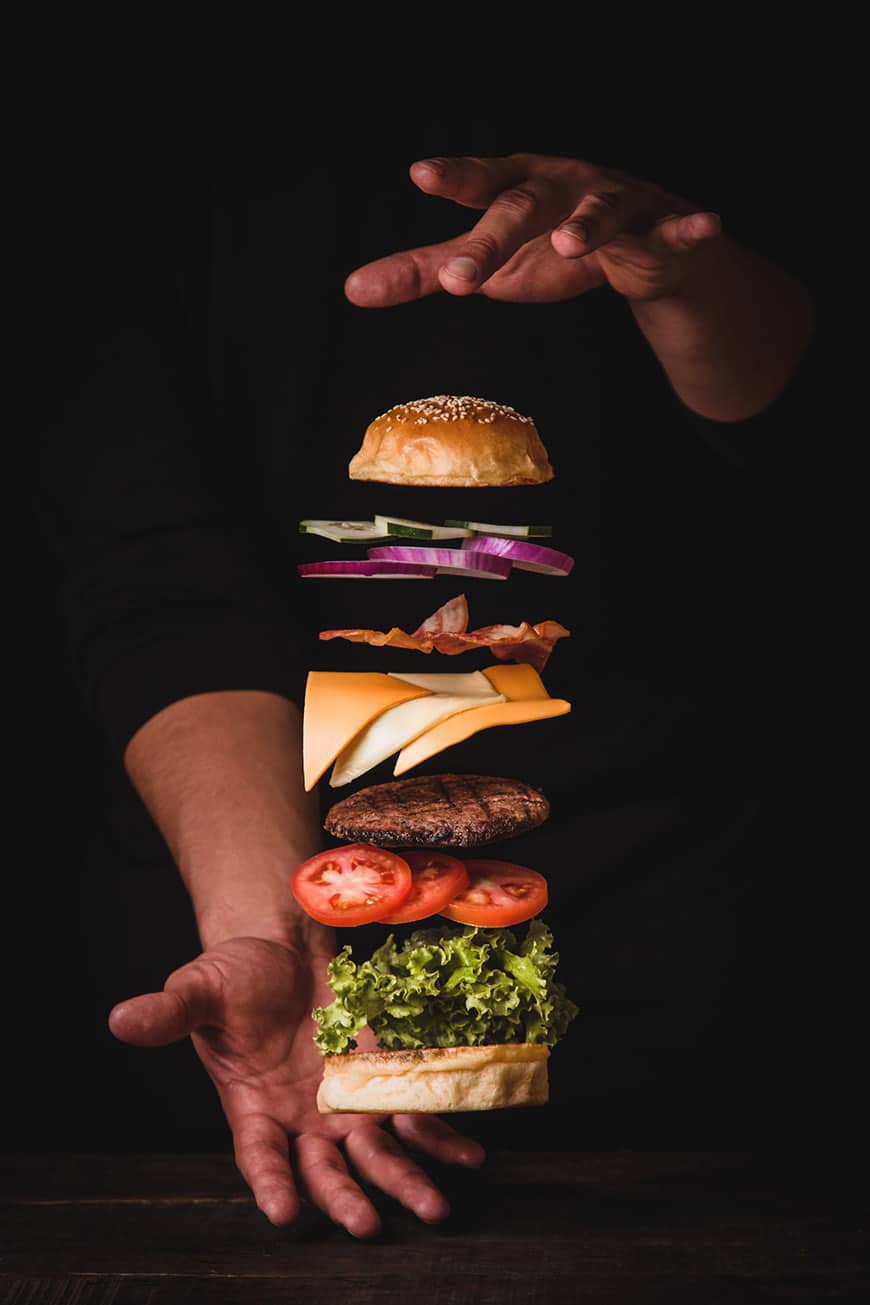
You can do this with any type of photography – if you do a quick search on Instagram, Pinterest or Google, you’ll find levitation portraits, decomposed hamburgers where each ingredient is floating separately, or some magical books flying around a Hogwarts inspired library.
All of these can be done with this technique. However, you can start with something easy and work your way up.
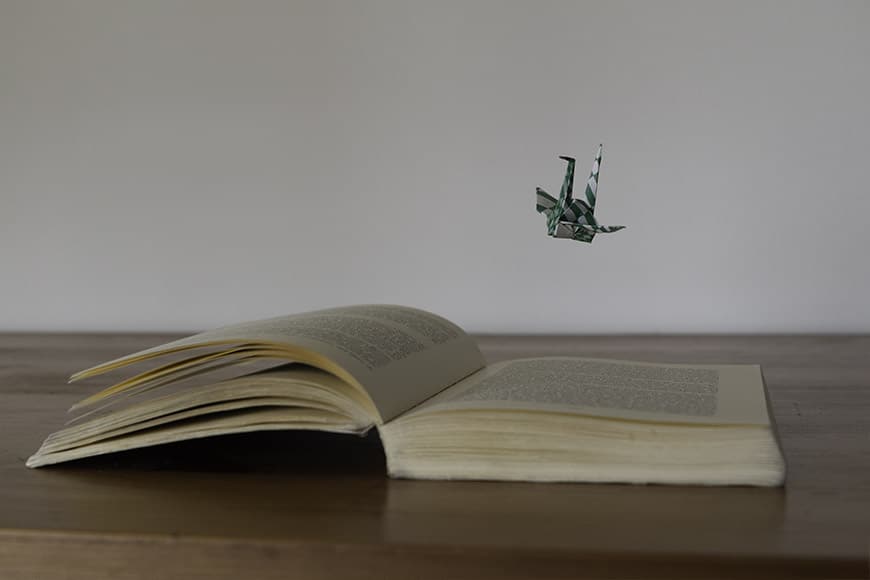
I’ll show you the basics to create your first levitation photograph with a single object on a solid background.
Step 1: Set up your scene
Finding the right location for your photography is important, as it will set the mood of the scene.
Try to find a spot where you can have even light – this can be outdoors in the shade or indoors to control the light. (This is because hard shadows can make your life difficult in post-processing.)
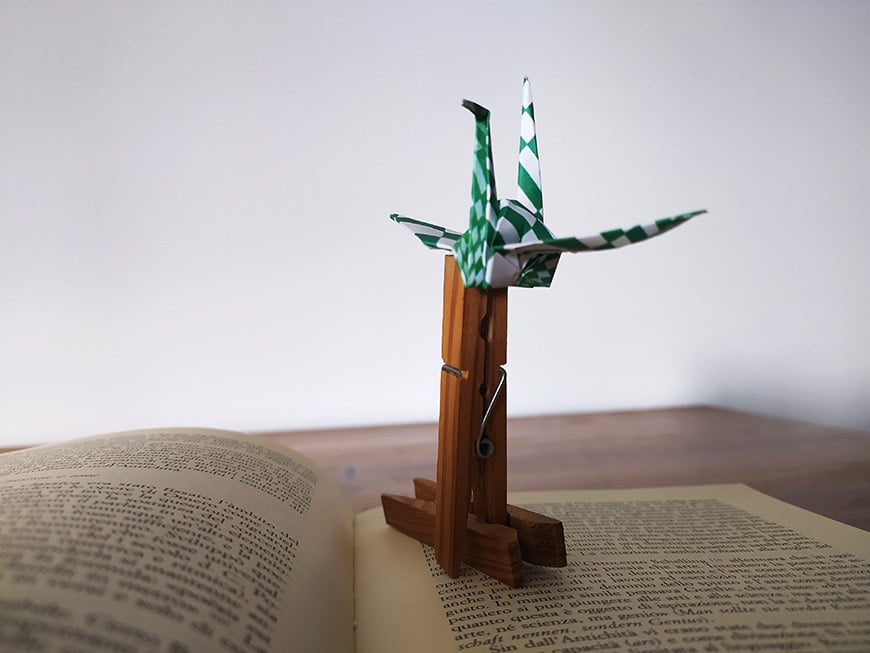
Once you know where you’re shooting, start building your set. This is a very important step because you need to position your subject on top of a stool, a ladder, a box or something similar.
Make sure the support is not blocking a part of your subject. In my case, I used a piece of scotch tape on the back ‘wing’ of my origami paper crane.
If you’re working with something that should be flowing downwards, make sure the prop is not in the way—for example, your model’s jacket or dress.
The general idea is that you should be able to delete the prop later and won’t be missing a part of your subject. It could always be fixed in Photoshop, but it requires more time and skill.
Depending on the subject, sometimes it’s better to use strings or ropes to hold it from the top instead of using a support. Use whatever works best for you.
Step 2: Position the camera
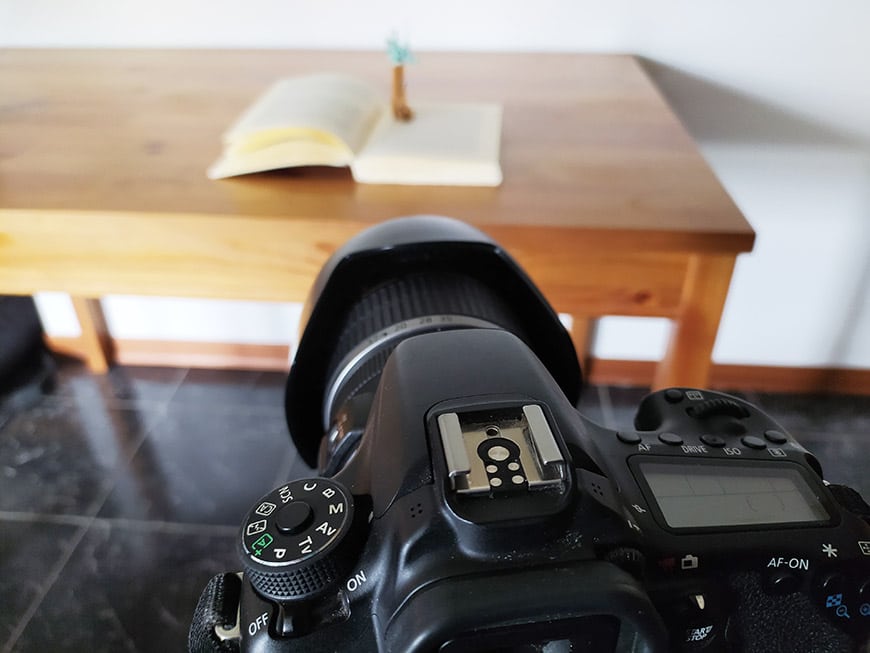
You’re going to need two images framed exactly the same – to achieve this, you need to use a tripod (some lightweight options here).
Once the camera is on the tripod, frame and compose your scene.
The camera angle is important to get the right effect. If your point of view is below the object, you’ll enhance the sense of the levitation – as if the object is higher up in the air.
However, shooting from below, the support prop might be in the way. So keep an eye on that and choose the best camera angle for your specific situation.
Step 3: Set the focus
As you know, you’ll need to have a photo of the empty background and one with the levitating subject to create a realistic levitation photograph.
You should always take the photo with the subject first because that’s the one that you’ll use to set the focus.
So, turn your camera to manual mode and focus on your subject. It’s important that you use manual mode because that will make both images exactly the same.
If you were to have the camera in auto-focus, it might change the focal point in each picture – this is what you’ll need to avoid.
Step 4: Adjust the settings
Ideally, you’ll want to have your camera in manual mode – if you’re using a smartphone, you can do this with PRO mode or by using third party apps.
The reason is the same as the one for the focus – you want both images to be exactly the same. If you’re using auto or semi-auto modes, the camera might change its settings from one picture to the next.
If you don’t have a camera that allows you to have full control or simply don’t feel confident using the camera’s manual mode, you can do it anyway – you’ll have some extra work to do in post-processing, though.
Step 5: Shoot the first image
Ok, you’re ready to go – shoot the first image. If you’re using a slow shutter speed or your tripod is not super sturdy, try using a remote shutter release to avoid moving the camera when you push the button.
When you’re shooting a static object – like I was in the example here – one image will do just fine.
However, if you’re working with a model or something that moves, you should take more than one. This way, you’ll have more possibilities to get the right facial expression or the perfect flowing hair, etc.
Step 6: Repeat with every object
In my example, there’s only one levitating subject – so, I only need two photos for the final composite. If you want to include more of them in your scene, I recommend taking a separate photo for each one.
That’s because the subject’s support prop can cast shadows onto other items, making the post-processing job more difficult.
Step 7: Shoot an image of the background

Now that you have all the images you need of your subjects, it’s essential to have one of the empty background. It should be framed and exposed exactly in the same way – because you need to compose all the images together later.
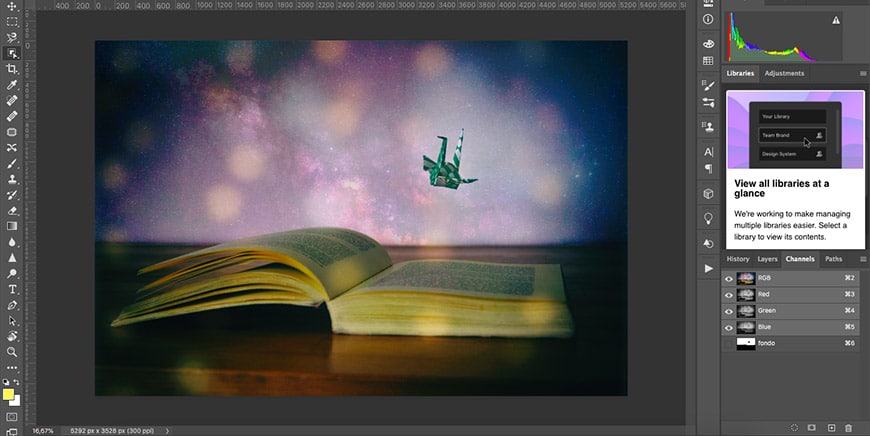
Take out the levitating object and photograph only the background. In my case, the background also includes the book in the foreground.
It’s important that I don’t accidentally move the book when I’m doing this. If you have a similar situation, make sure you don’t move any of the objects that form part of the background setup.
How to Process Levitation Photography
Now that you have all your material, you need to make the composite. I’ll do this process with Lightroom and Adobe Photoshop – but you can use other programs such as Luminar if you wish.
Step 1: Download your pictures
If you were using a smartphone for the photoshoot, you could do the post-processing on your phone or download the images on your computer.
For camera shooters, you’ll need to download your pictures onto your computer.
Step 2: Edit in lightroom (optional)
This step is optional, as you can do the entire process in Photoshop (or the software of your choice).
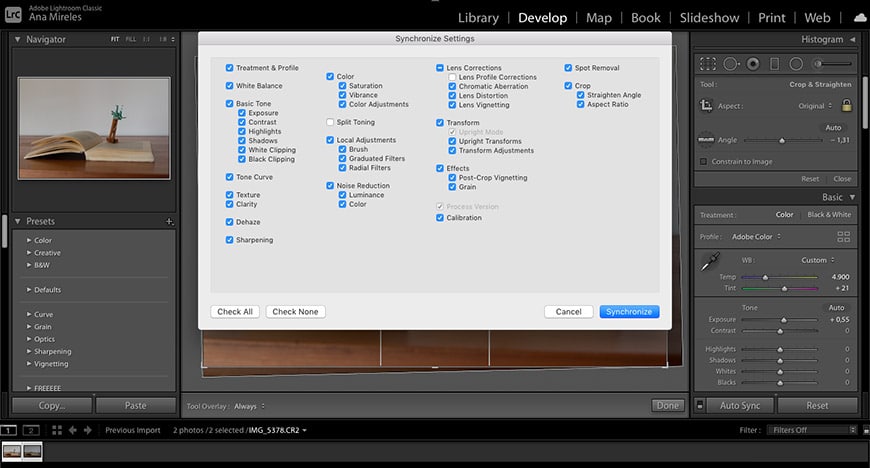
However, I like to start in Lightroom because both images – the one from the background and the one with the subject – need to look the same.
Using Lightroom, I can adjust white balance, curves or whatever else I need and sync all the images. This saves a lot of time and effort.
Step 3: Open in Photoshop

If you were editing in Lightroom – select all the images from your composite and go to the menu Photo. There, select Edit in, Open as Layers in Photoshop.
If you want to open them directly in Photoshop, first launch the program. Then go to the menu File, Scripts, Load Files into Stack.
Both these options will open your images into the same document as separate layers.
Step 4: Add a layer mask

Go to the Layers panel and make sure the top layer is the one with the levitation subject. To rearrange the order of the layers, you can just click and drag.
While you have the top layer selected, click on the Layer Mask button at the bottom of the panel to create a new mask.
By default, the mask will be white – therefore, you won’t notice any changes. You should see a white thumbnail next to the layer, though.
Step 5: Mask out the support prop
The way masks work is that anything in white is visible, and anything in white is hidden. So, grab the brush tool and choose the color black.
Then start painting over the support prop to ‘hide it’. This is a good way to work non-destructively because if you make a mistake and paint over your subject, you just need to toggle the color to white and paint it back.
Make sure you’re using the right size and hardness on the brush tool. You can use a bigger brush to do the widest area. Sometimes you can see the brush strokes, especially if the two images don’t match perfectly in brightness or tone.
This can happen if you didn’t take the original shots in manual mode or you didn’t edit them in the same way. If this is happening, use a soft brush to allow a smoother transition. These settings are on the Options toolbar on top of the screen.
When you’re getting close to the subject, you’ll be better off using a smaller brush with hard edges. You can zoom in to be more precise.
If you want to see only the mask, you can hold the Alt key while you click on it. Then do it again to go back to see the layer.
Once you’re done, click on the eye icon next to the layer to turn off the visibility. Toggle it on and off to make sure everything is OK. Sometimes by doing this, you’ll notice a shadow you still need to hide or a miss-match in the background.
Make sure you’ve fixed all those details. That kind of thing can be the giveaway that ruins your levitation photo.
Step 6: Make final edits (optional)
That’s it, congratulations! You’ve successfully finished your first levitation photography project.
If you feel like your levitation photograph could use some ‘magical ambience’ or any other retouching, you can use some textures, overlays and adjustment layers to get it the way you envisioned it from the start.
7 Great Levitation Photography Ideas
Remember that you can do levitation photography in many photographic genres.
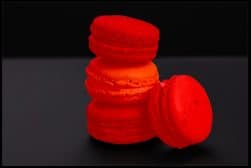
Here are some examples to get you inspired, from portraits to products to food photography.
In each example, have a think about how the photographer created such a realistic levitation shot – did they certain photography techniques, or rely more on Adobe Photoshop for post-production?
Credit: Designecologist

Credit: Pixabay

Credit: Gleb Albovsky
Credit: Pablo Merchan-Montes

Credit: Sara Julie

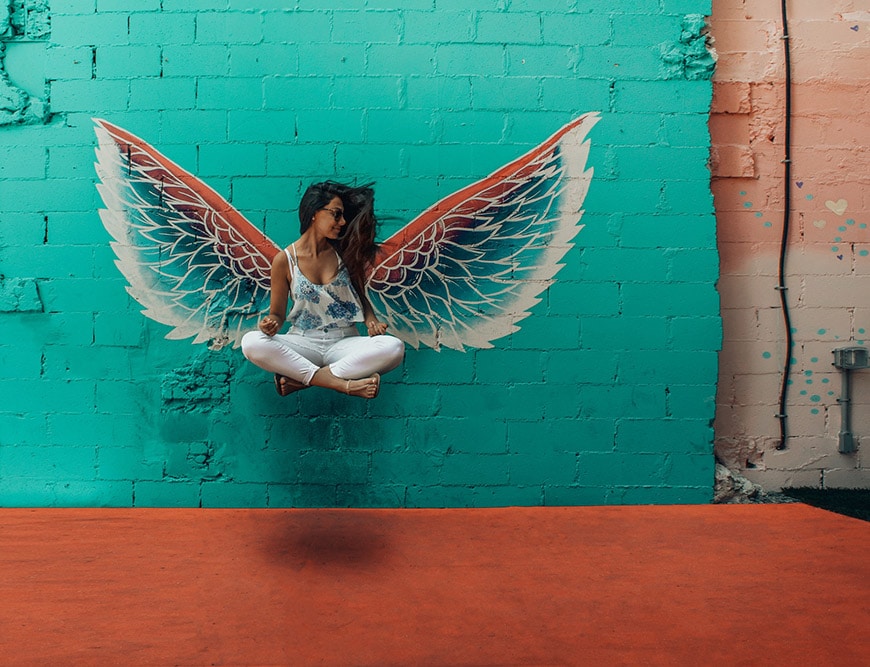
Credit: Kobu Agency

Credit: Julius Drost
Levitation Photography FAQs
How do you take levitation pictures on iPhone?
You need to ‘secure’ your shot by using a smartphone tripod, then take two photos – one of you being supported by an object, and one where only the background is showing. Then use an app such as Levitagram to edit the support out of the first photo.
How do you edit yourself floating?
Set your camera up on a tripod on a timer setting. Put yourself in the scene, sitting or lying down on whatever support you choose – a chair, step ladder, etc. Then take your first photo. Without moving anything other than to remove the support, take a second photo. Then use Adobe Photoshop to mask out the support from the first photo, leaving the background from the second photo showing in its space.
Final Words
From all the photography techniques out there, I think creating levitation shots is one of my favorites. I hope you’ll give levitation photography a try and enjoy it as much as I do.
I invite all the levitation photographers reading this to share their tips and ideas in the comments section – we’d love to hear from you.
 How to Use the Clipping Mask in Photoshop (Complete Guide)
 How to Merge / Blend Two Images in Photoshop
 How to Use Photoshop Smart Objects in 2023: Create, Edit & Fix
 Guide to Image Masking for Photo Editing
 Learn How to Layer Mask in Photoshop in 4 Simple Steps
 33 Most Famous Film Photographers in 2023

Ana Mireles is a Mexican researcher that specializes in photography and communications for the arts and culture sector.


WELCOME TO SHOTKIT
Enter your email to be sent
today's Welcome Gift:
19 Photography Tools
🔥 Popular NOW:


Shotkit may earn a commission on affiliate links. Learn more.