


Hunting Photography: 17 Essential Tips for Hunt Season
Documenting the story with the right camera and lens is an important part of hunting photography. Prepare yourself for the hunting season with these tips.
Learn | By Jeff Collier
Whether you’re photographing other people’s hunting adventures or capturing images from your own, this guide will make you a better hunting photographer.
Hunting stories have been etched into rocks and painted on walls for thousands of years.
Nowadays, you describe your hunting adventure to your friends by showing off a selection of amazing hunting photos.
Whether you want to become a hunting photographer or are just interested in the process, this is the guide for you.
These tips will ensure you capture everything from the great outdoors in all its glory.
Related: 15 Essential wildlife photography tips
Table of Contents
17 Hunting Photography Tips
Are you ready to go out hunting? Are you prepared to capture the amazing moments of your hunt, kills, and the wildlife you will encounter?
Continue reading for some expert tips about capturing the best hunting photographs:
1. Get the right hunting photography gear
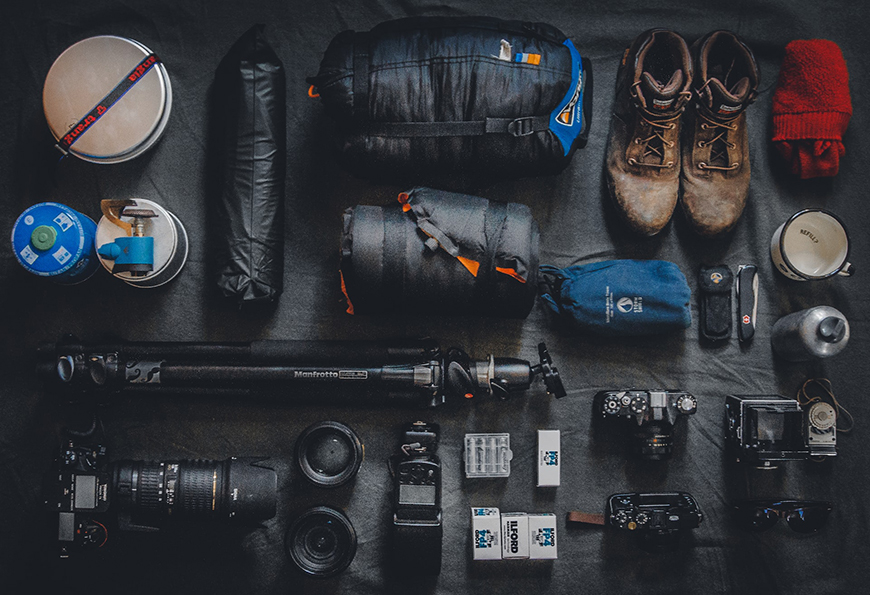
Credit: Alexander Andrews
To get the best kill, a hunter must have the best hunting equipment. The same thing goes for your hunting photography gear.
You must invest in high-quality camera equipment and other gear to capture the best photos possible during your upcoming hunting trip.
Continue reading for more information about the best hunting cameras, lenses, and equipment needed for capturing your hunting story and taking better shots while out in the wilderness:
- Hunting photography cameras
Many professional quality cameras are perfect for capturing your hunting story, but how do you know which is best for your upcoming hunting trip?
The type of camera you choose must fit your hunting photography skills and provide you with the quality of photographs you desire.
The camera you choose can make a huge difference in capturing simple images or creating great pictures.
Here is a list of some of the best cameras for wildlife photography or to use during your upcoming hunting trip to help you capture the best outdoor human interest photos possible:
- Canon EOS-1D X Mark III – Pricey, but an amazing wildlife camera
- Canon EOS 5D Mark IV – Older camera, but loved by hunters
- Canon EOS 90D – Great sensors and speedy performance
- Fujifilm X-H2S – Best for action shots
- Nikon D500 – A hunter’s dream camera
- Nikon Z9 – Best budget-friendly camera
- Olympus OM-D E-M1 X – Fast focus
- Panasonic Lumix FZ2500 / FZ2000 – Best versatile camera with 20x zoom
- Sony Cyber-shot RX10 IV – Best camera, but it’s expensive
In addition to the many excellent handheld cameras used for hunting photography, hunters use trail cameras to get close to wildlife without physically being there and risking scaring them off.
Some of the best trail cameras used by hunters include:
- Bushnell Core DS No Glow – Works excellent during the day or night
- Spypoint Force-20 Trail Camera – Best trail camera for its price
- Spypoint Force-Pro – Records 4K clips and 30MP stills
- Spypoint Solar Dark – Solar powered
- Stealth Cam DS4K Ultimate – Best trail camera for beginner
- BlazeVideo A280W – Great value for a WiFi trail camera
Trail cameras are a lot more affordable than you’d expect, and offer a glimpse into the animal world as you’ve never seen before.
You should also consider using a thermal imaging camera, which can help you see animals in the dark much more effectively than night vision alone.
Finally, don’t miss our guide to the best video cameras for hunting.
- Camera Arm
A camera arm can help keep the camera steady and stable when capturing footage from your tree stand.
Most camera arms are lightweight, weighing less than five pounds, and can support up to 10 pounds of camera gear.
Many camera arms, such as the one from Muddy Outfitter, also come with soft, quiet straps and joints making it possible to set up without disturbing nearby wildlife.
- Mic
If you plan to take video footage during your hunting trip, an external microphone can help improve the audio quality, ensuring you capture clear audio tracks.
The Sennheiser MKE 400 is a shotgun mic that is strong enough to capture the leaves crunching in the feet of a buck.
- Fill Flash
Even when shooting photographs in natural light outdoors, you can still run into unwanted and unsightly shadows.
To combat these shadows and create great photographs, a fill light can brighten up your subject at varying distances, providing enough light to eliminate unflattering shadows.
When shooting using a telephoto lens, a flash extender, such as the MagMod MaBeam Wildlife Kit, can push the light from the flash far enough to reach your subject and provide the light needed for a fantastic photograph.
When shooting at close range, the flash can put out harsh, direct light, and using a flash diffuser light softbox can help provide a fill flash without being too intense or bright.
In addition, the Altura Photo Flash Diffuser Light Softbox is lightweight and folds flat, allowing you to put it in your camera bag.
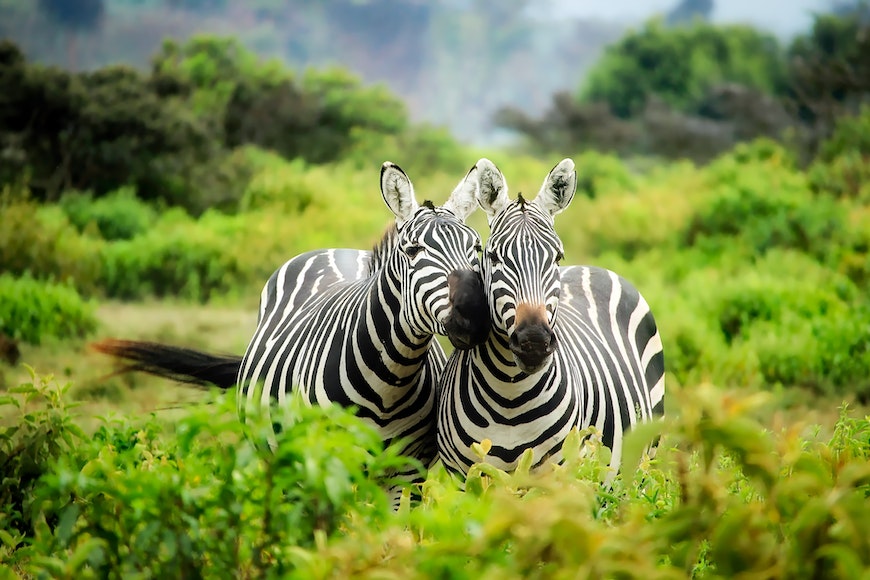
2. Camera Lenses to Document Hunting Stories

Credit: Jonathan Mabey
Using a DSLR camera body for hunting photography offers you numerous options when choosing the best camera lens for taking photos.
When shopping for a lens, you must purchase the lens from the same manufacturer as the body or a third-party lens designed to fit the specifications of your DSLR body.
When shopping for DSLR lenses, look for genuine U.S. market products to ensure both the quality and little motion blur. Though third-party lenses work, you will capture better images using manufacturer lenses.
A lens with a fixed aperture typically produces better and higher-quality photographs.
Zoom lenses allow you to get close to your subjects without spooking that trophy buck and still provide excellent photographic quality.
Some of the best zoom lenses for outdoor photography include the following:
- Canon EF 70-200mm f/2.8L IS III USM Lens
- Canon EF 100-400mm f/4.5-5.6L IS II USM Lens
- Nikon af-s 200-500mm f5.6e ED VR
- Nikon af-s 80-400mm f4.5-5.6g ED VR
- Nikon 200-400mm af-s ED VRII
- Sigma 120-300 2.8 DG OS HSM (for Canon and Nikon)
3. Choosing Camera Bags
The bag you choose can make a world of difference in how you carry your photography equipment as a hunting photographer.
When buying a camera bag, look for one lightweight, with lots of pockets, and camouflage to help keep it hidden.
One of the best camera bag brands for hunting photographers is Tenzing, which offers Lumbar Hunting Packs that are lightweight but large enough to carry everything you need in the wilderness.
4. Dial in the Right Camera Settings
The camera settings you choose can make a difference between good images and a bad photograph.
The best wildlife photography settings used by many hunting photographers include the following:
- Shutter speed: 1/250s to 1/2500s (depending upon if the animal is stationary or moving)
- Aperture: f/2 to f/6 (depending upon the lens)
- ISO: 200 to 800 (depending upon the available light)
5. Select The Best Orientation
Credit: Pixabay
Determine the orientation to use for your photographs – portrait or landscape.
Portrait is a vertical orientation and is best when shooting people or single animals up close.
Landscape is a horizontal orientation and is best when shooting scenery and animals within your favorite hunting grounds.
You can learn more about portrait vs. landscape orientation here.
6. Steady Your Hunt Shots With The Right Tripod
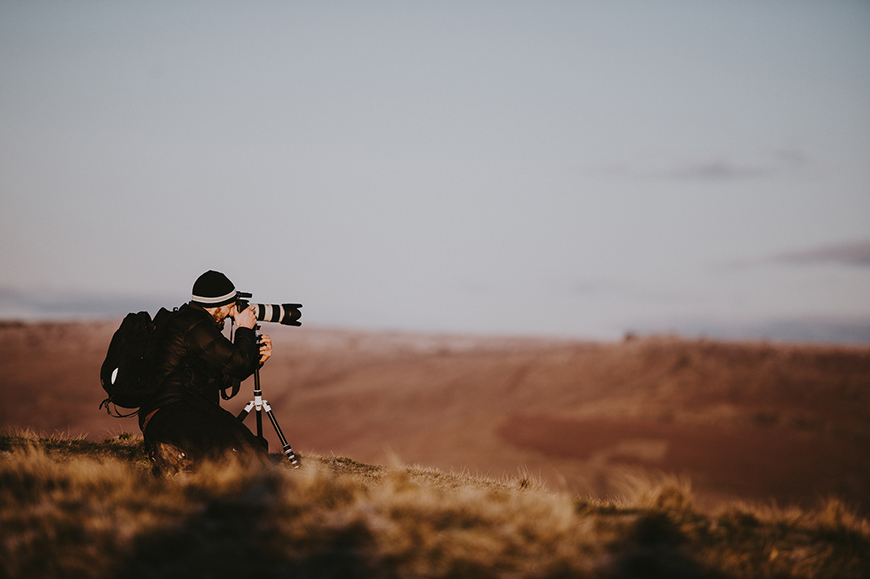
Credit: Annie Spratt
A tripod will help keep your camera steady, allowing you to use a slower shutter speed without causing a blurred background.
On a solo hunting trip, a tripod lets you take photos of yourself during your journey at distances to help capture your surroundings.
Here are some sturdy travel tripods.
7. Shoot Multiple Photographs for Diversity

Credit: Creativebin
Taking multiple photographs of wildlife during a hunting trip gives you plenty of options during post-production.
It is always best to shoot more images, and most cameras have a burst mode, which takes several shots in a quick sequence, providing multiple images of the exact moment.
8. Consider the Background
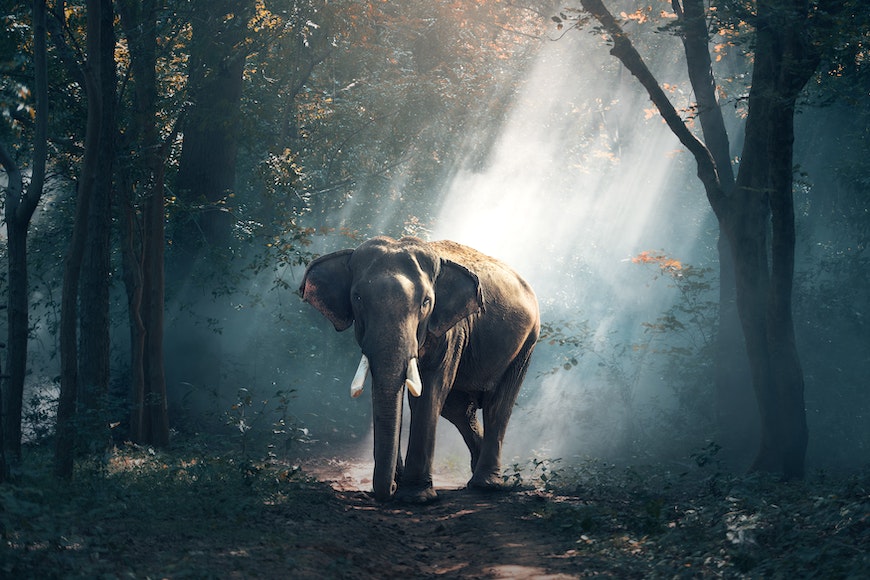
Credit: Pixabay
Wildlife and hunting photos turn out amazing because of the natural background, and it’s essential to consider the environment when setting up your shot.
Try to keep the background in focus and keep it with simple but essential elements avoiding anything that might distract from the natural setting, such as a truck or modern structures.
9. Use Unique Angles

Credit: Rob Zohrab
Don’t be afraid to adjust the angles you shoot wildlife, such as shooting from above, below, or from the side, instead of straight on.
Different angles can improve the lighting and appearance of the subject in the photograph.
10. Follow the Rule of Thirds
Credit: Pixabay
The Rule of Thirds divides your field of vision through the camera into three equal segments, which can be horizontal or vertical.
It is best to place your subject off-center in either one-third or two-thirds of the field of vision instead of taking the entire frame.
12. Utilize Reflective Surfaces

Credit: David Dibert
When shooting in the wild, look for reflective surfaces, such as water or ice (if shooting in the winter), and capture your subject in the reflection.
13. Clean Things Up
After shooting a deer (or other animals), please take a moment to clean it up before shooting photographs.
Wipe away as much blood from the carcass, antlers, garments, and hunting gear as possible before clicking the shutter.
If a water hose is unavailable, wet wipes or bottled water can help clean everything up enough to take a beautiful photograph.
14. Silhouette Photographs
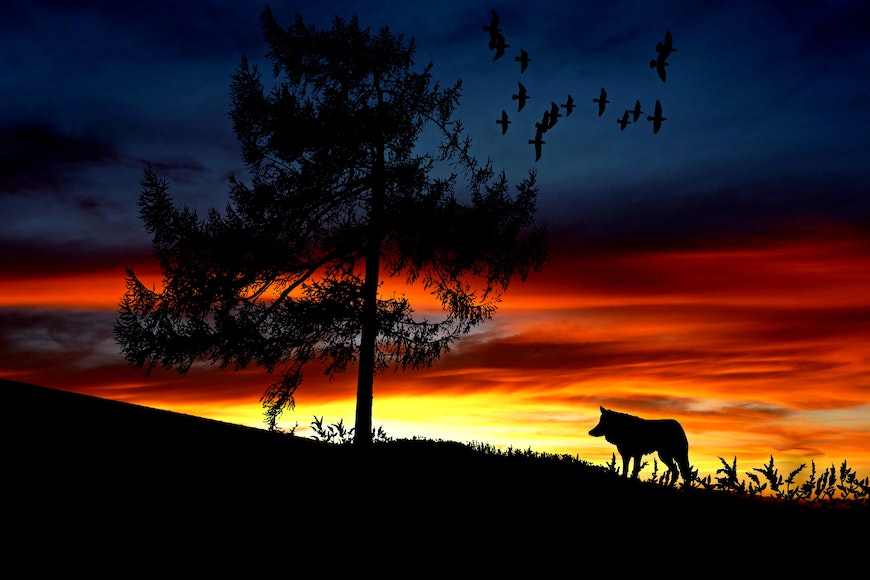
Credit: Pixabay
Capture beautiful images of wildlife by shooting against the light source, such as the sunrise or sunset, which creates a silhouette of the animal.
Here are some more ways to use silhouettes in your photography.
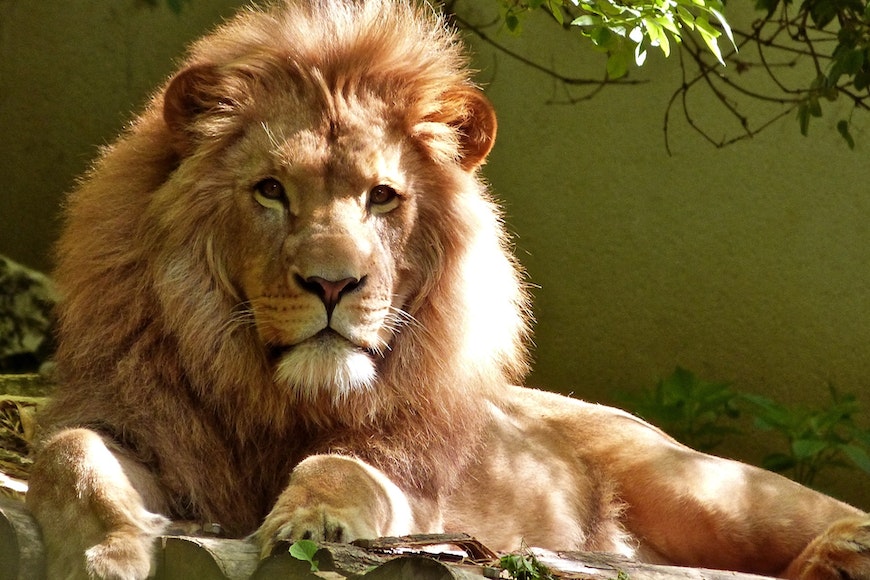
15. Keep It Simple

Credit: Egor Kamelev
Simplicity is vital when shooting wildlife photographs, and by minimizing any distractions in your photos, you naturally bring the viewer’s eye to the subject.
16. Combine Various Photographic Techniques, Tips, and Tricks

Credit: Ray Bilcliff
Not all techniques will work for all hunting photography situations, and sometimes more than one tip and trick with work magic when capturing wildlife photographs.
Don’t be afraid to mix and match techniques and try using different tips and tricks together to create unique images and help you discover which methods work best for you.
17. Post-Production is the Icing on the Cake!
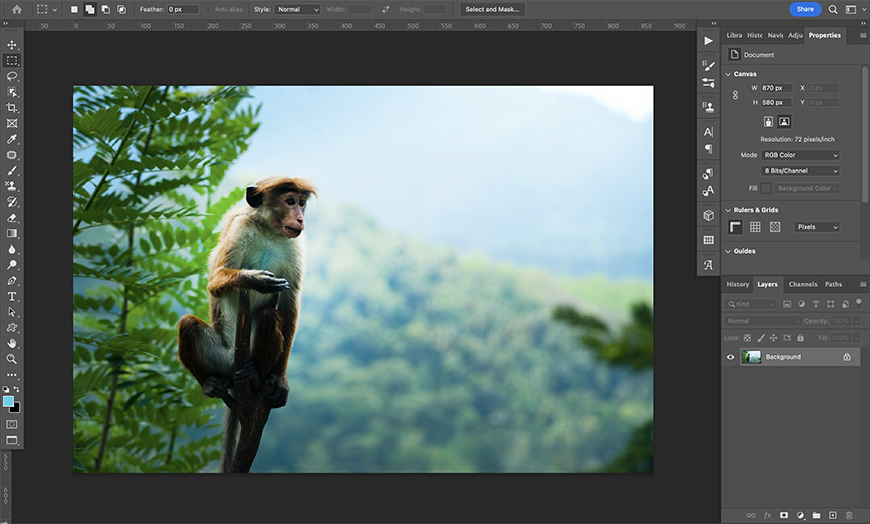
Credit: Oleksandr Pidvalnyi
The one question we’re frequently asked is, “How do you edit hunting photos?”
If your photos need some tweaking, such as cropping, straightening, or lightening, editing software, such as Adobe Lightroom or Adobe Photoshop, can help with all of your post-production editing needs.
Check our guide to the best photo editing software for wildlife photography to see what tools you should use to edit your hunt photos.
FAQs about Hunting Photography
What is the best ISO for wildlife photography?
Mid-range ISO, such as between 400 and 800 is best for wildlife photography; however, you can go as low as 200 and still create amazing images.
What is the best time to photograph deer?
Deer tend to stick to the same routine and visit their favorite locations; however, the best times of the day to capture them are in the early morning hours or late evening, when they are at their most active.
Plus, the light is warm and low during these hours, making for striking photos.
What lenses are best for filming hunts?
The best lenses for filming and photographing your hunting trip are those with telephoto capabilities, such as those that reach up to 300mm, and work best for shooting landscapes and wildlife off in the distance.
However, suppose you will primarily be shooting people, photographing your hunting partner, camping activities, up-close hunting activities, hiking, or similar activities. In that case, a mid-range zoom lens will give you the quality and zoom depth you need.
How far should you track a deer before giving up?
With light feet and careful skills, you can track a deer for quite some time before you either lose track of the animal or get tired of following it through the woods.
On average, when tracking a deer for photo opportunities, you can track them for about 20 to 30 minutes before giving up.
If you are hunting and have shot the deer, a well-hit animal should be found within 200 yards of where you hit it.
What is the best f stop for wildlife photography
Wide apertures are best for shooting wildlife photos, providing proper exposure, which means the best f-stop for your lens is often f/2.8, f/4, or 5/5.6.
What time are you most likely to see a deer?
Deer are more likely to be active during the twilight hours of the day (dusk and dawn), and though you may encounter one during the day, most deer sleep during the day.
Deer typically feed in the early morning hours and again in the evening, and these are the times when you will see them being the most active.
Final Words
Hopefully, these tips will help you during your next hunting trip, where you can confidently begin taking photographs, knowing how to create fantastic pictures and remarkable treasures to cherish forever.
Whether you want to become a hunting photographer or are just curious, I hope you got something out of this guide.
If you still have questions about hunting or wildlife photography, do not hesitate to ask us.
We are here to help with all your photography questions.


Jeff Collier is an experienced film photographer who enjoys experimenting with modern digital photography equipment, software and apps. He’s also an ex-world champion triathlete and avid cyclist, clocking hundreds of km each week in the beautiful Tweed Valley of northern NSW, Australia.


WELCOME TO SHOTKIT
Enter your email to be sent
today's Welcome Gift:
19 Photography Tools
🔥 Popular NOW:


Shotkit may earn a commission on affiliate links. Learn more.