


Guide to Flat Lay Photography
Find out the best flat lay photography tips and ideas in this must-read guide! Get started or take your flat lay photos to the next level.
Learn | Photography Guides | By Andy Day
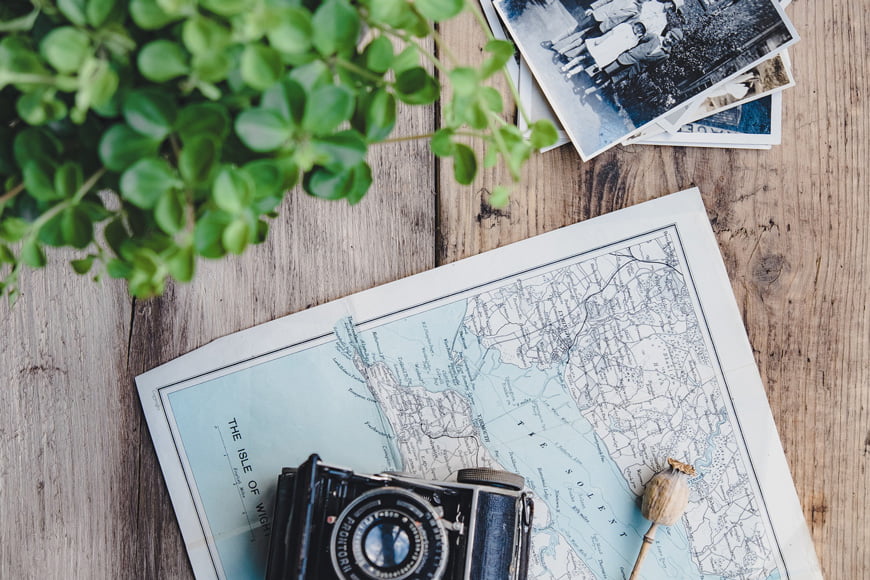
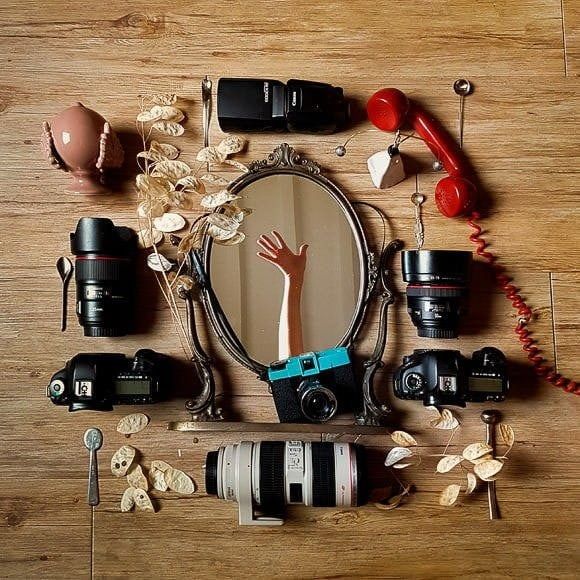
Shotkit is proud to be the home of the camera gear flat lay, so if you’re asking yourself “how do I take a flat lay picture?”, we’ve got the answers you need!
Be sure to click around this site to see inspirational flat lays from photographers of all genres.
So whether you want to learn about flat lay clothing photography, food photography or just just something for your OCD tendencies, there’s something here for you!
Let’s dive into this short guide to get you started.
Table of Contents
What is Flat Lay Photography?
Flat lay photography is shooting a variety of items all laid out on a flat surface — from above.
It creates a bird’s eye view of a still life — and often one that has been carefully constructed to give a sense of balance.
This type of photography has become incredibly popular, particularly on social media, and you’ll find it used on everything from Instagram to corporate websites to personal blogs.
Flat lay photographs are simple, pleasing to the eye, and can be very effective in presenting a product or a feeling.
These photographs are like mood boards, creating a portrait of a person through their belongings, inspiring a vibe or an emotion about an activity, or building a brand around a product — all achieved through props that tie together.
When it comes to flat lay photos, the only limits are your imagination – but there are some basic guidelines and ideas to follow that will help you quickly start producing professional-looking results.
17 Tips for Perfect Flat Lay Photography
Flat lay photography can be as simple as shooting your desk with your smartphone but quickly becomes intricate when you want to start creating more sophisticated setups. These tips will give you a good foundation as you begin your journey.
1. Use a Lot of Light

Credit: Sittig Fahr Becker
Light is key to every photo and flat lay photography is no exception. You’ll need a lot of it, but ideally, it needs to be even and diffused so that your items don’t cast lots of strong shadows.
This type of photography relies on creating a clean look to the items that have been laid out, and shadows can undermine their shape, clog up the scene, and also overlap onto other items causing them to lose their impact. At the same time, we don’t want to eliminate them completely.
If you’re asking yourself “how do I take a flat lay photo without shadows?” there are a few things to consider.
Large windows and skylights can be ideal for natural light, but you’ll want to avoid direct sunlight. If the sun is streaming into your room and creating strong shadows, try hanging some sheer curtains.
This will cut down on the amount of available light, but it will prevent you from having strong shadows — something you definitely want to avoid. If you can’t eliminate the shadows, perhaps try and incorporate them into your scene.
White walls and reflective surfaces in the room that you are shooting can be helpful in making the light feel even.
Avoid using on-camera flash completely as this will create a very directional light and cast very deep shadows with lots of contrast.
Remember: you don’t want to eliminate shadows completely. Shadows should be soft enough to give the props a sense of depth so that the images look real and with a three-dimensional feel, without being so hard that they become distracting.
Think carefully about your lighting and camera settings, and if you need to shoot outdoors, remember that direct sunlight is far from ideal. Shoot in the shade or wait for a cloudy day.
Alternatively, check out our guide: how to build a DIY light box.
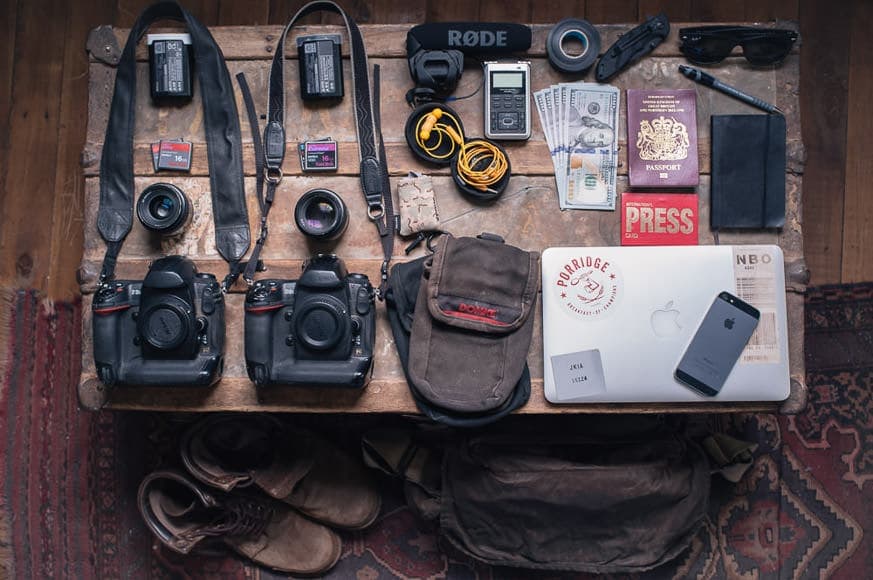
2. Choose Your Background Carefully

Credit: Deanna Mushins
The surface on which you are laying out your items is critical, and choosing something with a neutral colour and tone is usually the best bet.
If the background is too dark, any black or grey items — especially cameras! — can start to disappear and become hard to see.
Bright white backgrounds can create too much contrast, making the surface distracting and jarring on the viewer’s eye.
Wooden textures are very popular, especially given that the best flat lays create a scene that makes you feel like you can reach out and touch.
Wood and concrete can help to give a handmade, artisanal feel to the image, giving a sense of physicality that draws in the viewer.
Sometimes, space might be the determining factor, and you might end up stealing a bedsheet or heading outside and using your neatly cut lawn. Whatever you end up using, try to make sure that it doesn’t distract too heavily from the items that you are laying out.
The background will set the tone for the entire image and the best flat lay photographs have backgrounds that work together with the items that are laid upon them.
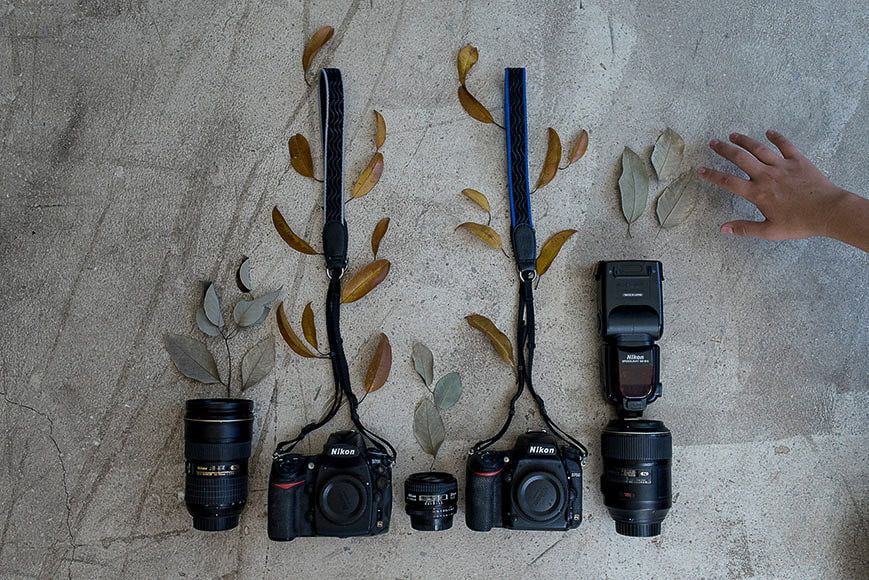
3. Create Unity
Credit: zamurovic
Just as the background must work together with the objects that you are laying out, the items must themselves work with each other.
Aim to be able to explain how each creative decision is contributing to the overall piece. Every small detail should be working with the image to create the look and feel that you are trying to achieve.
All of the elements in the photo — from the textures, the background, the choice of colors, and of course the objects themselves — should work together to conjure this feeling. Whether it’s painting a picture of a boutique coffee house, a tattoo artist, or even a corporate office.
4. Create a Mood, a Vibe, a Feeling, an Atmosphere — Not a Photo
Credit: Phil Moore
All of the elements going into creating your flat lay photograph should work together — but towards what?
Flat lay photographs are about constructing something stylised that gives a strong sense of a person, an activity, or a product. What values and ideas do you associate with that subject, and how can you express them through objects?
Remember: people might make things, but things also make people, and flat lay photographs can be an opportunity to paint a portrait of an individual through the items that contribute to their identity.
5. Get High
Credit: Dirk Dallas
For larger flat lays, you’ll need to get some height in your photograph. Standing on a chair is a good option but you might be better off dragging a step ladder from out of your cupboard.
A wide-angle lens will make life a little bit easier, but avoid going too wide as you might start introducing distortion to your images. Any distortion will undermine the geometry of what you have constructed and hinder your quest to nail the perfect flat lay photo.
6. Shoot On a Tripod

Credit: Natalia Y
For smaller still life setups, a tripod can be an essential piece of gear, allowing you to be more precise in your framing and also adjust what you’re creating without having to continually pick up and put down the camera.
You’ll want to choose a tripod that incorporates a horizontal arm so that you can point your camera straight down. A ball head will also make life much easier in finetuning your framing.
Keep in mind that extending the tripod arm with the camera attached can cause the tripod to tip over, so it might be worth investing in a small sandbag as improvised alternatives can often be a recipe for disaster.
Alternatively, you might prefer to take your flat lay photos by rigging up a system that clamps to the edge of your desk.
7. Find Inspiration and Plan as Much as You Can
Credit: rocknwool
The internet is not short of ideas when it comes to flat lay photography and there are countless great examples to be found, particularly on Instagram and Pinterest.
These are valuable sources of inspiration. Pinterest is specifically designed to allow you to gather ideas, and Instagram allows you to save posts to specific collections.
Instagram also has a pile of hashtags related to flat lay photos that you can follow.
8. Don’t Be Afraid to Overflow
Credit: Annie Spratt
A struggle for many of us shooting flat lay photos at home is not having enough space.
Overflowing your frame is one way of getting around this.
For example, a viewer might only need to see the corner of a laptop and its keyboard to understand what it is, saving you from having to include the entire item.
Overflowing can also be a creative choice, prompting the viewer to imagine what’s outside of the frame based on everything that appears within, giving a sense of intrigue to your flat lay photo.
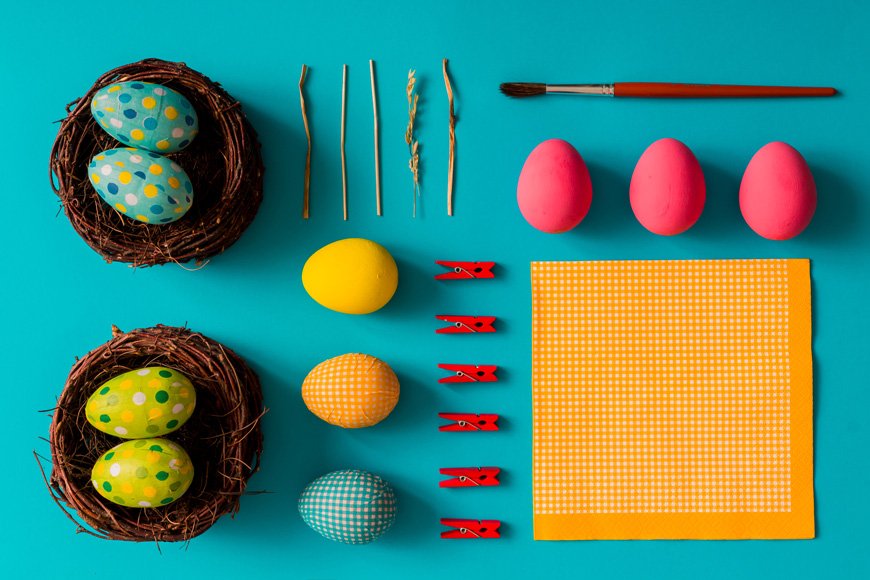
9. Consider Colors
Credit: The Creative Exchange
Because of its often minimal nature, flat lay photography really benefits from bringing some color theory to your images.
This can mean sticking to a series of muted tones and relying on the textures to create interest, or taking inspiration from a color wheel to see which colors work well together.
Or you can abandon traditional principles completely and deliberately choose colors that clash.
Again, your choice of background will have a large influence on how well the colors work together in your chosen theme.
A background with a neutral color — i.e., close to grey — will give you the most flexibility when it comes to placing items, while a vibrant background can help bring drama if the items themselves are comparatively boring in color.
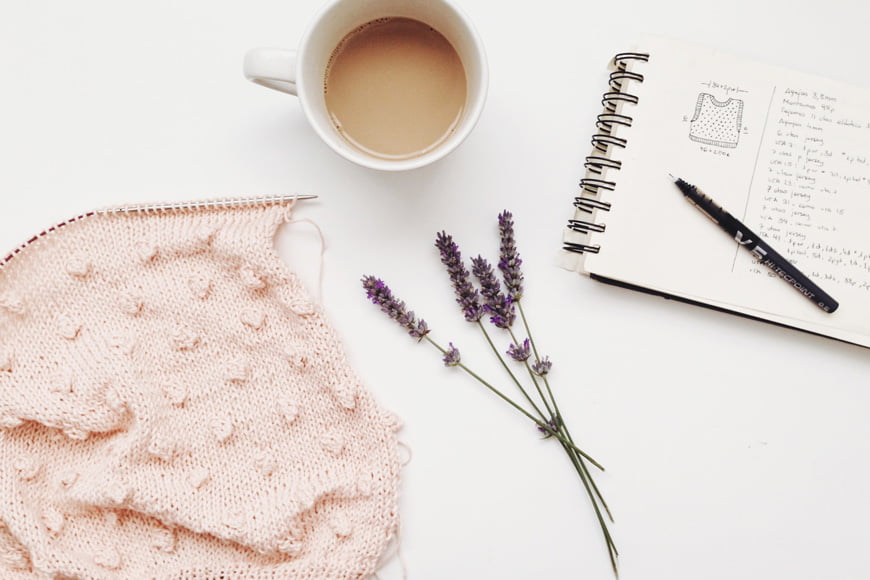
10. Start Minimal

Credit: Icons8 Team
Flat lay photography often relies on items sitting cleanly in their own space, framed by nothing but background. Obviously, this is a rule that you can then go on to break, but aiming for simplicity early on is the groundwork for building up a successful image.
Starting with as few items as possible is a great way to build up a scene. You can then figure out how each new element will work to add to a setup, making them complement what you’ve already put in place rather than having them create clutter.
Be sure to shoot at each stage as you build up your layout. Not only will you come away with more images, but you’ll also continue to learn about how to construct a scene when you come to sit down and edit your images.
11. Create Balance

Credit: Jess Bailey
One of the advantages of embracing minimalism is that it gives you an opportunity to learn how to create a sense of balance in your images. Unfortunately, there’s no specific set of rules of what works, and if there were, many of them would be there to be broken.
That said, you can start by drawing on the principles of photographic composition, such as the rule of thirds, centering, golden ratio, leading lines, and many more.
Editing your work is when you learn most about what works. In this sense, editing doesn’t mean tweaking contrast or lifting shadows, but looking through countless images and figuring out which have a sense of balance and which do not.
You then take those lessons with you into the next shoot.
12. Think Geometrically
Credit: Priscilla Du Preez
The human eye loves geometry. Creating pleasing shapes, clean lines and distinctive angles in your flat lay photography is a shortcut to making engaging, satisfying images.
The frame of your camera — whether it’s square, 3:2 or 4:3 — imposes its own geometry on the scene and this is the foundation which you then build upon. Lines that are parallel with the edge of the frame should be exactly that: parallel. If they’re off by a degree or two, you might start triggering viewers’ OCD.
If you want to create something that is off-kilter, be bold: go for 30 degrees or beyond. 10 degrees will just make people feel uncomfortable that it’s not straight!
Geometry isn’t just about straight lines, 90-degree angles and perfect circles, however. You can make sweeping curves; just be sure that these shapes are strong as less distinct forms can give the image a messy and haphazard feel that undermines the overall composition.
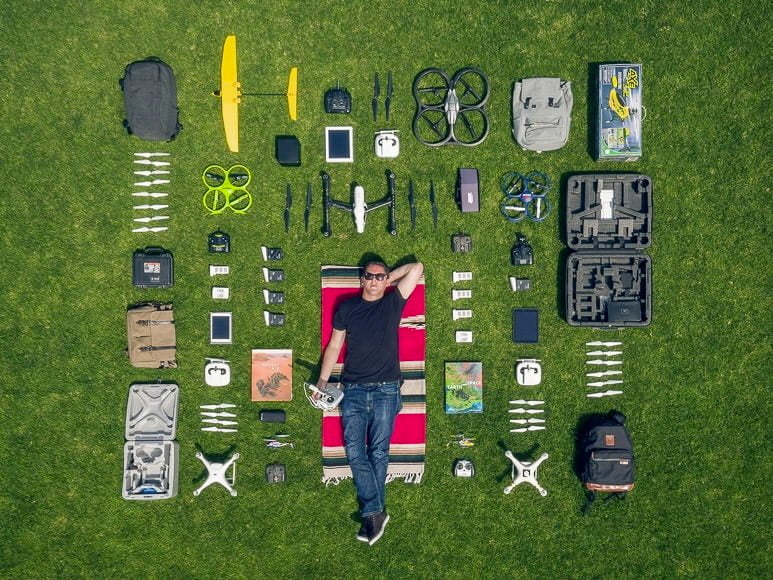
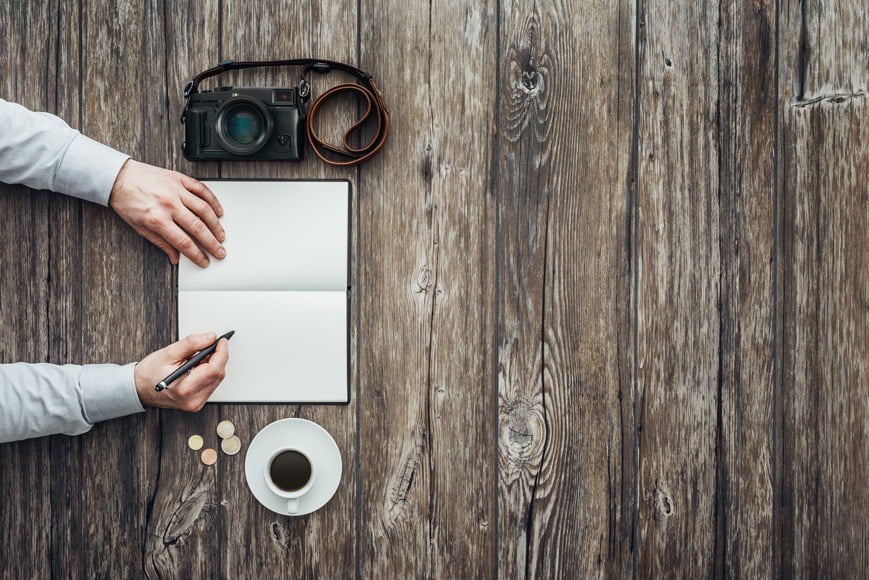
13. Arms and Legs

Credit: Hipster Mum
There’s no reason not to incorporate a model — or even yourself if you have a tripod and timer — into your scene, and it can make the world that you’ve created feel more real and engaging.
Hands holding coffee cups are a popular choice on social media, and while feet and legs can be harder to include, it’s not impossible.
Perhaps the only rule is not to include the top of someone’s head. Climbing into your scene can make for some innovative portraits and selfies, but the top of a head is rarely what a viewer wants to see.
No model? Try photographing your toys by using action figures or Barbie dolls – making them look like real people can be fun and serve as good practice for using all the various lighting techniques.
14. Where Is the Image Going to Appear?
Credit: Beatrice Moricci
How the image is going to be used is going to be fundamental to how you start creating your scene.
Will it be used as a web banner? Or is it going to be uploaded to Instagram?
A web banner needs to be landscape in format, and might even need to have more of a letterbox ratio — even wider than the 3:2 of a camera with an interchangeable lens, and far beyond the 4:3 of many smaller cameras, including smartphones.
By contrast, Instagram lends itself well to square (see above) or 4:5 portrait images – see this guide to social media image sizes.
To help with this, many cameras allow you to set up guides that overlay or even crop the image while you compose it.
15. Try a Flat Lay Video
If you’re wondering how to make your brand stand out, you might be asking yourself “how do I make a flat lay video?” Simple movements and stop motion animation can give your work an edge, especially when you consider that Instagram seems to favor video more and more.
Some of the most creative flat lay videos use stop motion. This is a series of still images that are then edited together to give the illusion of movement.
You simply take a series of photos and convert them into an animated video file. If you want to use them on the web, the best option is to convert your images to an animated GIF.
This can be done in Photoshop, through a smartphone app, or by uploading the images to a website such as imgflip.com.
Note that you can’t upload animated GIFs to Instagram, but there are smartphone apps that will convert your images to video files, or you can drop your images into Windows Movie Maker or iMovie, edit your animation and then export to the right format.
16. One Scene, Multiple Shots
Credit: stockasso
Once you’ve got the shot that you wanted, don’t stop. Grab multiple variations, making small changes to give you lots of options from which to choose later.
It might be that you end up with something that’s even better than your original idea, or you might decide that you want to overlay some graphics and the one you shot later with lots of negative space lends itself perfectly.
17. Edit Your Photos
Credit: Citlalli Rico
The work isn’t done once the image has been captured on your camera. Editing should be a part of your creative process to polish the details.
This can mean throwing on a Lightroom preset to give the photo a certain look and feel, cropping the image to give a better sense of balance, repositioning items slightly using Photoshop, or even using Photoshop’s Transform tool to correct any lines or angles that weren’t quite perfect.
Flat Lay Photography FAQs
What is flat lay photography used for?
Flat lays are used primarily on social media. They’re used by both individuals and businesses to showcase products, convey a mood, or as lifestyle branding. Food and fashion are two particularly popular themes for flat lays.
Why are flat lays so popular?
Flat lays are popular because they’re simple, highly pleasing to the eye, and offer lots of room for creativity. They’re also very effective at presenting products or conveying a mood or theme.
How do you light a flat lay?
Soft, even light is best as you want to avoid hard shadows. You can use natural light from windows or skylights; add sheer curtains if the sun is too strong. If using flash, diffuse the light with a softbox. Lightboxes are also handy for product flat lays.
How do you take flat lay pictures on iPhone?
Lay out your arrangement of objects on a low surface. Next, get up high (you may need to stand on a chair if you can’t fit in the whole picture) and take a photo looking downwards. Be sure to hold the phone parallel to the scene you’re shooting and not on an angle. Avoid using the optical zoom on your phone; it will reduce the quality of the picture and it’s better to capture more space and crop later.
Final Words
As you’ll no doubt find out as soon as you start sifting through Instagram and Pinterest, flat lay photography can be a wonderfully creative and artistic process.
It gives you the chance to create tiny, two-dimensional worlds that convey something unique about someone or something that might not even appear in the image.
Hopefully, this list of flat lay photography tips will give you plenty of inspiration to get started! If you have any questions or other recommendations, feel free to give us a shout in the comments below.


Andy Day is a British photographer and writing, living and working in France, specialising in adventure, travel, architectural and landscape photography.


WELCOME TO SHOTKIT
Enter your email to be sent
today's Welcome Gift:
19 Photography Tools
🔥 Popular NOW:


Shotkit may earn a commission on affiliate links. Learn more.