


Composite Photography Ideas, Tutorials & Examples for 2023
Learn more about Composite Photography and how to composite images using Photoshop with this handy beginners guide. Create amazing images to wow your friends!
This guide is about composite photography – the bringing together of different photographs and images into a single picture.
Composite photography covers a very wide range of creative photography and digital image manipulation ranging from pleasingly simple to extremely complicated!
In this guide, we will discuss some general principles and basic working methods of composite photography.
Then we will look at a number of typical examples including landscape, focus stacking, ‘surreal’ imagery and working with images of different types.
We’ll also look at how to create your own composite images in photoshop. So let’s get started!
Table of Contents
What is Composite Photography?
Composite Photography – sometimes ‘photo composite’ or ‘composite image’’ – is the term most commonly used today, but in concept, the process of bringing images together goes back to the birth of photography with double exposure and then photomontage.
Today digital processing provides a toolbox of opportunity for everyone.
Now there may be some people who see composite photography as somehow ‘cheating’ – that the use of photoshop or other software takes away any artistic integrity.
However, it is worth considering how the techniques we recognise from composite photography were pioneered long before photoshop existed.
The only rules to photography are self-imposed. If Man Ray was alive today, he would no doubt be creating Photoshop composite images, just as he created ‘photograms; a hundred years ago.
Discussion about ‘composite photography’ always raises the question of ethics – when does being creative become telling an untruth.
If your landscape has sky that was taken an hour later when the cloud formation was more striking is that a lie or are you showing what you envisioned?
Can street photography use compositing? It is like many things in photography a discussion you have to have with yourself.
There is a difference between a taken photograph and an assembled picture, and there is definitely an ethical line drawn when an assembled picture is presented as a photograph with the aim of deceiving the viewer about real-world actuality, as in fake news versus photojournalism or documentary photography.
But in the end, composite photography is about creativity and about having fun, so don’t worry too much about the rest! Photographers have a habit of overthinking things ;-)
9 Tips for Successful Composite Photography
Below we’ll cover some essential tips for you to get started with creating stunning composite images.
1. Pre visualise your composite photography
Paint me Your Tomorrow – Kellie North
This is a tip for if you’re photographing for a composite – meaning you’re going to take two or more new images to create a composite image.
Here it is important to pre-visualise your project: think through what you want to achieve visually and how you are going to achieve it.
2. Plan your composite images
Blissful Drift by Kellie North
Step 2 is to plan: what do I need? How many photographs will put together? It’s a simple step to consider but an important one! Is it going to have two images stitched together, or more?
3. Use a tripod
If you’re photographing the same scene multiple times – but differently – ensure your camera on a tripod. If you changing your camera position while shooting it would make it difficult to make the photo look believable.
Also, editing will become really troublesome. Frame your photo and set your aperture. You should use a narrow depth of field to flatten out the image – say F8 or stop down from there – then you can move objects and subjects around with every shot you take.
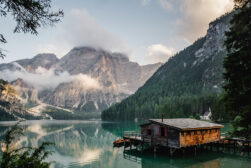
4. Use landscape photography for your composites
Credit: Atanas Malamov
The eternal problem in landscapes (and cityscapes) is how to expose correctly for both sky and the ground. By ‘correct’ we mean what you want from your picture – remember that as we look at a landscape our eyes scan up and down and across giving good exposures for everything.
The camera just averages things out or gets it right for one or the other – good sky but dark ground, or ground with detail but washed-out sky. Now, expensive filter systems can be the solution – however, composites offer a cheaper answer.
With composite photography, you can take two landscape images, using a tripod. One is exposed correctly for the sky, the other for the ground.
The technique can be extended with different images for different sections of the ground. HDR photographers use this technique to achieve their unique look to their images.
5. Try double exposures
Credit: Luka Senica
You can try composite photography in camera of course – why not try a double exposure. Bringing two different images into one makes an instant metaphor – one thing being of another releasing emotion, thought provoking or comedy.
Done with a portrait face it can reveal character or project a persona or, in advertising a desired world. Modern cameras have a double exposure mode – much easier than winding the film back as it was in the days of film photography!
6. Use focus stacking
Even with careful exposure and choice of lens getting everything you want in into perfect focus is sometimes impossible.
Focus stacking is a composite technique, often used in product photography (jewellery, antiques, two objects on a surface, etc).
Using a tripod several photographs of the object are taken from the same POV but altering the point of focus.
The images are brought together and using different blend modes in post-production to get that pin-sharp product look throughout the final picture.
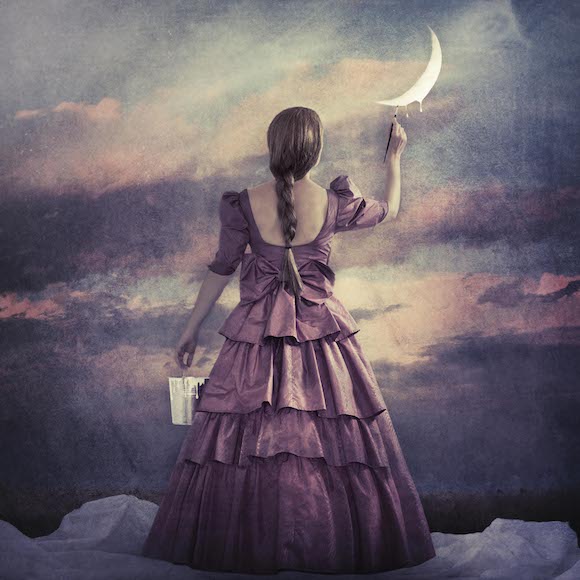
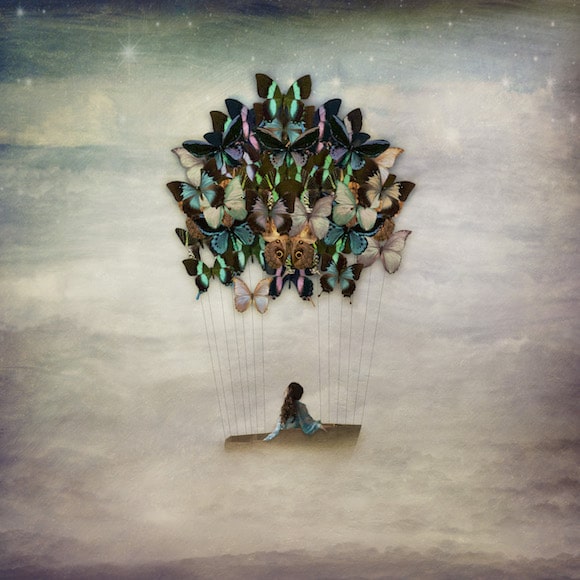
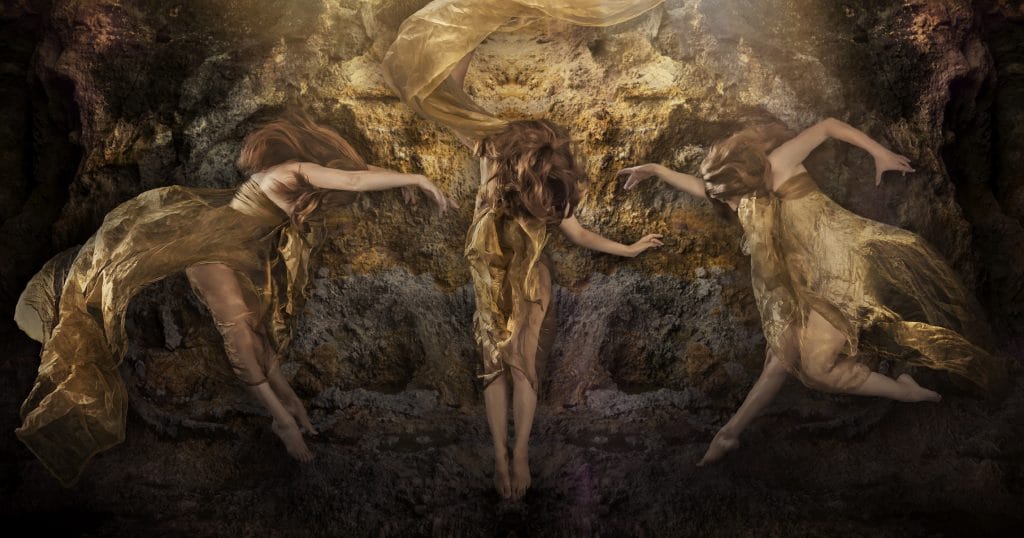
7. Aim for imaginative creations

Voices from the Stone by Kellie North
Composite photography allows you to create imaginative pictures. Playing with scale – a figure of a friend in a flower bed. Playing with the unreal – a person with a kitten’s head.
There are no limits to your imagination or with composite photography!
8. Look to fine art for inspiration
All In by Kellie North
The aforementioned Man Ray is a great starting point to look back on – but it’s not just photography. Why not look back at the surrealist painters for inspirations: Salvador Dali for example. (More surreal photography artists here.)
Or try recreating the painting: The Son Of Man by Rene Magritte – the famous painting where a man’s face has been replaced by an apple.
9. Use existing photographs to create new composites
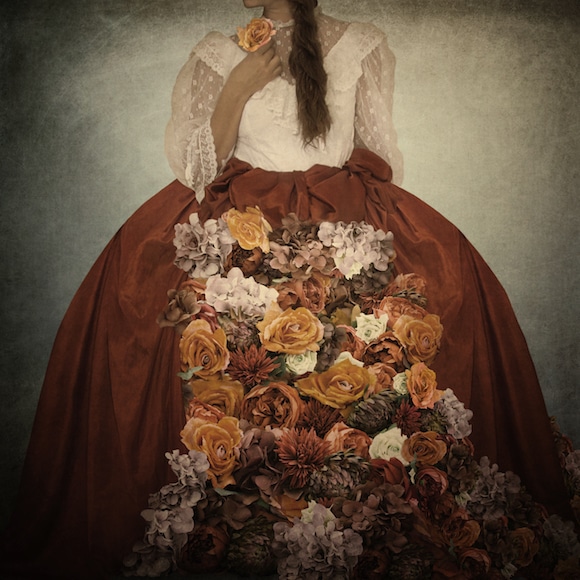
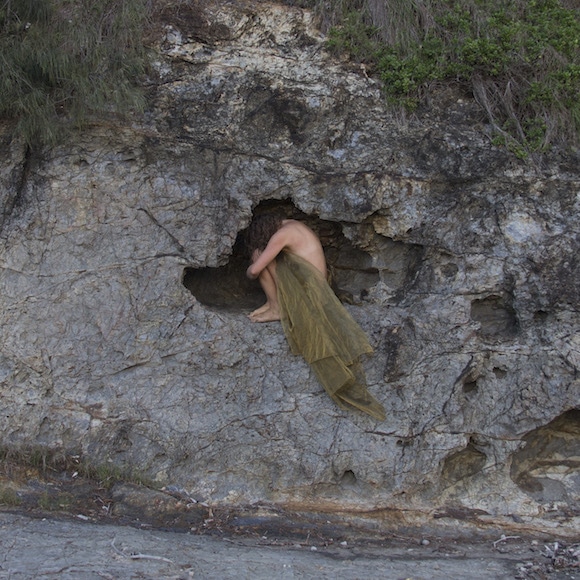
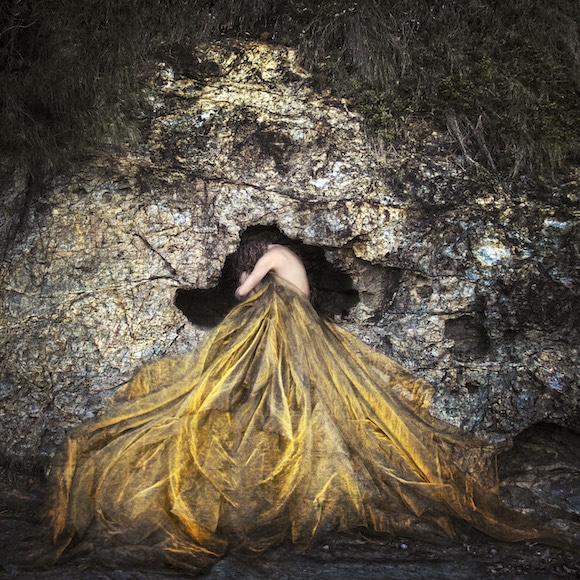
Endearment by Kellie North
You don’t have to take new images to create composites – why not look back on your back catalogue of work. Pick two or more old images and create a photo montage.
Also – you could look to stock images to help you create – there are millions of free to use photos that you could utilise in your final image.
Composite Photography Before/Afters
Talented photographer and visual artist Kellie North has kindly allowed us a behind the scenes look at two of her composite images.
Obviously, hours of pre-production planning and post-production Photoshop work has gone to create these works of art, but at least you can get an idea of what the starting image looks like when compared to the finished version.
Be sure to check out more of Kellie’s amazing work on her website and on Instagram @kellienorthcreative.
How to Composite Images in Photoshop

While this guide has shown some composite photography from talented photographers, we’re going to take it down a notch to something anyone with Photoshop can accomplish within an hour!
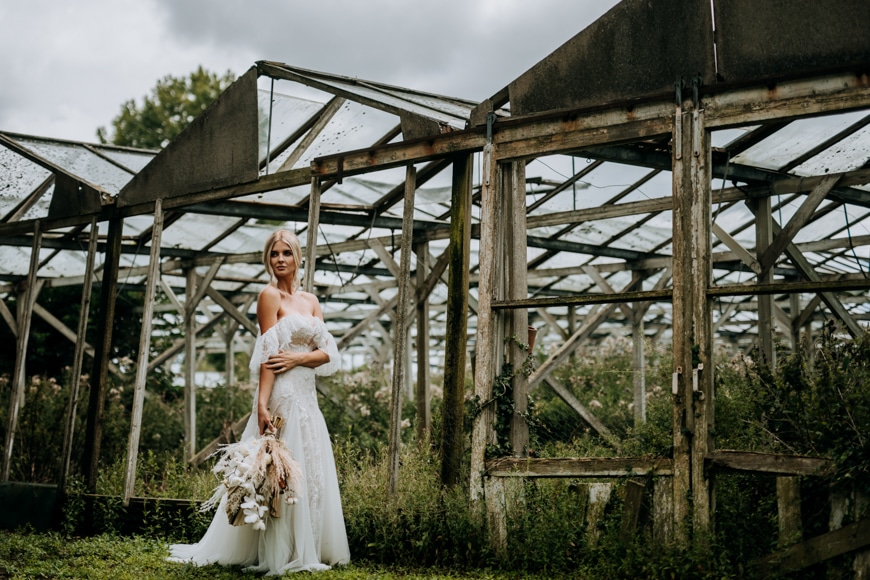
Our example above shows one of the most commonly used composites, inserting blue skies into an overcast scene. It’s a simple and easy technique to get started with and you can use the tips below to achieve it. (Credit: Hollie Mateer)
Below we will talk you through how to create composite photography in Photoshop.
1. Check your image EXIF data
If you are bringing images together from different sources – such as an archive image, a mobile phone image and images from your DSLR – they will have different sizes and dpi. Some thinking through about setting up is needed before importing different image types into the project.
To check your image size and resolution, you need to check the exif data. Luckily this is easy to do – just right click your file in windows, or click cmd-i on a Mac.
2. Save your work as you go
A good tip is to save versions as you go. The ‘history’ tool will help you track back but save different versions with different file names along the way as you develop your image. And, if your picture is complicated, name the layers!
3. Importing and Layers
You may be working with a set of photographs you took under controlled conditions – say a landscape using a tripod. Or you may be using different images entirely.
Either way, you need to import parts or whole images into others.
So, open your first image in Photoshop. Then open your second image – you can then copy that image (or just part of it) into the first image.
You can do this by using the move tool and dragging it from one image to the other. Then you can resize the imported image or rotate it – use the transform tool to do this.
You can also use the Smart Object tool so you can adjust the size of the images you are working with without losing definition.
You can even lower the opacity of the image to help it easier to position your image over the original. Two or more layers will now be available for you to work with.
4. Selection and Masks
This is an important step to making your image look believable. You don’t want to be able to see where one image ‘joins’ to another. So you want to clone out or remove parts of the images you don’t need – just leaving the edges you do want.
Use the quick selection tool to pick out complicated areas to precisely help with this part of the process. Paint over the image and it will show us the edges of the image. You can then work on it from there, taking out jagged edges.
Define the radius and use the special refine edges brush. This is ideal for precise areas like hair.
You can also convert your selection into a Layer Mask. Do this with ‘Output Settings’ in Select and Mask menu.
You will find that areas outside the selection are hidden. Then by highlighting the Mask thumbnail you can then paint it black or white.
5. Getting the look and feel right.
Now, this is a crucial part of the process – getting the look and feel of the image just right. Your image may need cloning to – you can do this at the end after flattening the image (make sure you save before flattening!) you can also use blending modes like liquify, smudge and other tools to help.
However, some of this needs to be considered while shooting. Your separate images will merge more naturally if you photographed them consistently – this means taking note to shoot in the same or similar lighting conditions and paying particular attention to shadows.
At some point you may need to think about making things fit together visually: perspective, colour balance, colour perspective. This is of course unless you want to retain a crude cut and paste look of some pop art collages!
6. The finishing touches
If an image you bring in looks out of place even when the scale and perspective have been adjusted look at matching the Tone Values.
Use the ‘Hue and Saturation’ tool to take the colour out of the image – desaturation – until it is black and white.
Then match the dark shadow in the background to those in the new image. You can adjust further by increasing the light on some areas with a mask brush. Then return the colour.
Poor or unbelievable composites can be due to mismatched tones, so you really do have to pay careful attention to this. You can add effects to add consistency to a whole image after flattening it by using: Filter>Camera Raw filter.
Final Words
Composite photography is an open door to creativity, it’s all about your idea and taking that as far as you want to. This can be from the simple to the complex.
The composite image master/photographer/artist Erik Johansson said, “It’s about planning well, collecting materials and bringing everything together. So long as I have good material, the Photoshop bit is putting the pieces together. If you have a good idea and plan, it’s a straightforward process – the only limits are those that you put on your own creativity”.
So don’t be afraid to get started – you need to experiment, the choices are all yours. If you have any questions at all, please leave them in the comment sections and we’ll get back to you.


Patrick Mateer is an award-winning photographer who lives in Yorkshire, England with his wife (wedding photographer Hollie Mateer) and two children.


WELCOME TO SHOTKIT
Enter your email to be sent
today's Welcome Gift:
19 Photography Tools
🔥 Popular NOW:


Shotkit may earn a commission on affiliate links. Learn more.