


How To Make a Video or GIF Into a Live Photo on iPhone
Learn how to make a video a Live Photo on an iPhone. Discover how to make Live Wallpapers and upload looping videos and GIFs to Instagram & Facebook.
iPhone Photography | Learn | By Ana Mireles and Usnea Lebendig | Last Updated: October 4, 2023
If you want to learn how to make a video a Live Photo (or vice versa) on your iPhone, this article will show you all the easiest ways.
You’ll also learn how to save a live photo as a video or GIF using a free app, the iOS Shortcuts app or even an online third-party app.
Use iMazing to transfer, backup and browse your iPhone live photos and data.
Live Photos can capture 1.5 seconds of additional audio and video content before and after you press the Camera app’s shutter button – they’re a great way to capture your favourite memories.
Let’s look at all the best ways at converting Live Photos, GIFs and Videos on your Apple device.
Table of Contents
How to Make a Video a Live Photo and Vice Versa
Facebook allows you to share Live Photos for Feed and Page posts as a still image or a video.
Instagram supports them for Stories, but other social networks may not support Live Photos at all – here’s how to convert them into videos or GIFs.
Here’s how to turn video into live photo.
How to make a video into a Live Photo using IntoLive
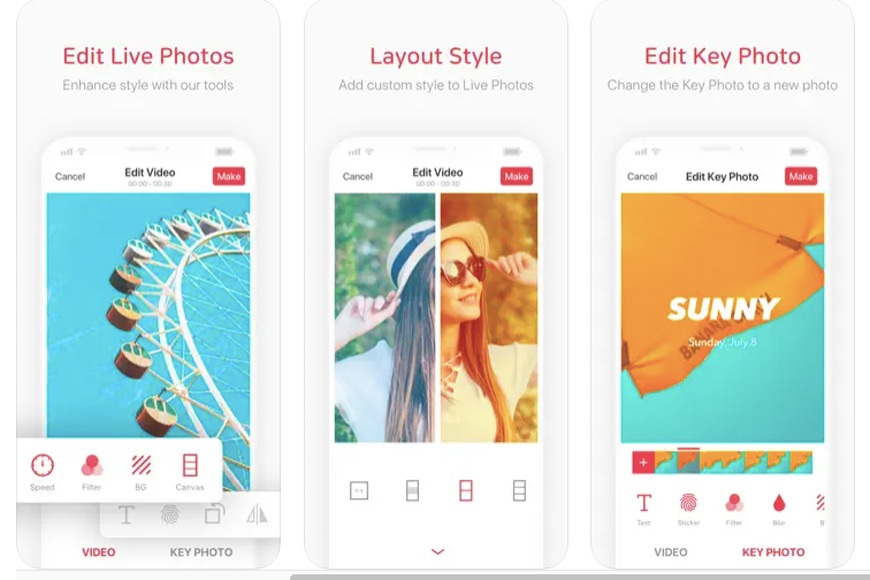
Here’s a quick tip on how to turn videos into live photos. To turn a video into a Live Photo, you’ll need to go beyond the software that comes with your iPhone and look to a third-party app like the IntoLive app. You can also use this to convert mp4 to live photo.
IntoLive is a free iPhone app that converts GIFs and videos into Live Photos. It’s great for creating live wallpaper on your phone, but will also let you create “Press and Hold” posts for Facebook and other social media.
To quickly turn the video into a live photo, follow these steps.
First, though, let’s look at how to turn a video into a Live Photo:
- Once you’ve downloaded the app, open IntoLive.
- Choose the video you wish to use.
- Click on Edit the First Frame to make any changes you’d like (i.e. adding a press-and-hold secondary photo, adding filters, zooming in, changing the size, background color, etc.).
- Once you’re finished using the editing tools, hit Make.
- Select the clip length. This is also where you can turn on “wallpaper”mode by pressing the light square in the middle of the bottom tool bar.
- Now press Save Live Photo.
Your new live photo will now be in your Camera Roll.
Note: While IntoLive is free for basic use, there are a number of inexpensive in-app purchases available that make it a much better tool – especially for “Press and Hold” Facebook posts.
How to turn a Live Photo into a Video using iOS 13 or Later
The process is surprisingly easy to convert video to live photo. If you have iOS 13 or later, it’s now easier than ever to convert Live Photos into videos.
Here’s how:
- Open Photos.
- Select the Live Photo(s) you wish to make into a video.
- Press the Share button in the bottom left.
- Swipe up and press Save as Video.
That’s it.
You can now see your video in your Videos folder under its timestamp.
How to turn a Live Photo into a video with iOS shortcuts
I’d recommend a better screenshot.
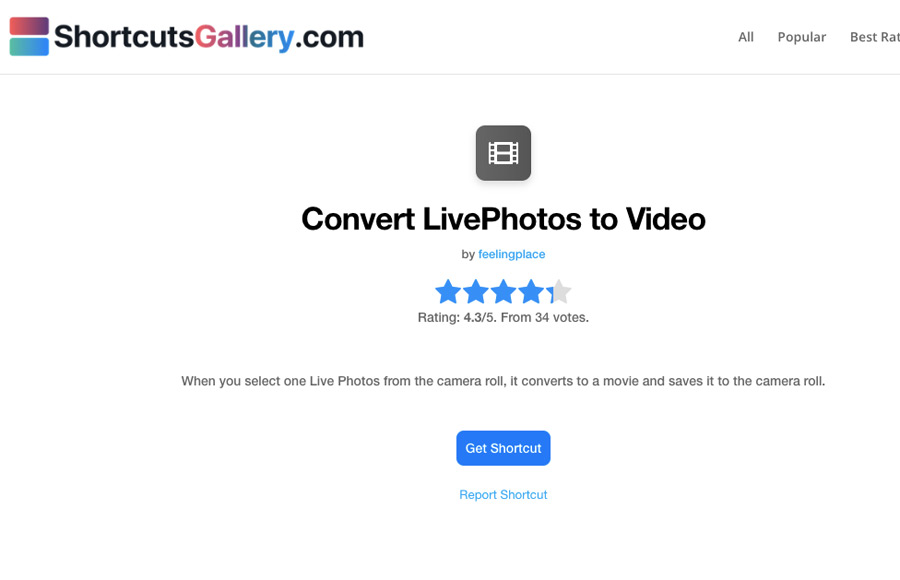
Want to convert a video into a Live Photo but don’t have have iOS 13? No worries. The Convert LivePhotos to Video shortcut works great.
Before you get started though, you’ll first need to download the shortcut:
- Open the link above using the web browser on your iPhone.
- In your iPhone settings under Shortcuts, tell your iPhone to “allow untrusted shortcuts.”
Now you’re ready to go – it’s super simple:
- Open the Shortcuts app.
- Press the Convert LivePhotos to Video shortcut.
- Select the Live Photo you wish to turn into a video..
Shortcuts will now automatically transform your Live Photo into a video. You’ll be able to find it in your Camera Roll under Recents.
Another cool use for Shortcuts is to combine photos together on your iPhone.
How to Make a Live Photo into a GIF and Vice Versa
Since many social networks don’t accept Live Photos but are happy to accept GIFs, here are some ways to convert a Live Photo into a GIF.
How to turn a Live Photo into a GIF using Lively
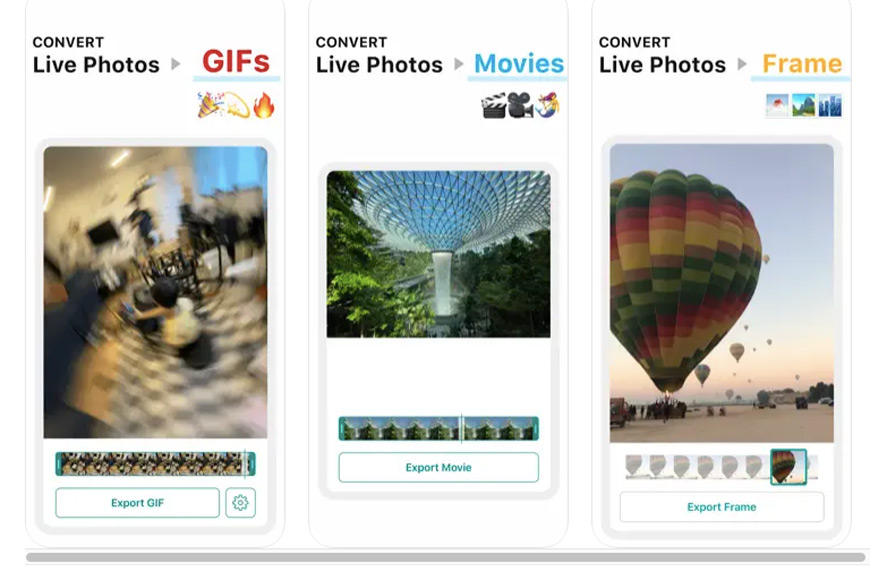
For total control over how your final GIF image turns out, Lively will give you more options than the native iOS software.
Lively converts both Live Photos and videos to GIFs. As promised, it comes with extensive editing features (i.e. speed control, play backward, auto reverse, etc.). It also has full 3D Touch support.
Here’s the quickest way to turn a Live Photo into a GIF using Lively:
- Download and open the Lively app.
- Navigate to and select the Live Photo you wish to convert.
- Press the Export GIF button at the bottom of the screen.
- Select Save.
You’ll find your new GIF on your Camera Roll.
Note: Like many free apps, Lively is free to download and use, but has in-app purchases. Also, the free version adds a Watermark to you GIFs. You may be able to remove the watermarks.
How to turn a Live Photo into a GIF with iOS shortcuts
How to make a new Shortcut in iOS
If you’ don’t want to use an external app, you can use a Shortcut to turn a live photo into a GIF.
You’ll first have to make a new Shortcut, but once that’s done it’s all cream from there.
First, add the shortcut:
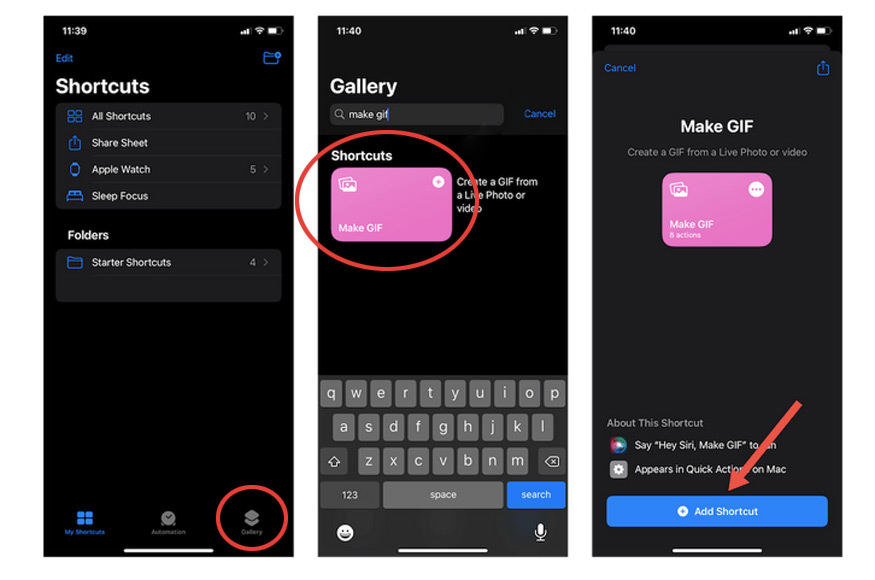
- Tap the Shortcuts Gallery button in the bottom right corner of the Shortcuts app. (Can’t find the Shortcuts app on your iPhone? No worries! Download it for free from the App Store.)
- Type “make GIF” into the iPhone find field.
- Tap on the Make GIF shortcut, then hit Add Shortcut.
Once the shortcut is installed:
- Open Shortcuts and scroll down to the My Shortcuts tab.
- Tap on the Make GIF shortcut.
- Choose the Live Photo you want to convert.
- Hit Done.
Your new GIF can now be found under the Recents album in your Photos app.
How to convert GIFs to Live Photos with GIPHY
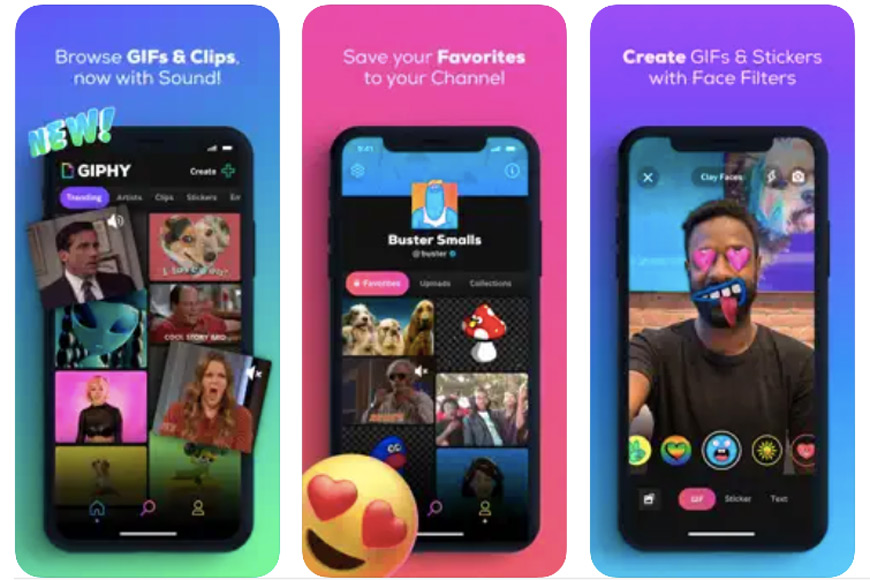
If you want to reverse the process and convert GIFs into Live Photos, you’ll need the help of a third-party app. A GIF to Live Photo converter specifically. GIPHY is our favorite, as it’s free to download, is amazing for anything GIF-related, and is easy to use. With this app, it is quick and easy to convert GIF to live photo.
Here’s how to convert a GIF into a Live Photo using GIPHY:
- Open GIPHY.
- Find a GIF you want to use, either via the search bar at the bottom-center of the screen or use one of GIPHY’s.
- Tap on the three dots on the right of the screen.
- Hit Convert to Live Photo.
- Choose either the fit-to-screen or full-screen option.
You’ll find the new Live Photo in your Camera Roll.
There are other apps to convert GIF to Live Photo online but GIPHY is the most reliable.
How to Set a Live Photo as a Live Wallpaper on iPhone
[image: sorry, I wasn’t able to get a screenshot for this one]Here’s how to set a Live Photo as a Live Wallpaper on your iPhone:
- Go to into your iPhone’s Settings, then to Wallpaper, then to Choose a New Wallpaper.
- Find your Live Photo by either tapping Live and selecting a Live Photo or tapping Live Photos Album.
- Hit Set, the choose either Set Lock Screen or Set Both.
Conversely, you can use the free third-party app IntoLive, mentioned above to create dynamic wallpapers.
How to Make a Video into a Live Photo on an Android Device
So far we’ve only discussed how to make a video a live photo on apple devices, but you can also convert videos into Live Photos on Android devices.
Here’s how:
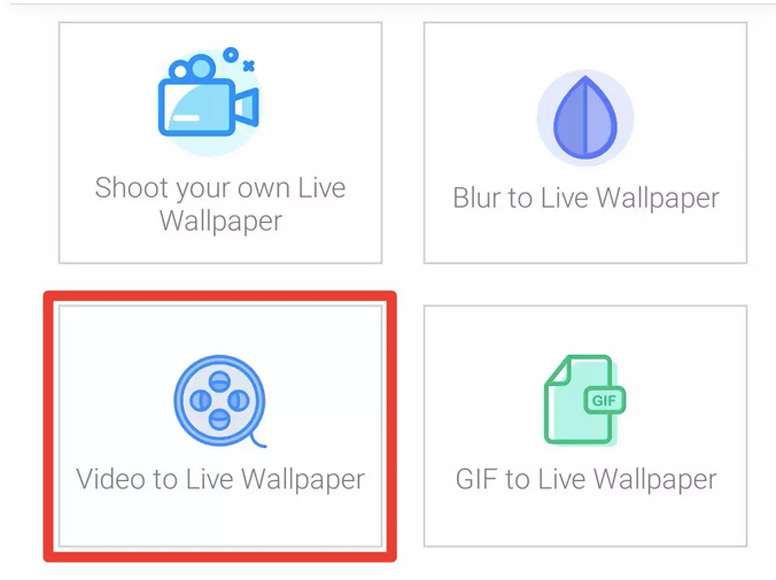
- Download and open the free app TurnLive (or something similar).
- Tap the Live Photo icon (the bullseye at the bottom-middle of the screen).
- Choose the Video to Live Wallpaper option.
- Choose the video you’d like to turn into a Live Photo and tap Done in the top-right. (You can pick any video, but keep in mind, a Live Photo can’t go over five seconds in length.)
- Pick the video frame you’d like to use as a Cover. Tap Next.
- Choose which part of the video you’d like to turn into a Live Photo by moving the slider.
- Add any filters or effects, then tap Next.
- Select how many times you’d like the Live Photo sequence to repeat.
- Your Live Wallpaper will then be processed and filed under My Wallpapers.
- Tap it, then tap the download icon.
- Clear your current wallpaper, give TurnLive permission to change your system settings, and then re-tap the download icon. Clear again.
- On the”DayTime LWP” pop up screen that appears, tap Set wallpaper, then decide whether you’d like the Live Photo on just your home screen, or on both your home and lock screens.
That’s it.
Other third-party apps will have a very similar process, but that’s how to do it on TurnLive.
Note: Live Photos are called Live Wallpapers on Android because they can only be used as wallpaper.
How Do You Edit Live Photos?
Editing Live Photos can be done right from your iPhone’s Photos app, and you have a number of options available.
Here’s a quick guide:
1. Trimming:
- Open the Photos app on your iPhone.
- Select the Live Photo you want to edit.
- Swipe up on the photo. This will reveal four effects: Live, Loop, Bounce, and Long Exposure.
- Tap on “Edit” at the top right corner.
- On the timeline at the bottom, you can drag the sliders at each end to adjust the start and end of the Live Photo.
- Tap “Done” to save your changes.
2. Add Effects:
- Open the Photos app.
- Select the Live Photo.
- Swipe up on the photo.
- Select from the four options: Live (the original Live Photo), Loop (a loop of the Live Photo), Bounce (a back-and-forth animation), or Long Exposure (a simulated long exposure effect).
- The effect will be applied automatically.
3. Change the Key Photo:
- Open the Photos app.
- Select the Live Photo you want to edit.
- Tap “Edit” in the top right corner.
- Scrub through the timeline at the bottom to select the frame you want to use as the new Key Photo.
- Tap “Make Key Photo,” then tap “Done.”
Live Photos FAQs
What is the point of live photos?
With live photos, you can make animated wallpapers and GIFS.
How do I make a live photo a loop?
You can turn on the loop effect on an iPhone by opening the Live Photo, then swipe to the menu Effects and choose Loop.
The live photos made on IntoLive play in a loop by default.
How do I activate Live Wallpaper?
If you’re an iPhone user, you can activate Live Wallpaper from the menu Settings. Swipe down to Wallpaper, New Wallpaper. Then choose Live and tap on the one you want to use.
Some Android phones also allow Live Wallpapers. The specific way to activate it can be different in each one; however, it’s usually inside Settings just like the iPhone.
You can also use any of your creation from IntoLive. On the final screen, you’ll find a big orange button that says Set Wallpaper. Then you can choose if you want it only for your Home screen, or Home screen and Lock screen.
How do you post a live photo on Instagram?
On the preview screen of IntoLive, you’ll find a Share icon in the top right corner after doing your edits. Tap on it and choose if you want to share it by Direct, Feed or Stories.
Instagram doesn’t yet support Live Photos from iPhones as Facebook does, so you need to save it as a video using IntoLive or any other app.
Can you post a live photo on Instagram story?
Yes. Videos turned into live photos using IntoLive can be shared directly from the app – as explained in the previous answer. You can also save it on your phone and share it from your Gallery at a later time as an Instagram Story template.
How do you post a live photo loop on Facebook?
You could post a live photo using the Share icon from inside the app if you converted it using IntoLive. Simply tap on it and choose if you want to share it in your Facebook Stories or as a post on your feed.
Also, the Facebook app recognizes a Live photo from an iPhone when you upload it to your post. It will ask you if you want to share the still photo or the Live version.
Are live photos lower quality?
When you take a live photo on your iPhone, it will take one frame as the still image in high quality, and the rest of the video is compressed.
Does turning off live photos save space?
Yes, live photos on an iPhone take around twice the space of a still photo. Tap the Live icon to turn it off just once. The next time you open the camera app, it will be on again. If you want to leave it off, you need to disable it in Settings, Camera, and Preserve Settings.
Final Words
That’s it! Now you know how to convert a live photo into a video or GIF and use it as an animated wallpaper.
You can also create live photos with Android phones and create lively content that you can share via email or post on your favourite social media.
Use iMazing to transfer, backup and browse your iPhone live photos and data.


Ana Mireles is a Mexican researcher that specializes in photography and communications for the arts and culture sector.

Usnea Lebendig is an experienced photographer and reviewer who loves to photograph professionally and in moments where the world’s beauty and/or strangeness leaps in front of the lens.


WELCOME TO SHOTKIT
Enter your email to be sent
today's Welcome Gift:
19 Photography Tools
🔥 Popular NOW:


Shotkit may earn a commission on affiliate links. Learn more.