


Guide to Worm’s Eye View Photography
Giving viewers a worm's eye view in your photography is a great way to get your images to stand out. Learn 5 tips and get inspired with these creative examples.
Learn | Photography Guides | By Ana Mireles
If you’re tired of taking all your pictures at eye level and you want to make them more interesting, worm’s eye view photography can be just what you’re looking for.
You’ve probably seen people down on the ground taking photos. Well, now you know what they were doing – capturing the world from a worm’s point of view!
This perspective will make your images and film more creative and eye-catching – alternating your camera shots and angles is a simple way to create really powerful scenes.
Keep on reading to find out how to do worm’s eye view photography and how it can improve your shots.
Table of Contents
Worm’s Eye View Photography Definition
Credit: Toni Ivanov
The degree to which you point your camera towards the subject is known as the camera angle. Most people simply shoot at eye level because that’s the way we see life around us.
When you start to get more serious about photography, you start exploring new ways to capture life. Photographers use many camera angles, and there isn’t one that’s better than the other – it’s more a matter of style and storytelling.
Just like the name suggests, worm’s eye view photography is when you take a photo from a lower angle in relation to the subject. Since worms live on the ground, their perspective of the world is always looking up at it.
You can also find this photography technique referred to by other names – low-angle photography, ant viewpoint photography or maybe some other animal that’s small or lives on the ground.
Unlike worms, though, we are taller – so we can do worm’s eye view photography without actually being on the ground. Even if lying down is the most common position, you can still have a worm’s eye viewpoint standing up if you’re capturing subjects in the sky or the roof of a building.
You can photograph any subjects from this viewpoint – trees, architecture, portraits, animals, etc. If you’re looking for inspiration, you can check out the examples in the tips section of this article.
The opposite camera angle to the worm’s eye view is also named after an animal’s perspective – the bird’s eye view. It refers to images taken from above the subject looking down.
How does a worm’s eye view benefit a photo?
A worm’s eye view offers an unusual perspective on a subject that we’re used to seeing at eye level. This makes your photograph more original, and it becomes more intriguing to the viewer.
Shooting at ground level also offers a narrative advantage. The perspective provided by a worm’s eye view makes the subject look giant, which conveys a feeling of smallness and vulnerability to the viewer.
On a more practical note, photographing from a worm’s eye view allows you to fit very tall subjects in the frame, such as trees or buildings.
How do you Take Worm’s Eye Pictures?
Here are five tips and examples of how to get some great worm’s eye view photos to really give your viewer a unique perspective on things.
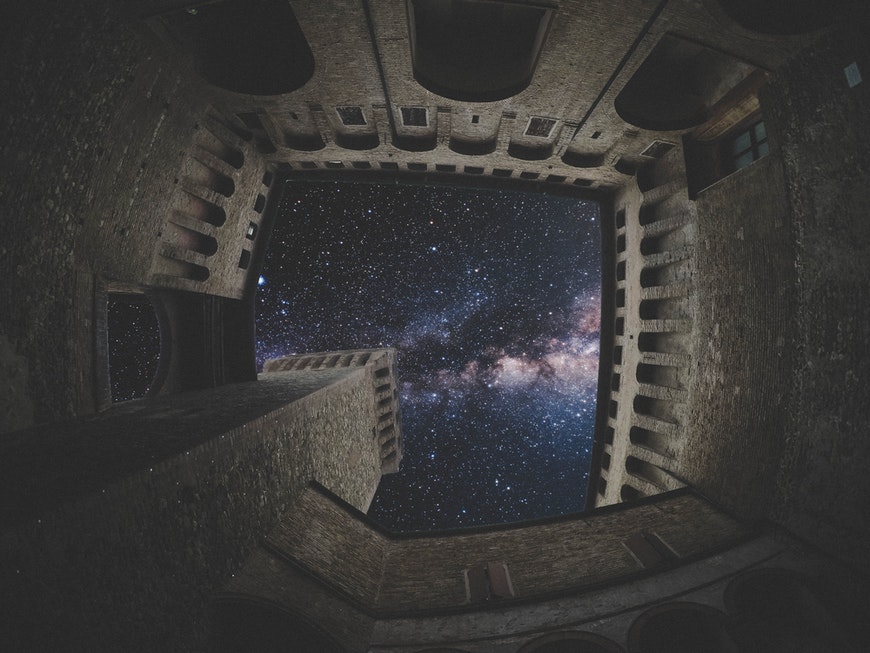
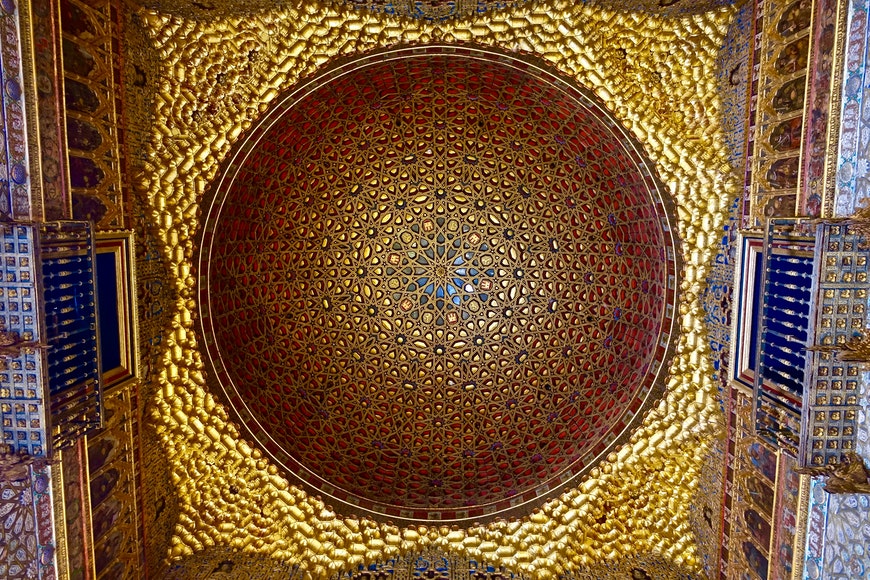
1. Composition
Credit: Pixabay
The way you arrange the subjects inside the frame can add interest to your images – that’s what composition guidelines are all about.
The rule of thirds is the most popular because all cameras and smartphones have a grid that you can use to position the elements when preparing the shot.
However, some of the most common composition rules used in worm’s eye view photography are symmetry and the use of patterns – especially when you’re photographing buildings.
Try experimenting with different compositional techniques and see how they affect your images.
2. Nail the focus
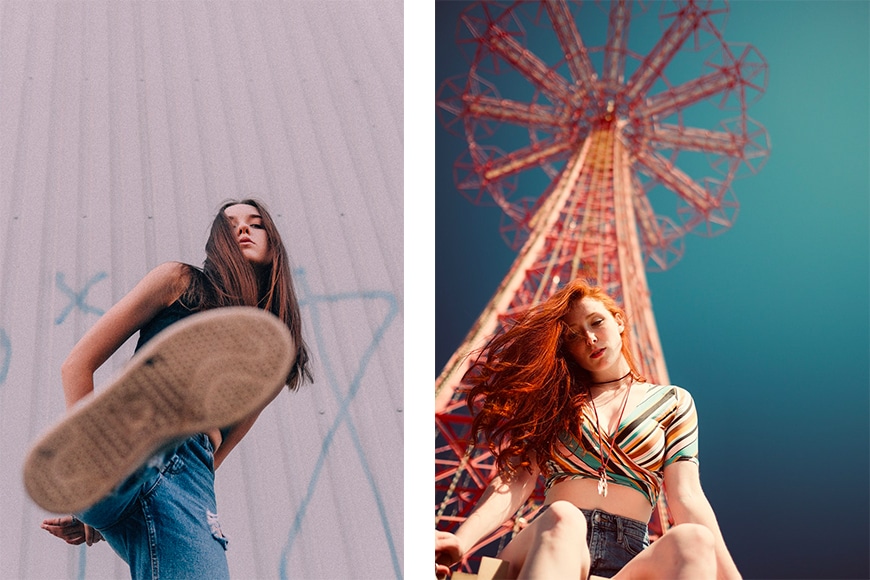
Credit: Dimitry Zub (left) / J. Cruz (right)
When you’re shooting from a worm’s eye view, you have to be aware of the focus point and the depth of field.
Sometimes you’re photographing a flat ceiling that’s parallel to the sensor plane, in which case, there’s no problem.
However, if you’re lying on the ground and you angle the camera up to photograph a subject that runs perpendicular to the focal plane – such as a tree, a tall building or a person – you need to be wary of focus.
If you want to make sure that your subject is sharp, you have to make the best out of the depth of field (DoF). The DoF refers to the part of the image that will be in focus: 1/3 of it will be in front of the focal point, and 2/3 in the back of it.
You need to consider three things that affect the depth of field – distance to the subject, focal length and aperture.
For a shallow depth of field, you should shorten the distance between the camera and the subject and use a wide aperture with a long focal length.
To widen the DoF, you need the opposite. If you’re new to this, there are a number of apps and websites where you can input your values and calculate the resulting DoF – the most famous one is Photopills.
3. Exposure

Credit: Sevenstorm Juhaszimrus
When you do worm’s eye view photography, you often find yourself shooting against the sun or a bright sky. This backlighting can be tricky for your camera to handle on its own, so it’s best if you use your camera’s manual mode.
On top of that, you need to use the best metering mode to determine the correct settings. The best way to measure light on backlit scenes is to use Spot Metering.
Usually, the spot metering mode takes the information from a very small area in the centre of the frame. However, switching the spot to the focus point is possible with some higher-end cameras.
In any case, you should measure the light on your subject and adjust the camera settings accordingly. Then, you can go back to composing the scene as you see fit, and the exposure will be correct.
Check out our guide to over and underexposure to learn more.
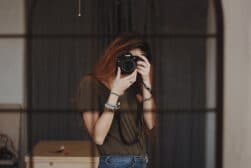
4. Use a remote trigger or self-timer

Credit: Cottonbro
To get the camera at a lower angle, you usually need to lie on the ground or get in an uncomfortable position. This makes it difficult to shoot, compose and keep a steady hand if you’re using a slow shutter speed.
So, if you’re capturing worm’s eye view shots, you’re better off putting the camera on a tripod and triggering it remotely.
If you don’t have a remote trigger, some apps can sync with your camera to use your smartphone as a remote control. Otherwise, you can use the self-timer. All cameras, including smartphone cameras, have this feature.
This is very helpful when doing macro photography because the focus is critical, and the depth of field is very narrow.
This technique is always recommended with a tripod and a remote shutter to avoid missing focus due to camera shake when pressing the button.
You can also use a remote shutter release or self-timer to shoot some self-portraits. In this case, it’s easier if you have the remote because you can adjust the focus while you’re already in position.
However, you can still use the self-timer if you put a dummy object where you would be. With this method, the camera focuses on the object and starts the countdown. Then you just replace the object with yourself.
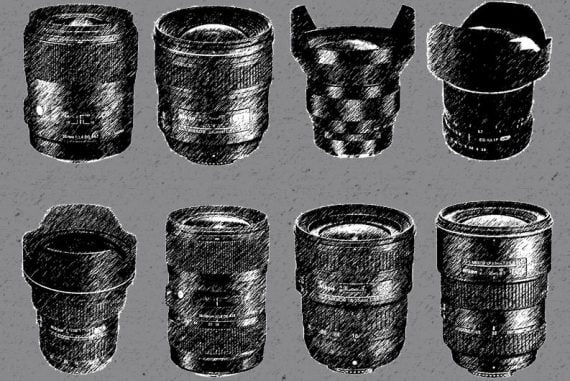
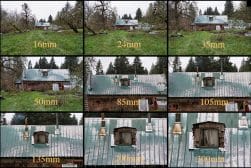
5. Use a wide-angle lens

Credit: Jan Kopřiva
It is, of course, possible to do worm’s eye view photography with any lens as long as it’s from a low angle. You can take a shot of a plane, for example, using a telephoto lens.
However, most images taken at ground level benefit from a wide-angle lens. This is because a wider angle of view allows you to capture the entire scene – otherwise, only what’s far away would fit in the frame.
How short you want the focal length is up to you. You can use a fish-eye lens if you’re going to create special effects with the distortion of the subject or simply because the subject is really close.
Otherwise, stick to longer focal lengths between 18mm to 35mm, which are still wide-angle but produce less distortion and are usually quite affordable lenses.
Final Words
In conclusion, worm’s eye view is one of the many camera angles you can choose for your images. It refers to angling your camera up from a low level in relation to the subject.
It’s an easy and creative way to represent the world. Give it a try in your photography, and let us know how it goes.
If you have any questions, don’t hesitate to ask!
 Beginner’s Guide to Depth of Field in Photography
 Best Wide Angle Lenses in 2023 for Nikon, Canon & More
 What is Perspective in Photography (Complete Guide with Tips & Examples)
 23 Creative Self Portrait Photography Ideas & Tips
 Guide to Shallow Depth of Field Photography
 FOV Calculation: Understanding Field of View in Photography

Ana Mireles is a Mexican researcher that specializes in photography and communications for the arts and culture sector.


WELCOME TO SHOTKIT
Enter your email to be sent
today's Welcome Gift:
19 Photography Tools
🔥 Popular NOW:


Shotkit may earn a commission on affiliate links. Learn more.