


Guide To Low Light Photography (With Camera Settings & Tips)
Shooting in low light can be tricky. Learn how to master low light photography with this guide, including 15 must-know pro tips!
Learn | Photography Guides | By Andy Day
Photography is all about light, and shooting in dark conditions can make life tricky. However, there are ways to make low light photography work for you – perhaps taking advantage of the moody, mysterious atmosphere and adding some drama to your images.
So if you’ve ever asked yourself, “How do I take sharp photos with low light?” then this guide is for you.
In it, we’ll cover things like what camera setting is best for low light, teach you how to take control of your aperture, ISO and shutter speed, and learn how to use additional equipment such as a tripod for better results.
Let’s get started.
Table of Contents
What is Low Light Photography?
There’s no strict definition of what is considered low light photography, but as a general idea, any situation where you’re starting to drop to a slower shutter — or perhaps your ISO is starting to creep up — probably falls into this category.
Cameras work well in bright daylight and dealing with interiors, dark shadows, or shooting after the sun has dropped will require you to make intelligent compromises to get the best results.
Common low light situations
Low light situations are varied and probably more common than you might think. As our eyes are smarter than our cameras, what you see is not always an accurate indication of light levels and it might be much darker than you realise.
Low lighting situations might include:
- After sunset – Even before night arrives, once the sun dips over the horizon, the amount of light plummets.
- Standing in shadow – It might seem a bright day but stepping into an area with a lot of shade — perhaps under the canopy of a forest — can make for dark shooting conditions.
- Indoors – You may have switched on all of your lights and opened the blinds, but interior spaces can remain very dark.
Now let’s have a closer look at how to improve your low light photography.
15 Low Light Photography Tips
Low light photography can be challenging, but with the right knowledge and gear, you can capture some excellent photographs.
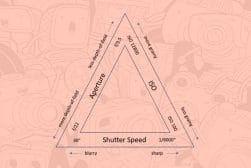
1. Understand the exposure triangle

Credit: Chanakya
When photographing in bright daylight, you can often rely on your camera’s automation to choose the perfect settings, but once you’re shooting in low light, it’s important to know how aperture, shutter speed, and ISO all relate to one another.
This three-way relationship is key to exposing correctly, and letting your camera decide all three for you automatically isn’t always going to give you the best results.
As we will see from some of the tips below, having a reasonable understanding of the exposure triangle will be immensely useful.
For example, it’s important to realise that if you double your shutter speed — say from 1/30th to 1/60th — you will also need to double your ISO in order to achieve the exact same exposure.
See also: what is the shutter on a camera?
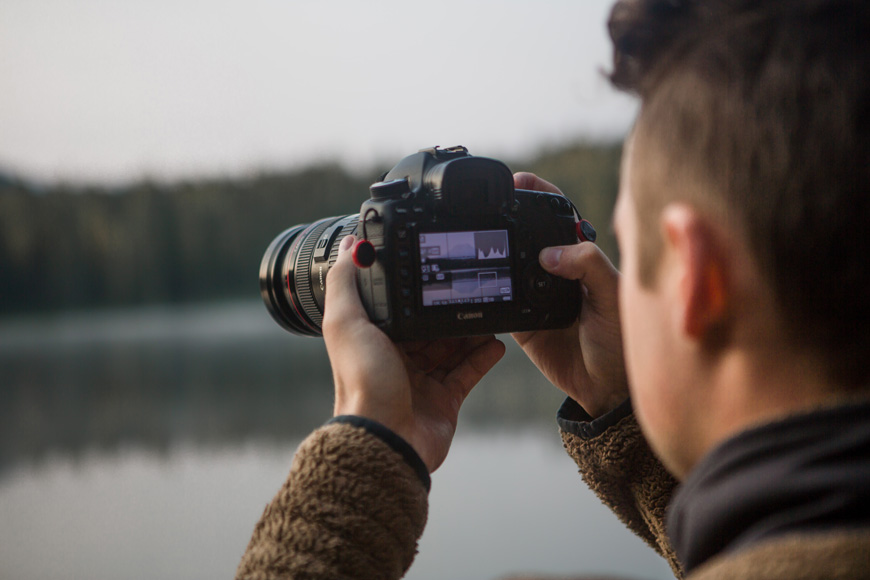
2. Use your histogram, not just your camera’s LCD
Credit: Maxim Medvedev
Every DSLR and mirrorless camera — and lots of others too — will allow you to view a histogram for any photograph that you have taken, and this graphical interpretation of the blacks, shadows, midtones, highlights, and whites will allow you to understand very accurately if your shot is correctly exposed.
Basing your judgement on what you see on the LCD on the back of your camera can be deceptive, as the screen can make a photograph seem much brighter than it actually is, and this becomes exaggerated during low light photography.
A shot that clearly looks underexposed when you view your LCD in bright light might look like a good exposure when you’re in a dark environment.
One of the advantages of shooting with a mirrorless model is that you can set your camera to show a live histogram, allowing you to dial in your exposure even before you’ve taken a shot.
If you’re not sure how to understand your histogram, check out this excellent article.
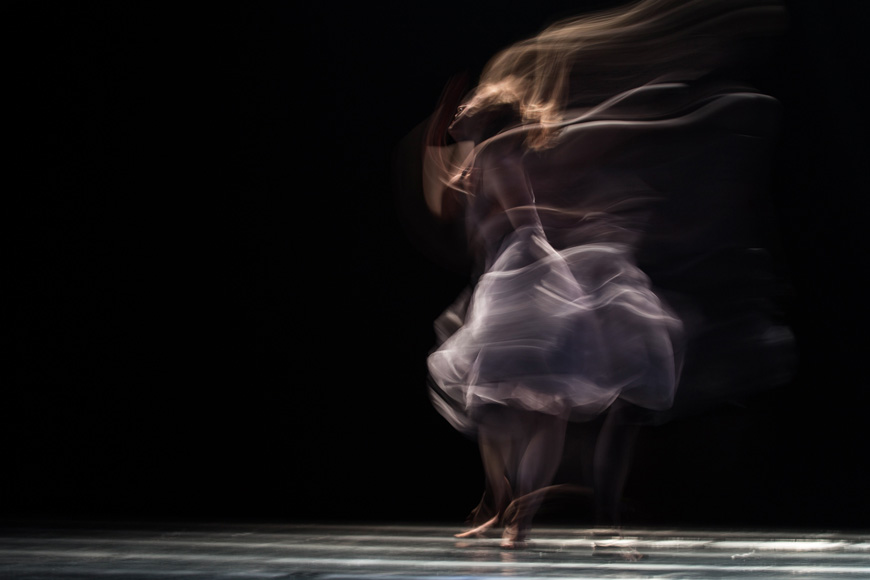
3. Learn how your shutter speed can affect your photographs
Credit: Ahmad Odeh
Changing the shutter speed on your camera will set the amount of time that your camera’s sensor is gathering light. Longer/slower shutter speeds mean that movement in your scene starts to become blurred.
This presents a number of problems when shooting in low light, the foremost being camera shake.
At certain shutter speeds, it becomes impossible to hold your camera still enough while the shutter is open, and this can cause your entire image to become blurry — not because the image is out of focus, but because the camera itself is moving too much and causing motion blur.
When shooting handheld, it can be useful to remember what’s called the reciprocal rule. This is where your shutter speed should at least match the focal length of your lens (or thereabouts).
For example, to get images free of motion blur when shooting on a 200mm lens, you should not let your shutter speed go any slower than 1/200th of a second.
The shorter the lens, the less movement there is relative to the scene. As a result, if you’re shooting on a 35mm lens, you can typically handhold successfully with a slow shutter of 1/30th of a second — but no slower.
To make sure that your shutter speed doesn’t drop too low, you can choose to use your camera’s Shutter Priority mode.
Alternatively, see if you can tell your camera to use a minimum shutter speed. This setting is often buried in the menu so you might need to do some Googling specific to your camera to find out how to do this.
As discussed below, you can sometimes avoid camera shake by using a tripod or stabilization, but any subjects moving within your scene — traffic, water, people, animals — might become blurred.
For more information on shutter speed, you can also check out this article.
4. Zoom in to 100%
Credit: Neil Mark Thomas
Every photographer has done this: you think you’ve taken a nice sharp photograph only to get home, load it onto your computer, and find that it’s soft.
The chances of this happening become even more likely when you’re shooting low light photography because the motion blur introduced by camera shake is so slight that it doesn’t show up on your LCD unless you zoom in to 100%.
For this reason, it’s important to pay close attention when you’re reviewing images on the back of your camera straight after shooting. Always zoom in and make sure it’s sharp!
This is particularly the case for Northern Lights photography, or any other ‘once in a lifetime’ opportunity where it’s particularly important to get a sharp shot before heading home.
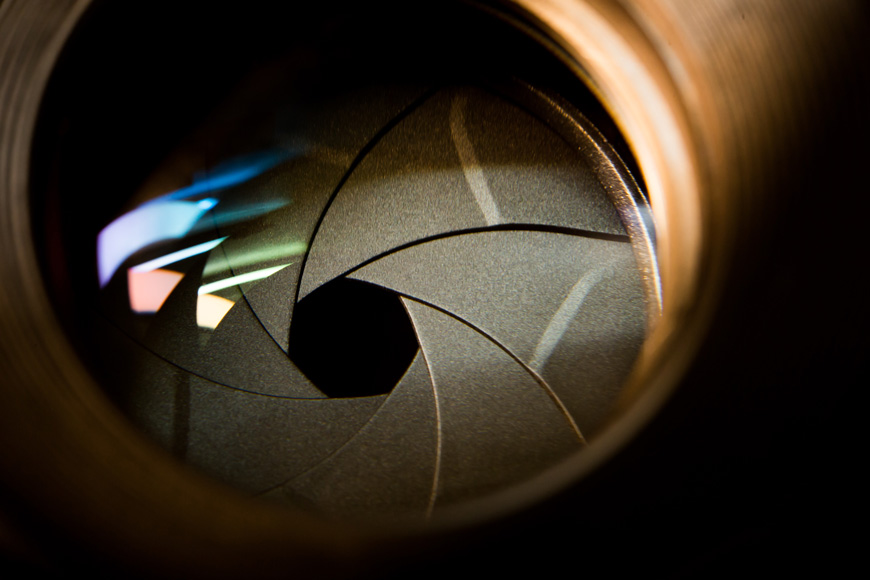
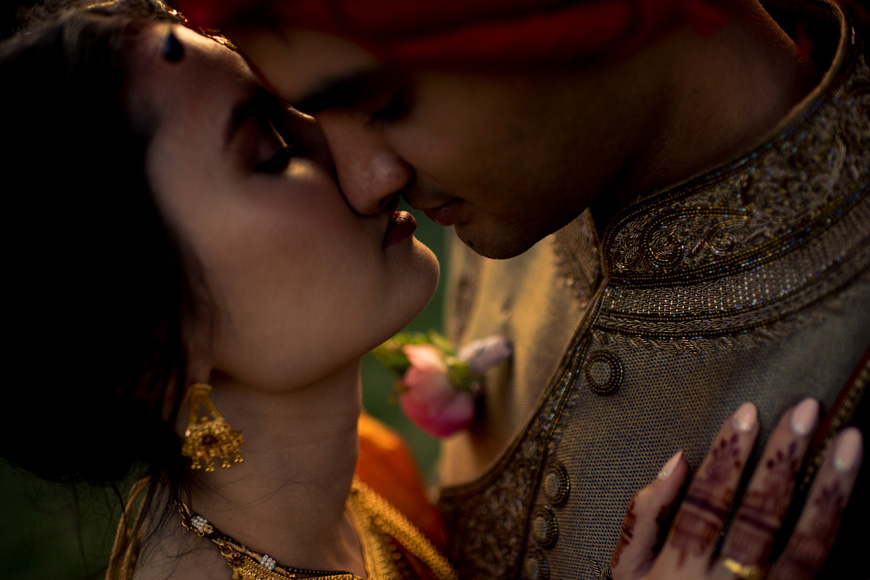
5. Use a wider aperture
Credit: Wan San Yip
When shooting in low light, photographers tend to have a preference over which settings to change first. For most, the first thing to change is the aperture.
Selecting a bigger aperture is better than increasing ISO as high ISO can introduce noise into your photographs, disrupt color accuracy, and affect the overall quality of the image.
Changing aperture is often a better choice than selecting a slower shutter speed as you might want to avoid motion blur, either from not being able to hold the camera steadily enough, or from subjects moving within your frame.
Changing your aperture from f/5.6 to f/4 is an increase of one whole stop, and effectively doubles the amount of light that hits your sensor.
The lower the f-number, the more light will pass through your lens.
Unfortunately, entry-level lenses tend not to have very big maximum apertures, and the aperture on a zoom lens might also vary as you zoom in. For example, a kit lens might be listed as having a maximum aperture of f/3.5-5.6.
This means that when you’re zoomed out, the maximum aperture is f/3.5. Once you zoom all the way in, however, the maximum available is f/5.6.
By contrast, an expensive zoom lens might have a maximum aperture of f/2.8 — throughout its focal range. This allows in a lot more light.
If you choose a wide aperture, it’s worth remembering that it will create a shallower depth of field and you may need to be more careful with your focusing as a result.
For more on lens aperture, check out this article.
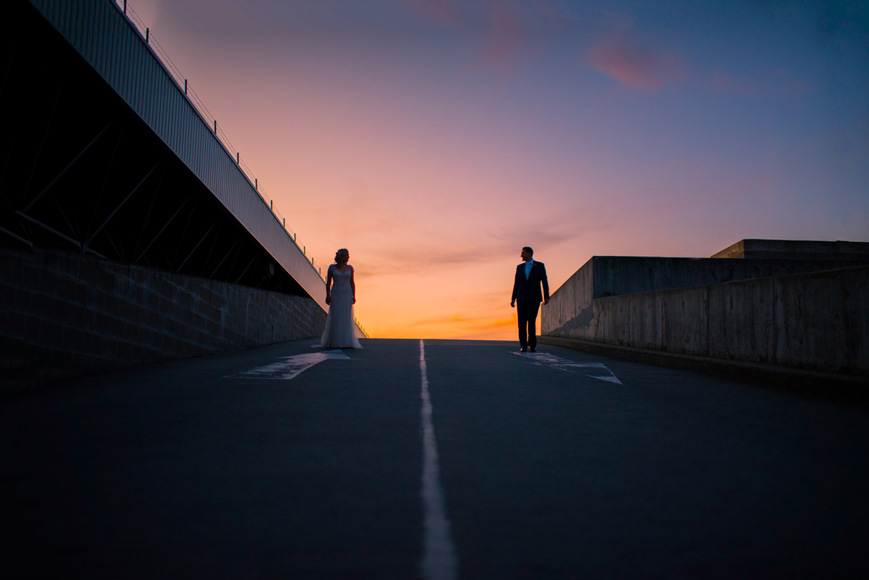
6. Buy a faster lens
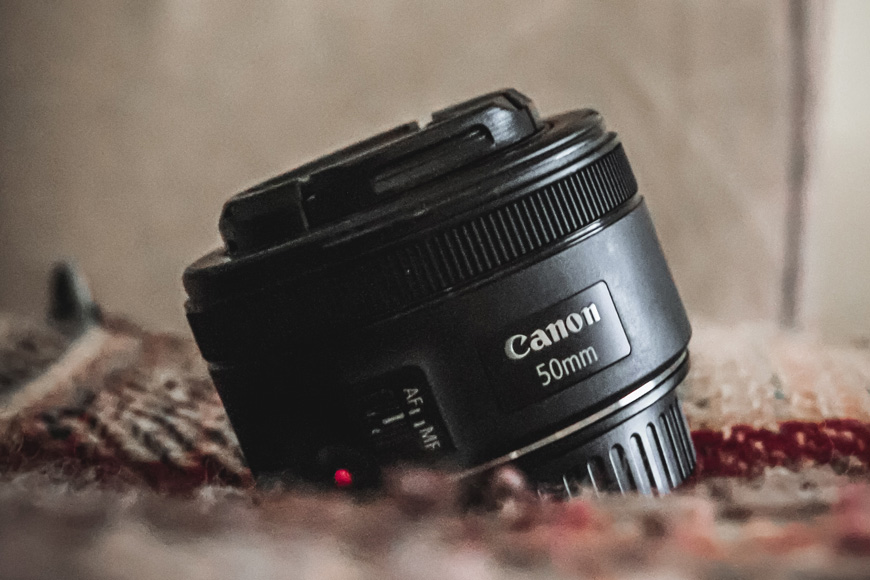
Credit: Scott Gummerson
Buying a fast lens — i.e., a lens with a wide maximum aperture that allows you to use faster shutter speeds — doesn’t necessarily mean spending a lot of money on an f/2.8 zoom.
Instead, consider buying a very affordable nifty fifty — a small, lightweight, inexpensive 50mm lens with a maximum aperture of f/1.8.
F/1.8 seems to be a nice sweet spot for great ambient light grabbing capabilities, for surprisingly affordable costs. It’s also a good way to blur the background.
If you’re not sure what lens to choose, take a look at this guide which will run you through most of the options.
7. Increase your ISO
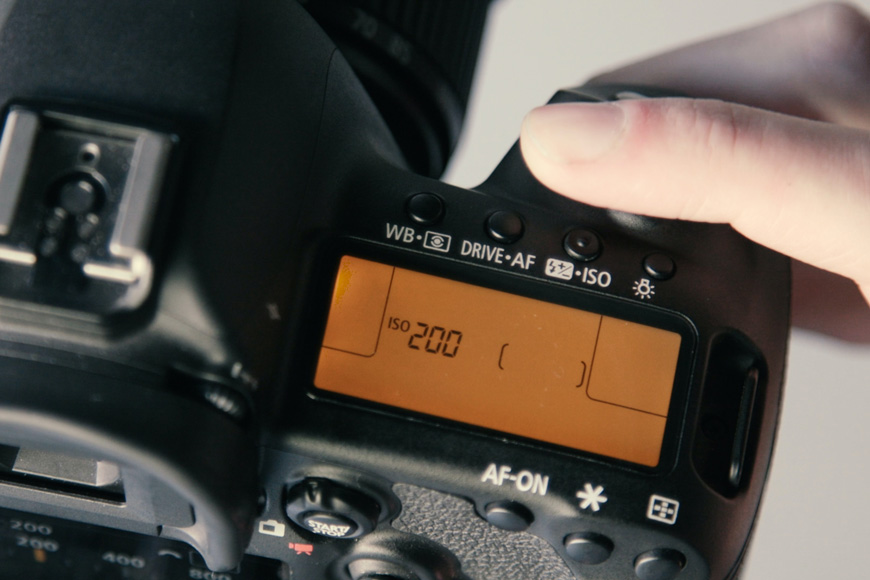
Credit: ShareGrid
For most photographers, ISO is the last variable of the exposure triangle to change. Increasing the ISO will introduce digital noise into your images, as well as impacting the quality and accuracy of colors.
However, sometimes this is the only compromise left to make if your aperture is at its maximum and you can’t risk dropping the shutter speed any further.
As any photographer will tell you, it’s better to have a noisy image than a blurry one! Softness in an image is far more distracting.
Furthermore, there’s always the possibility of using software to reduce the noise in your photos. For example, Lightroom has a couple of sliders to help you control noise, as explained here.
Modern cameras have dramatically improved the quality of images shot at high ISO levels, although you will still get better results from cameras that feature physically larger sensors, such as APS-C and full-frame.
It’s worth testing your camera by shooting a series of photographs at different ISO values with the lens cap on to see how it performs.
Check out our guide to ISO here.
8. Shoot RAW
While RAW files require you to process a file before you can print an image or post it to social media, they also contain a lot more information.
The shadows and midtones typically contain a lot more information than can be squeezed out of a JPEG when the camera compresses the data to create the file.
When a camera creates a JPEG, it’s taking raw data and compressing it into the .jpeg file. This process can remove some of the detail that can be found in the shadows and midtones, and this can be critical when processing photographs taken in low light.
By contrast, RAW files are literally just that — raw information waiting to be processed. You can fix bad lighting in photos using Photoshop, Lightroom or most other editing software.
Shooting RAW also means that you have complete control over your white balance after you’ve taken the photograph. This gives you far more control over color accuracy compared to shooting in JPEGs, and choosing the wrong white balance is very easy in low light.
If you want to get as much as possible out of your low light photography, set your camera to shoot in RAW.
9. Convert your images to black and white
Credit: Pedro Perez
Because high ISO levels can introduce noise, cause textures to become muddy, and make colors look a bit odd, sometimes it’s best to embrace the loss of quality and turn it into an aesthetic choice by converting your photos to black and white or monochrome.
Black and white is a great option for low light photography because it has a tradition of being shot on grainy film. As such, your converted photographs will tie in with this look and feel.
10. Get it right in camera
Exposing correctly and capturing the perfect composition goes a long way to maintaining image quality when you don’t have much light to work with.
If you underexpose your image, you’ll have to increase exposure and raise shadows when you edit your image. This can introduce even more noise into your photograph, as well as disrupt colors.
Noise is also a problem if you crop into your image in post-production as you’re effectively zooming into the photograph and making the noise larger in relation to the rest of the photograph.
Also remember that the best cameras for low light photography are usually more expensive, so when your budget allows, plan to upgrade for the best performance after dark.
11. Use stabilization
Stabilization is becoming increasingly common in modern photography, whether it’s built into the camera, the lens, or both.
Different manufacturers give it different names. For example, Canon has IS (Image Stabilization) for its lenses and IBIS (In-Body Image Stabilization) for its cameras, while other manufacturers might call it Optical Steady Shot, Vibration Reduction, or Vibration Compensation.
Whatever it’s called, it completely changes the reciprocal rule described above. Instead of having to ensure a shutter speed of 1/30th when shooting with a 35mm lens, you might be able to shoot as slow as 1/5th of a second or even slower.
Stabilization can simply mean finding a way of making yourself more steady. Tuck your elbows in against your body, take a knee and rest your elbow, or find a wall or a lamppost to brace yourself against.
This can have a large impact on how still you can hold your camera.
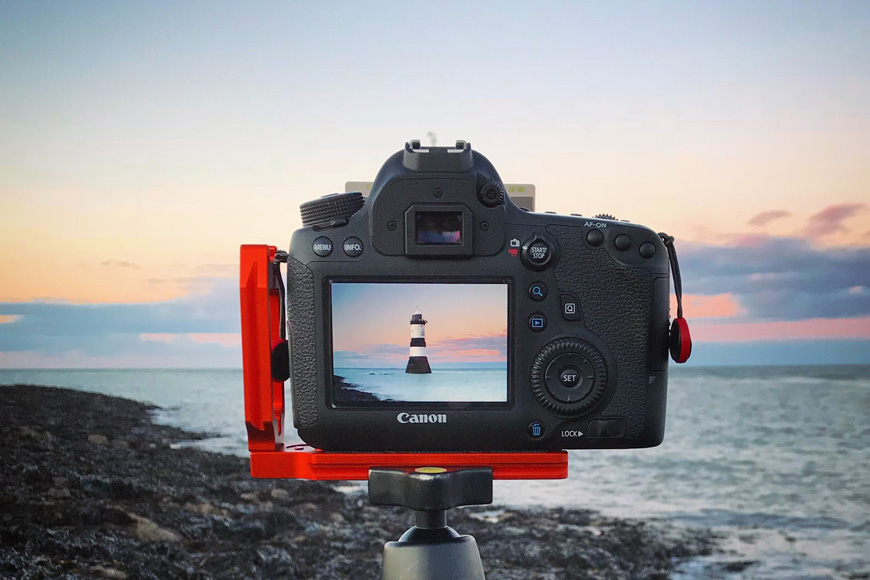
12. Use a tripod (or a monopod)
Credit: Ken Cheung
Tripods come in all shapes and sizes. There’s a handy guide here if you’re trying to figure out a nice budget option to buy.
A monopod can be a better choice if you need to travel light and don’t plan on using shutter speeds that require the stability offered by a tripod.
Using a tripod removes all of the issues of not being able to hold your camera steady enough, but there are a few elements to keep in mind.
You might want to use a cable release or use your camera’s self-timer. This means that you can avoid creating motion blur in your shot as even pushing the shutter button can be enough to create nudge your camera and ruin your photo.
Keep in mind that anything in your frame that’s moving is going to be affected by your choice of shutter speed. Water will become smooth, and people walking through the frame can become blurry and indistinct.
With practice, these long exposures can become a creative choice (more on this below).
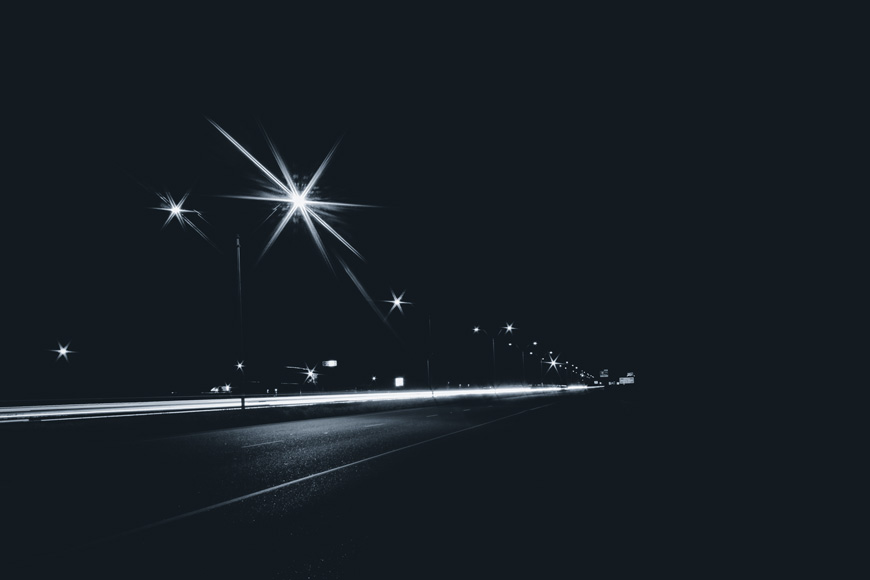
13. Shoot long exposures
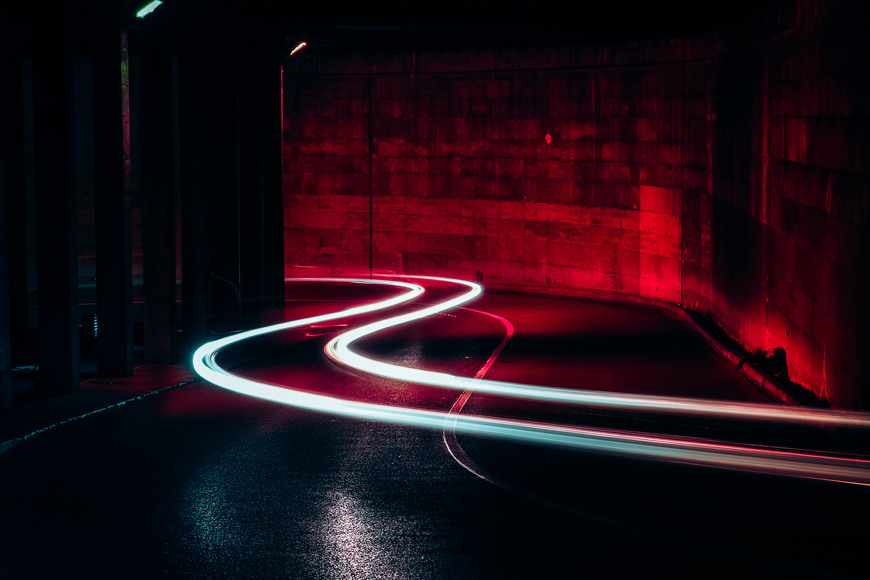
Credit: Marc Sendra Martorell
Deliberately choosing to capture movement with a long exposure is a great way to smooth out a large body of water, or capture trails of lights from flowing traffic. Skies can become ethereal due to the movement of clouds, and people can become indistinct and abstract.
Long exposures give you the opportunity to use smaller apertures and therefore achieve a greater depth of field. This can be useful if you’re shooting landscapes or architecture.
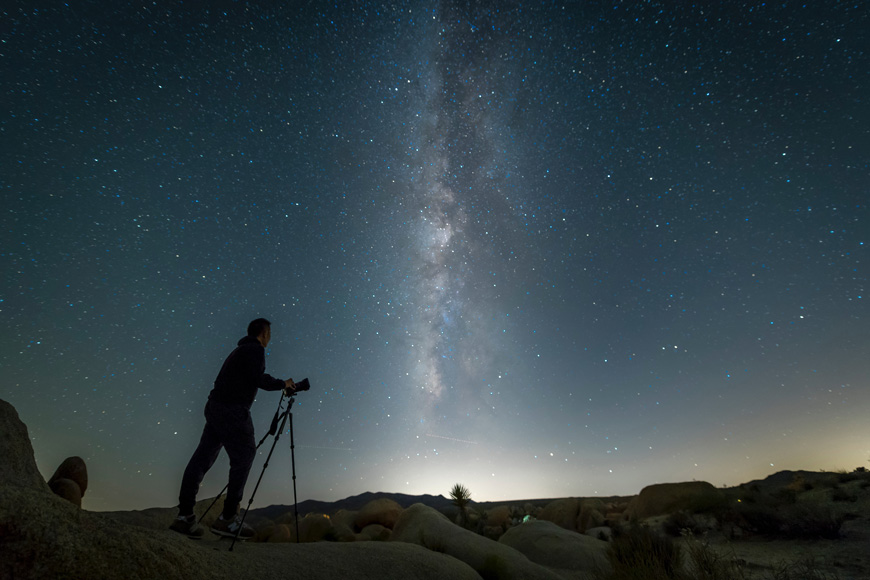
14. Use a new camera with a larger sensor
Credit: Ryan Clark
More light will fall on a camera sensor that is physically larger. For this reason, cameras with APS-C sensors — or even better, full-frame sensors — tend to produce photographs with less noise when shooting in low light.
In addition, sensor technology gets better every year and today’s entry-level cameras with small sensors are out-performing high-end cameras from ten years ago.
Don’t assume that lots of megapixels means better quality images when shooting photography in low light. In fact, the opposite can often be true.
The physical size of the sensor is much more important.
15. Use manual focus
Credit: Patrick Selin
Autofocus typically relies on the camera being able to identify contrast within a scene, and when light levels are very low, so is contrast. Our eye might see it differently, but compared to a bright day, the difference between the brightest and darkest parts of a low light scene can be tiny.
As a result, you might want to change how you focus your images when shooting in dark conditions to ensure accuracy.
Some cameras have an autofocus assist beam so that instead of identifying contrast, it can judge the distance of a subject by bouncing infrared from it and using that information to focus.
Often, the solution is to switch to manual focus. If you’re not 100% sure of your accuracy, you might want to bracket. This is where you shoot a series of images with your camera on a tripod, focusing slightly differently each time in order to guarantee at least one of your photos is sharp.
If you have a mirrorless camera, you might be able to use the focus magnifier to zoom into your image while viewing the scene on the EVF or LCD and make fine adjustments.
Low Light Photography FAQ
How do you take photos in low light?
Firstly, understand the exposure triangle so you can correctly balance your exposure. Try using a wider aperture, or using a tripod so you can set a faster shutter speed. Use your camera’s histogram to better understand the light, and opt for a fast lens and gear with Image Stabilisation wherever possible.
What is the best ISO setting for low light?
The higher the ISO, the more noise will start to enter your images. So, when shooting in darkly lit conditions, try starting with an ISO of around 800 and incrementally increasing it from there. Bump it up only as much as you need to.
How can I shoot in low light without grain?
To minimise noise or grain in your photos, make sure you keep your ISO within a reasonable range. Also, don’t underexpose your shots too much or you’ll have trouble bringing out the details in post. Finally, try using a tripod so you can keep the shutter open for longer and thus keep a lower ISO.
Final Words
Low light photography can be challenging, but with this extensive list of photography tips, you can soon learn how to take control of your camera even in the toughest conditions.
Good luck with your photos and be sure to leave a comment below if you have any questions!


Andy Day is a British photographer and writing, living and working in France, specialising in adventure, travel, architectural and landscape photography.


WELCOME TO SHOTKIT
Enter your email to be sent
today's Welcome Gift:
19 Photography Tools
🔥 Popular NOW:


Shotkit may earn a commission on affiliate links. Learn more.