


Easy to Understand Guide to Camera Settings for Beginners
Master your camera settings with this easy-to-follow guide for beginners, including pro tips you can use to keep improving your photography in 2023.
Learn | Photography Guides | By Ana Mireles
This guide to camera settings will help you through the first steps out of getting your camera out of Auto mode.
If you’re just snapping pictures with your camera as it came out of the box, you’re missing out on wonderful photography opportunities.
You don’t need to jump straight into Manual mode to start taking control of your pictures. You can learn how to use the different Auto and Semi-Auto features on your camera, and you’ll see a big difference.
With this guide, you’ll learn the basic camera settings and how they work. You’ll also find different shooting modes to put your knowledge into action to ease your way out of auto-mode.
Then, I’ll explain the different metering modes to learn how your camera measures light. This way, you can choose the right one for each photography situation.
Finally, I’ll cover the different auto-focus modes to help you capture sharp images every time.
Overall, this article is an ideal complement to our guide: Photography for beginners.
So, if you’re ready to improve your photos, let’s get started!
Table of Contents
Recommended Camera Settings for Beginners
There are no definite basic camera settings for beginners as it depends on several factors.
However, if you’re in a rush and just want the best all-round camera settings for most situations, here’s a cheat sheet:
- Image Quality: RAW (lossless compressed)
- White Balance: Auto
- Aperture Priority (A / Tv) (use exposure compensation to adjust the brightness of the scene)
- Single Area AF for static subjects; Continuous AF for moving
- Matrix/Evaluative metering
- Largest lens aperture available (i.e. lowest f-number)
- Auto ISO (if not available, the lowest ISO possible)
This is the closest you can get to camera settings for dummies.
Photzy is giving away a set of free photography cheat sheets to help you understand the basics, so head over there and download them.
Now let’s take a closer look at each of the camera settings available on modern digital cameras.
What are the 3 Basic Camera Settings?
Credit: jeshoots
As you probably know, a photograph is made by capturing light. With your camera, you let in the light that will be registered by a light-sensitive surface – in digital photography, it’s a sensor; in film photography, it’s the film.
You need the right amount of light, though. That’s what’s known as the correct exposure.
To achieve the right exposure, you need to control how sensitive the sensor is and how much light is going to hit the surface. For this, we have three basic camera settings: aperture, shutter speed and ISO.
Aperture, shutter speed and ISO all work together, as you have to find the balance between them.
If you adjust one of the camera settings, you’ll have to compensate with one of the others, and so on. This is known as the exposure triangle.
The exposure triangle is one of the most valuable things you can learn in photography, and no guide to camera settings would be complete without it.
So, let’s take a look at each of the three elements so you can get a better idea of what I mean.
-
Aperture
This is one of the camera settings that will control the exposure of your image. The aperture refers to the size of the hole that lets in the light, and the diaphragm controls it.
It works very much like your eyes: stand in front of a mirror and look at the size of your pupils, then shine a light and see how your pupil shrinks. That’s because the iris’ muscles constrict or dilate the pupil to regulate how much light can pass through it.
In the lens of the camera, there’s a piece called the iris diaphragm. It’s shaped like a circle and holds movable blades that make the aperture smaller or larger. Obviously, a small aperture lets in less light and vice versa.
The size of the aperture is expressed in f-numbers; each one of them is considered a stop. That’s why changing from one to the next is called moving an f-stop.
Normally, the scale goes f/1.4, f/2, f/2.8, f/4, f/5.6, f/8, f/11, f/16, f/22. Some rare (and expensive) lenses have diaphragms that can go beyond this range.
You’ll often find other numbers representing fractions of an f-stop, for example, f/1.8 or f/3.5.
The lenses with smaller f-numbers are called fast lenses and are usually more expensive, especially when they’re zoom lenses.
When you adjust the aperture, you’re also changing the depth of field (DOF) – in other words, how much of your image is in focus.
A wide aperture (such as f/1.4, f/2, f/2.8) results in a shallow depth of field, creating a selective focus. This is useful when you want to create a blurry background or attract the viewer’s attention to a specific part of the image.
Then, of course, a small aperture (such as f/11, f/16, f/22) will create a deep depth of field. This is used mainly in landscape photography, or product photography where everything needs to be sharp.
I’m not going into it in this article; however, you should know that depth of field is also impacted by your lens’s focal length and the distance between you and the subject.
So, if you’re using an aperture of f/1.8, you’ll have a lot of light, but not much of your image will be in focus. If instead, you choose an f/11, you’ll have less light, but more will be in focus.
When you’re adjusting the aperture to achieve a specific focus effect, you need to compensate with the other camera settings; otherwise, you’ll be affecting the exposure resulting in a darker or brighter image.
For example, if you close your aperture by one stop, you need to make the shutter speed slower by one stop too. Alternatively, you can raise the ISO by one stop.
Have a play around with this depth of field calculator to learn more.
-
Shutter Speed
Aperture lets you decide how much light comes into your camera; shutter speed lets you control for how long.
The shutter is what covers the sensor from being hit by light. When you press the shutter button to take a picture, you’re moving the shutter out of the way and exposing the sensor to light.
When you adjust the shutter speed setting, you’re controlling how much time the shutter will be open – in other words, how long the exposure is.
Since you measure time, the values are expressed in seconds or fractions of a second. Most cameras offer a range from 30 seconds to 1/4000 of a second. Some higher-end cameras can shoot even faster.
If you need a shutter speed of more than 30 seconds, you’re doing long exposure photography. In this case, you should change to bulb mode.
The amount of time goes hand in hand with how much light is coming in through the aperture. If you’re using an f/22 you’re not letting in a lot of light, so you’ll need a slower shutter speed to expose the sensor for a longer time.
Keep in mind that the entire time that it’s open, the sensor is capturing your image. So, if you or your subject are moving, it will be registered. This results in blur.
If you’re not using a tripod, a slow shutter speed will then capture your own movement while you’re holding the camera. Unfortunately, this happens often in low-light situations.
As a result, you’ll have a blurry photo due to camera shake which is less than desirable. The slowest shutter speed you can use without camera shake is related to the focal length – telephoto lenses need faster shutter speeds.
(See also: the best lenses for photographer beginners.)
It also depends if your equipment has image stabilization. Image stabilization technology can be built into your camera or your lens. However, it’s always better to use a tripod if you’re going to be taking photographs in low light.
When you’re using a tripod and deliberately capturing your subject’s movement, the effect is called motion blur and can be used as a creative element.
On the other hand, if you want to freeze moving subjects, you’ll need to use a fast shutter speed. The right amount will depend on the velocity of your subject.
For example, in street photography, you can freeze a walking person with 1/250. However, if you’re doing wildlife photography and want to take a picture of a flying bird, you might need something around 1/2000.
Make sure you compensate for any adjustments that you make to the shutter speed by changing the other camera settings. You can do this with the aperture or the ISO, whichever works best for you.
-
ISO
This is perhaps the most well-known among the photo settings to even beginners. The ISO determines how sensitive the camera sensor is. In film photography, you had a fixed sensitivity on each roll. Fortunately, in digital photography, you can change this on every shot.
A low ISO number will be less sensitive to light, but the image’s quality will be smoother. In most cameras, the lowest ISO can be 100 or 200.
If you use a high ISO instead, the sensor will be very sensitive to light, but you’ll get a grainy effect called digital noise. Camera manufacturers keep extending the highest ISO numbers, but they are rarely used.
Ideally, you should stay in the lowest ISO your camera offers, but this isn’t always possible. If you’re photographing at night or low light conditions, you often have to compromise. Fortunately, you can reduce the amount of noise by using post-processing software.
In general, full-frame cameras deliver images with less noise than cameras with a cropped sensor. However, the difference is less noticeable as technology keeps getting better.
Remember that, as with the other camera settings above, you have to compensate for any changes in the ISO. That means changing the aperture and shutter speed. You can also let the camera decide the ISO value by using the Auto ISO feature.
I know what you’re thinking: What if my camera chooses a really high ISO and you end up with super noisy images?
Well, you don’t have to worry about that because you can set a limit to how high it can go. If you feel that your images are too noisy after ISO 800, for example, you can configure it to never go over that value.
Inside these settings, you can also determine the minimum shutter speed. This value will let the camera know when to change to the next ISO value.
Keep in mind this is a secondary setting – so, the camera will overwrite the minimum shutter speed assigned if there isn’t enough light to prioritize the maximum ISO setting.
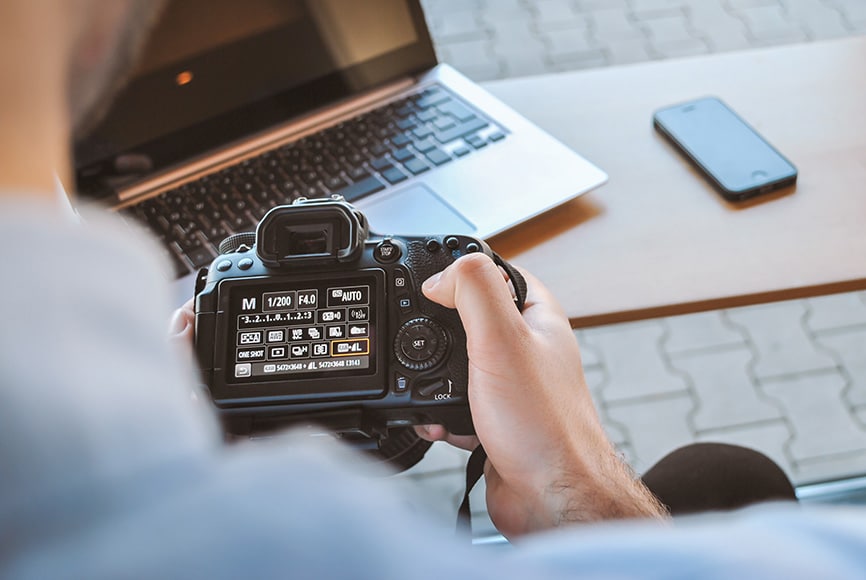
Camera Shooting Modes
Now that you know the basic camera settings that determine the exposure, you might be wondering how to use them to capture a well-exposed photograph.
While setting DSLR camera settings for beginners is pretty easy, understanding exactly how your camera works is a must.
Not to worry, you don’t have to figure it out from scratch and shoot in Manual mode. Digital cameras have different shooting modes to fit your level of expertise.
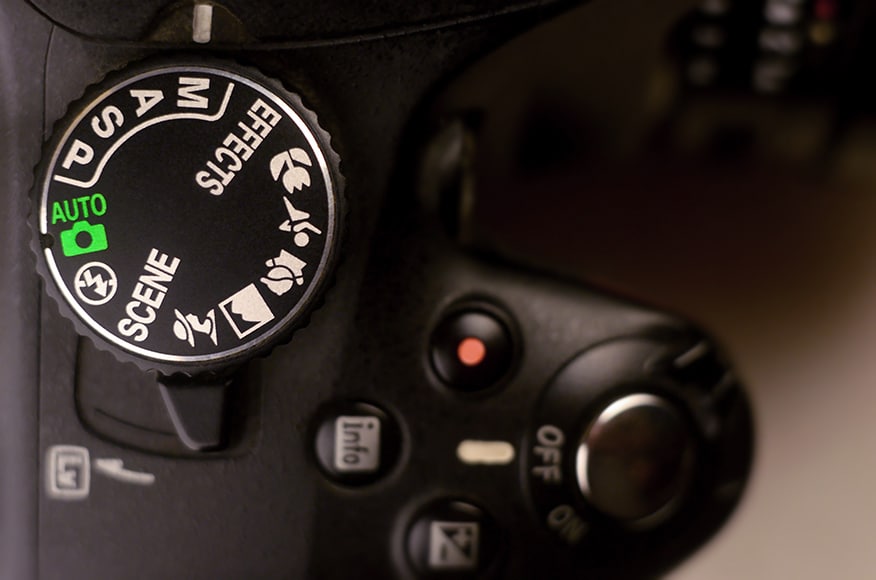
They range from Full Automatic up to Manual with a wide set of choices in between. You’ll normally find them on the top dial of your camera. Some of these modes are expressed in letters, the others in icons.
Here’s how to set camera settings quickly and easily.
In our guide to camera settings, we’ve included the most common:
As the name indicates, you have to adjust all the camera settings by yourself when you shoot in Manual mode. You don’t need to jump right into this mode, as it requires advanced skills and knowledge. You can work your way up to it by starting with some of the Semi-Automatic modes.
-
Full Automatic Mode (A)
You’ll notice that your camera has a shooting mode called Auto, usually marked in green. This stands for a Fully Automatic mode – the camera will decide all the settings for you. Setting camera to A mode lets you jump straight to shooting without fiddling the settings.
In Auto mode, you can’t adjust exposure settings like the aperture, shutter speed and ISO, and features like metering mode and white balance are also disabled.
Technology is so good by now that most of the time you’ll get a correctly exposed photograph when you have the camera settings in Auto. However, it’s still not very advisable.
As mentioned in the first part of the article, each setting impacts more than the amount of light. If you can’t control them, you’ll also lose control of the final image.
-
Program (P)
Most people often overlook the Program mode because they think it’s the same as the Auto mode. While they are similar, there are some advantages to using this one. For starters, the ISO is not set by your camera.
This means you can decide which ISO you want to use, and the camera will adjust the aperture and shutter speed settings accordingly.
Then – this is the best part – you can shift those values in case you have a moving subject, or you want to control the depth of field.
If you’re looking to take some baby steps to leave the Auto mode on your camera, you can start by using Program mode.
Plus, you can also change other camera settings such as metering mode, white balance and focus mode in Program – which are usually disabled when you use your camera in Auto-mode.
This is another semi-automatic program that – as you probably guessed already – gives priority to the aperture value. It’s useful when you want to control the depth of field.
If you want to have everything in focus or create a bokeh background, you just worry about the right aperture and the camera will take care of the rest.
It’s useful to pair up aperture priority with auto ISO. This way, you can avoid noisy images due to a super high ISO or blurry images due to camera shake.
-
Shutter Priority (S)
Being part of the exposure triangle, the shutter speed also has a semi-automatic program. It’s represented with an S on most cameras, but you can also find it as Tv (time value).
If you’re experimenting with motion blur or long exposure, or need to stay over a certain speed to avoid camera shake, then this is the program you need. This is because it lets you choose the shutter speed while the rest of the camera settings are determined automatically.
-
Scene Modes (Icons)
You already know all the letters in your dial, but what about the icons? Those are called Scene Modes, and they’re part of the Automatic features.
You probably know that different camera settings work better for different types of photography. With the scene modes, the camera will decide the exposure value and settings based on this.
Depending on your camera, the amount and variety of scenes might be different. Here are some of the most common:
Landscape: Since this type of photography is best with a deep depth of field, the camera will prioritize having a closed aperture causing a higher ISO and a slower shutter speed. Apart from landscapes, it’s also a good mode for group portraits or any wide scene.
Portrait: This mode is used mainly for headshots. Contrary to the landscape, a portrait needs a shallow depth of field to blur the background. That’s why this mode will choose wider apertures. It’s also good for creating bokeh with any kind of subject.
Macro: With this mode, you are telling the camera that you need a shorter focusing distance. Its icon is usually a flower because flowers are a common subject in macro photography. However, it also works on insects, jewellery, and other small subjects. The minimum focus distance that you can achieve with this mode will depend on the lens you’re using.
Sports (Action): When you want to freeze a moving subject, this is the scene program that will deliver the best camera settings. It works well for sports, children playing, wildlife, etc. To achieve this, it chooses a fast shutter speed.
When the camera is deciding the settings, sometimes it can be ‘tricked’ by difficult scenes. As a result, the image can be overly bright or dark.
For example, if you’re photographing a snowy landscape, the white can reflect so much light that your camera will underexpose the picture.
Fortunately, digital cameras come with a feature that allows you to override the settings to get the best result. This works when you’re using any of the Semi-Auto modes. If you’re using Manual mode, it’s not necessary because you are deciding the camera settings yourself.
So, if you’re using any of the Scene Modes, aperture priority mode, shutter priority mode or program mode, you can use exposure compensation.
This feature has a dedicated button in most cameras that you can identify by its icon that has a plus and a minus symbol (+/-).
If you can’t locate it, it might be a dial instead of a button. You can always check your owner’s manual to find the various parts of your camera or do a quick internet search.
Either way, it’s fairly simple to use. If your photo is too dark, you’ll add a +EV number which will overexpose it one stop. If the image is too bright, use a -EV to underexpose one stop. Most digital cameras range from -3 EV to +3 EV.
If the exposure compensation on your camera is on a dial, just turn it to one side or the other. If the camera has a button, press and hold it while using one of the dials to adjust it.
When you’re using the shutter priority mode, the exposure compensation adjusts the aperture’s f-stop, so you don’t have to worry about overriding the wrong setting.
In the same way, the aperture priority mode will compensate by adjusting the shutter speed. This combination is the ideal way to shoot in most situations.
Autofocus Modes
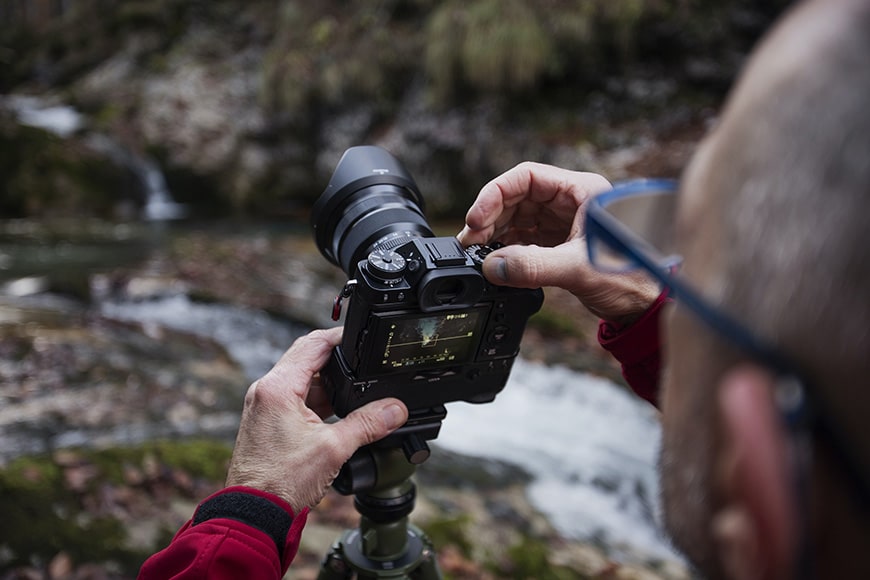
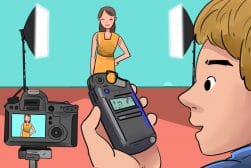
Credit: Federico Bottos
With most cameras, you can press the shutter button halfway down, and you’ll hear a beep that lets you know that it’s in focus and ready to shoot.
If you’re looking through the viewfinder, you’ll see the focus area highlighted, or the focus points selected. In some cameras, it’s also possible to see this in live view. You can choose the focus area manually or leave it in Auto mode.
Separately, you can tell your camera how to behave: if it should lock the focus or try to re-focus whenever a subject moves. The Autofocus Modes control this.
-
AF-S / One-Shot
Depending on the camera manufacturer, this focusing mode can have different names: in Nikon, it’s called Single Area AF and Canon calls it One-Shot AF. Either way, it’s fairly simple to use.
With a single-point focus, you pick a spot, and the camera will lock the focus there. To see this before snapping the picture, you can press the shutter button halfway down.
If the camera can’t focus there because there isn’t enough contrast or you’re too close to your subject, you won’t be able to take the picture.
-
AF-C / AI Servo
Continuous AF-C for Nikon or AI Servo for Canon is the ideal focus mode for moving subjects. That’s because it tracks the subject to keep it in focus.
To do this, you need to keep the shutter button pressed halfway or hold the focusing button if your camera has one. It’s also the best focusing mode to use when you’re shooting in burst mode.
This camera mode is ideal for photographing wildlife or action images, including sports. Keep in mind that having multiple subjects moving in different directions can confuse the camera, so it might get it wrong sometimes.
Another disadvantage is that consumes a lot of battery – bring a backup if you’re planning a long day of shooting.
You can learn more by reading our guide to AI Servo, AI Focus and the different Canon AF modes.
-
Autofocus Automatic / AI Focus AF
This third one allows the camera to decide between the previous two. It’s called Autofocus Automatic if you have a Nikon camera and AI Focus AF if you’re shooting with Canon.
Note that not all cameras have this mode as it’s mostly for the entry-level DSLRs like these models.
When you’re using this focus mode, the camera will choose Single AF if it detects a static subject or Continuous mode if it sees a moving subject.
It sounds like the best solution, right? Well, it could be, but very often it makes the wrong decision. Generally speaking, it’s better to decide on your own.
Metering Modes
The last thing we’ll cover in this beginner’s guide to camera settings is Metering. This is one of the least understood photography settings by even some intermediate photographers.
To determine the correct exposure – whether you’re using Manual, Auto or Semi-Automatic modes – you need to measure the light that’s falling on your scene.
All cameras have an exposure meter that reads the reflective light, even if you’ve never seen it.
When you use your camera in Fully Automatic mode, the camera measures the light and determines what it thinks are the best settings. Then it takes the picture, and you won’t even know how it made the decisions.
If you’re using the camera in Manual mode, you will see the meter. It’s a scale that goes from -2 to +2. The zero in the middle represents the correct exposure. So, when you’re adjusting your camera settings, you need to reach the middle.
To calculate if the exposure is correct or not, the camera needs to know where to gather the information (i.e., from what part of the scene). That’s why there are a number of metering modes.
Different cameras offer different metering modes; here are the three most common:
This is an exact way of metering because it takes the information from one spot – an area that ranges from 3% to 7% of the frame, usually in the centre.
Some high-end cameras allow you to choose between leaving the spot in the centre or aligning it with the focus point. This mode is very precise, and it’s the best one to use when you have a very contrasting scene.
For example, you can use it to capture a full moon against the very dark sky. It’s also handy for backlit subjects. Otherwise, you might end up with a silhouette.
-
Center-Weighted Metering
You can also find this metering mode with the name Average. This is because it takes into account almost the entire image and calculates the average amount of light.
The calculation doesn’t consider the corners; that’s why it’s also called centre-weighted. Of course, the area that’s considered central is wider than the one in spot metering.
-
Matrix / Pattern / Evaluative / Multi-Zone Metering
The name of this metering mode changes according to the manufacturer of your camera. For example, Canon calls it Evaluative, while Nikon calls it Matrix.
It has different names because it’s run by different algorithms – which are proprietary to each brand. With some differences here and there, it basically means that it measures the scene and decides the best exposure.
As you can imagine, you don’t have much say in this one, and that’s also because it’s used for all the fully automatic modes (Auto and Scenes).
It does a pretty good job when there isn’t much contrast; otherwise, it can be a little off. Obviously, this depends on the brand, and some algorithms are better than others.
Final Words
When it comes to camera settings, technology has come very far, and the features and algorithms in digital cameras do a great job on their own.
That doesn’t mean that you have to leave your camera settings in the hands of the device, however.
Making the decision between a shallow or a deep depth of field, a frozen subject or one with motion blur, etc., is what makes your photograph unique.
The basic camera settings are the ones that allow you to add your creative touch, so don’t underestimate them – they’re one of the five most important elements of photography.
Some exposure problems can be corrected in post-processing, especially if you’re shooting RAW files – so make sure you do that to have more flexibility when you edit. However, you should always try to get the best possible result in-camera.
I hope you found this guide to camera settings useful and are motivated to try out what you learned.
Let us know in the comments how it goes and if you have any doubts about managing your camera settings, ask your questions below.


Ana Mireles is a Mexican researcher that specializes in photography and communications for the arts and culture sector.


WELCOME TO SHOTKIT
Enter your email to be sent
today's Welcome Gift:
19 Photography Tools
🔥 Popular NOW:


Shotkit may earn a commission on affiliate links. Learn more.